After I got the A3 I started looking into the European hitches that were available for it. The best hitches are made by Westfalia Automotive, and I believe they make the ones that Audi sells in Europe. European receiver hitches are designed quite differently from American ones:
- Euro-style receivers are vertical, or close to it; not horizontal.
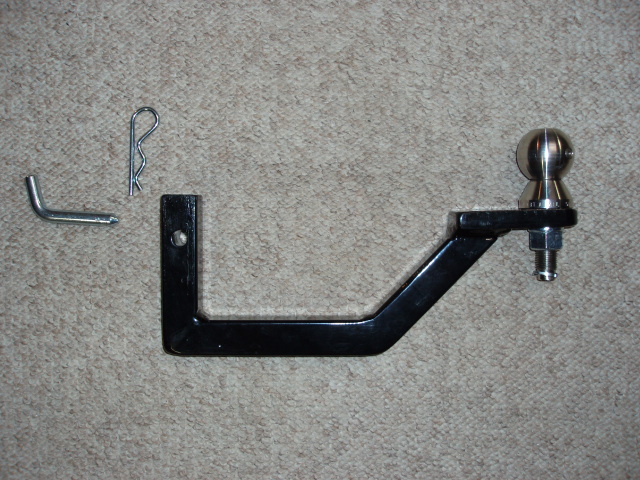
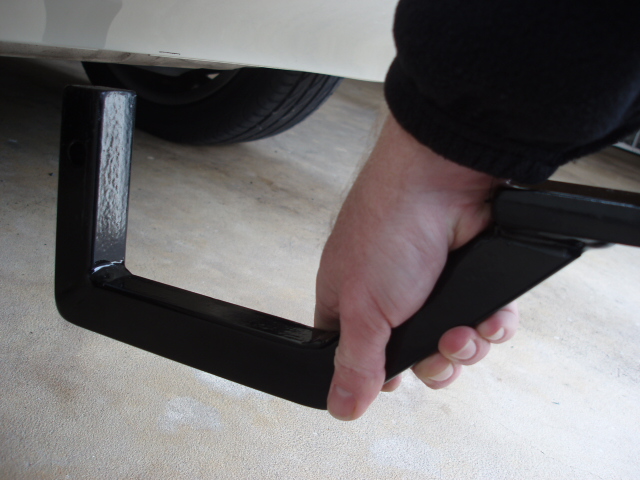
- A J-shaped bar goes into the receiver, and has the ball on it.
- The receivers have a much more sophisticated attachment system for the J-bar than the simple pin used in the US.
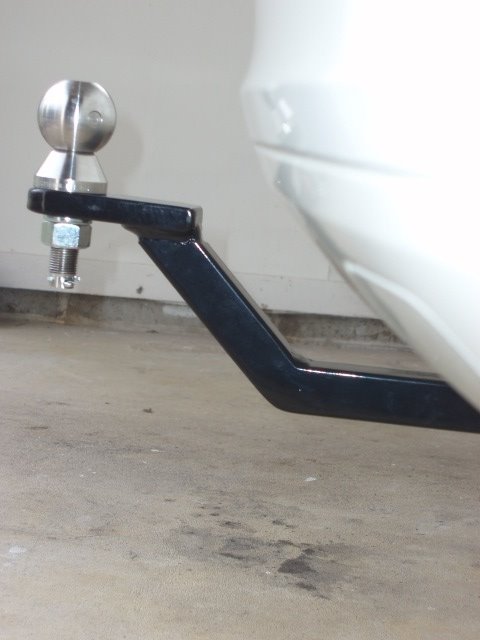
- The ball is part of the J-bar, not removeable.
- All balls are 50mm; by comparison, a US 2-inch ball is 50.8mm.
- European hitches do not have loops to attach safety-chains, which are required in the US.
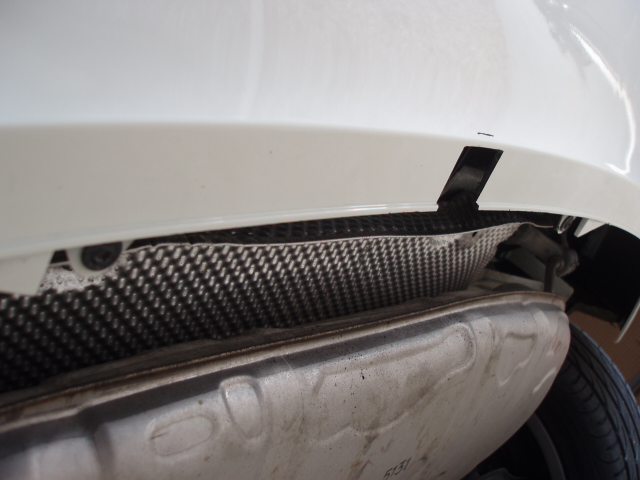
- Most of the European hitches for the A3 take the place of the bumper reinforcement bar.
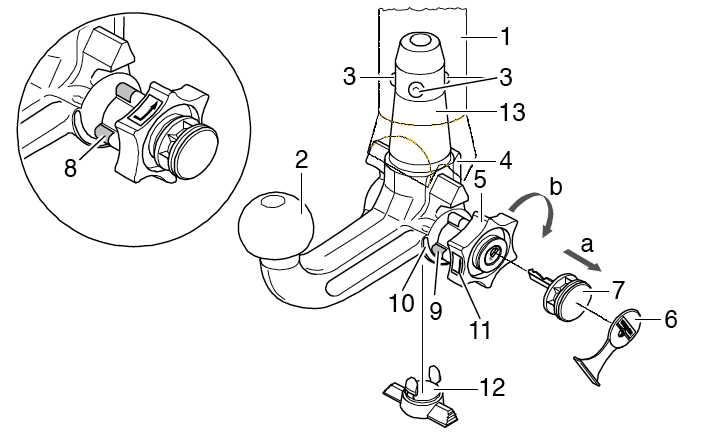
Here is a drawing of a European ball & J-bar for an A3:
My first thought was to obtain a European hitch and modify it. That proved very difficult - most vendors (including Westfalia) refused to sell to anyone in the US. Some eBay sellers would sell to me, but shipping costs were huge. Just to get a hitch (that I couldn't have used unmodified) would have been around $800, and then I'd have to modify it a lot. I was also really afraid of the wrong item being shipped to me, and being stuck with either an expensive unusuable hunk of steel or a huge return shipping expense.
So, I began designing one on my own. I had a good plan of what I wanted it to be like, but didn't have the help, or the money, to make it real (my CAD skills are pretty lame). I contacted a major US hitch manufacturer and tried to get them to make a hitch for the A3, but that didn't work out - they needed a car to prototype on, they were too far away to use my car, and I couldn't coordinate getting anyone closer to them to do it.
This summer I got an email from somebody who had just bought an A3, desperately needed a hitch, and had seen one of my hitch-related postings on the AudiWorld forums. Joe and I began collaborating on the design - he's an engineer and drafts metal parts in CAD all the time, so it was a perfect match. We both agreed on the approach, and quickly refined it via email and phone. Once we had the design worked out, I approached the hitch manufacturer again about producing it and provided them CAD drawings of the design. We were to receive the prototypes for testing, and they could then produce our finished design.
It hasn't turned out exactly that way. We received the prototypes, provided feedback, and were convinced that there was nothing in the way of having this great design available to the rest of the A3 community. However.... later we were told that '...the powers above...' in the company had overridden the design, and decided that the concealed vertical receiver would be replaced with a conventional, exposed, horizontal receiver. This completely destroys the design intent of the hitch, and Joe & I do not consider it to be 'our' design that they will produce.
For now, I'm considering this to be one of only 2 custom hitches made from my concept.
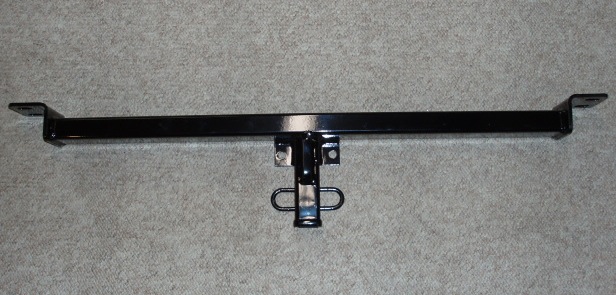
- It has a vertical receiver tube that is completely concealed behind the bumper cover.
- When the ballmount is removed, no part of the hitch is visible.
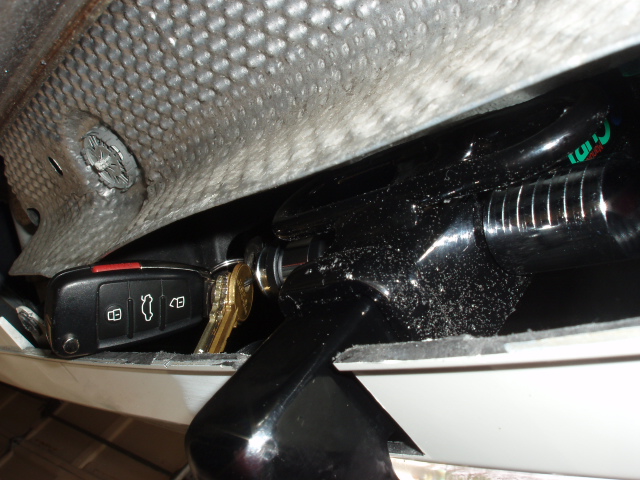
- The safety-chain loops are also concealed above the lower edge of the bumper cover
- The original bumper reinforcement bar is retained, satisfying SCCA requirements for certain autocross classes.
- It can be installed by one person with hand tools and a drill in about 1.5 hours.
- It is compatible with the standard and S-Line bumper valences, and appears to be compatible with the Votex valence.
- With a 90-degree adapter (which I will have fabricated soon), it's a great way to carry a bike rack or ski carrier.
Before Installation:
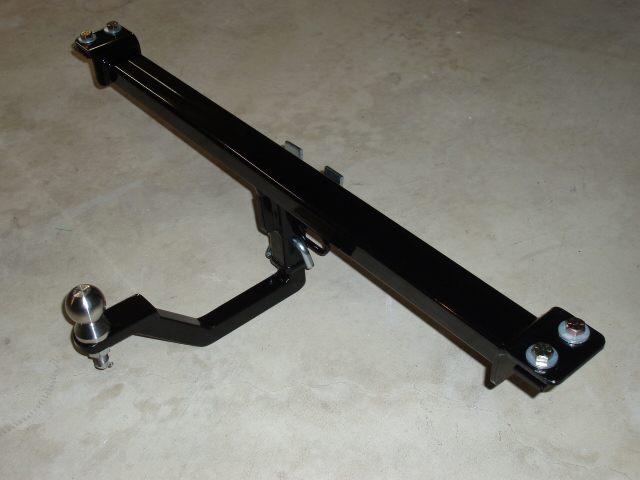
The Result:
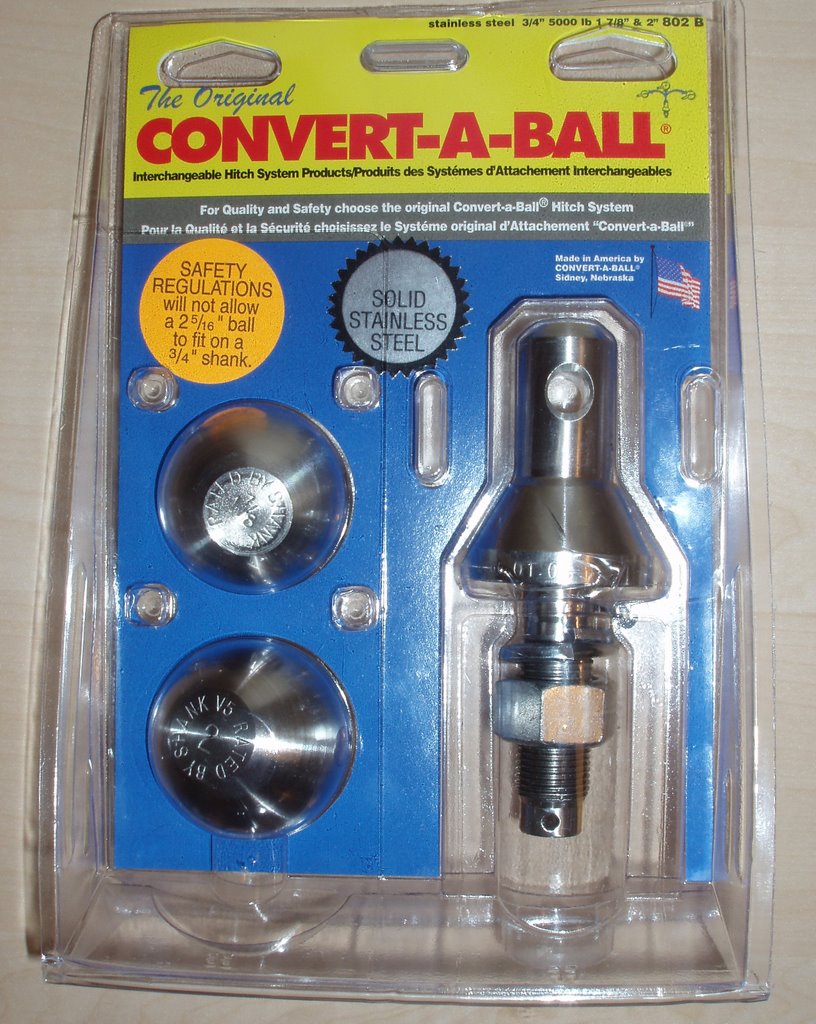
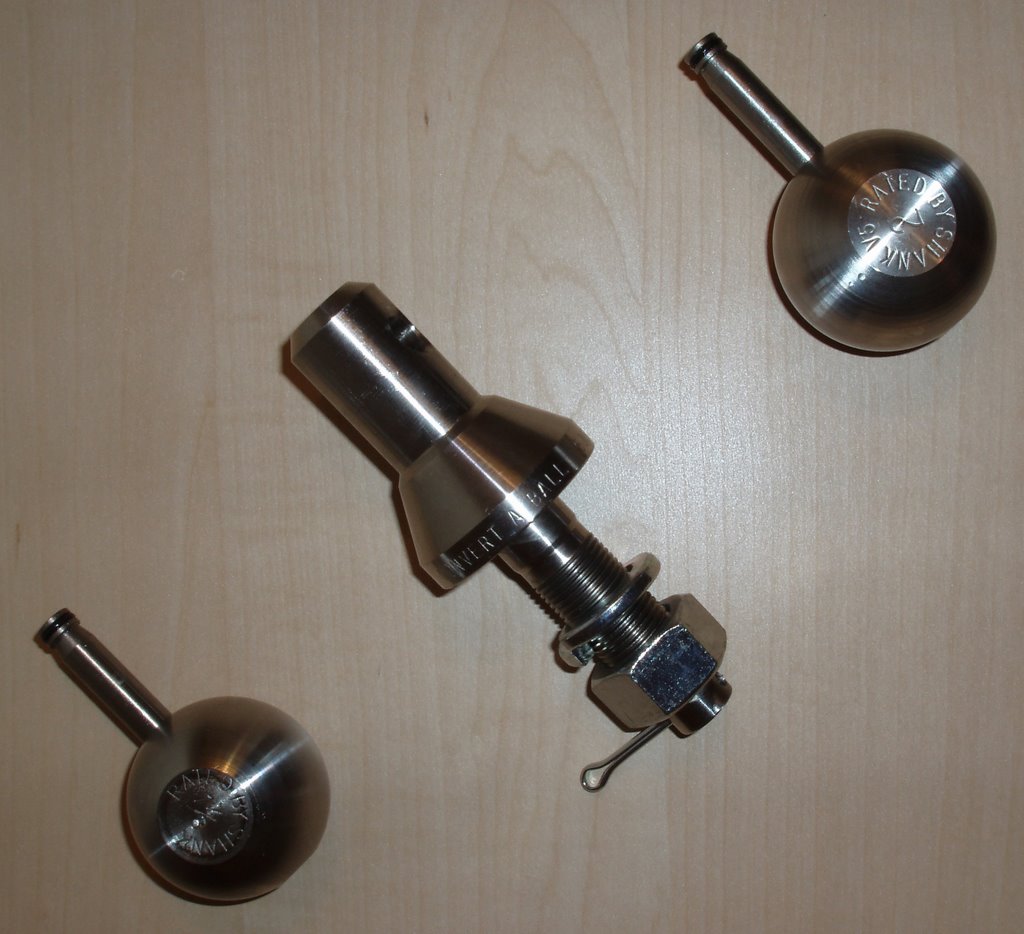
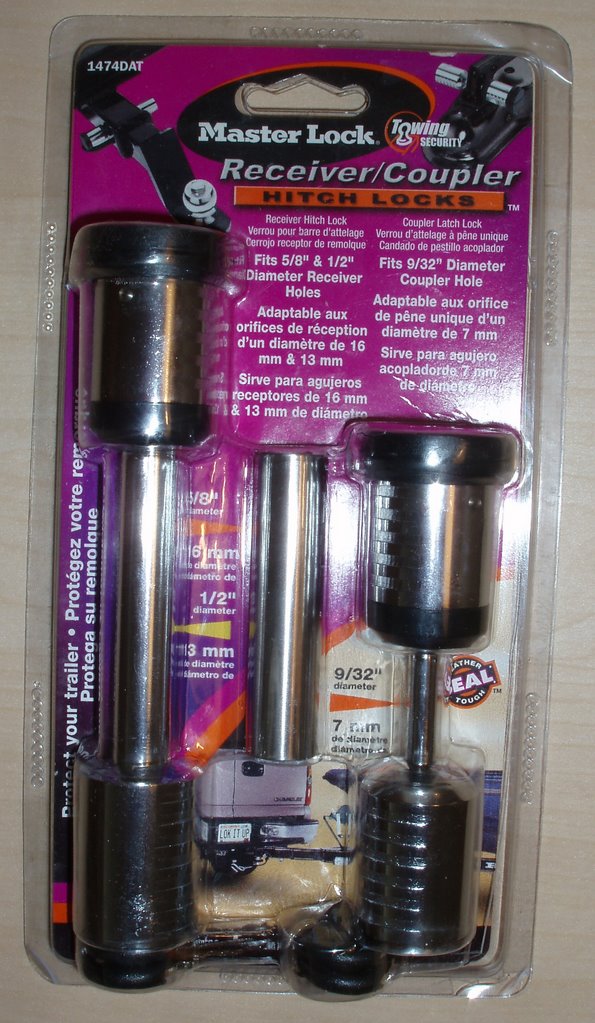
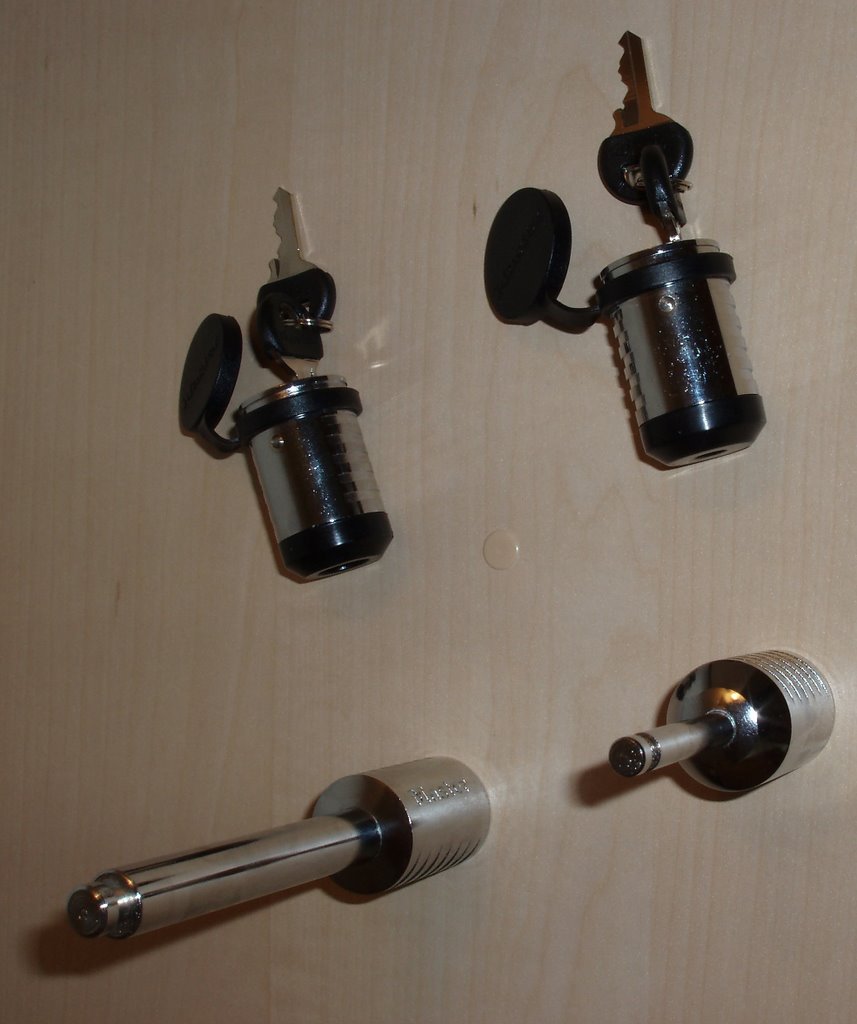
Interchangeable Ball System & Locking Pins:
More Photos of the Installation Process:

Here are Joe's photos right after he got the first prototype installed, hooked up and test-driven (originally posted on AudiWorld.
No comments:
Post a Comment