Preface
If you decide to go crazy and remove your transmission by yourself, you might want read this. I don't have a step-by-step procedure, but if I remember correctly, this should be close. Please don't break anything, but if you do, don't blame me! ;-)
Note from editor: Thanks very much to Gabor (tozoM8) for providing this procedure! Please look at the other sections of automatic transmission on audipages.com, it has a lot of supporting procedures.
Procedure
First roll at least one window down.
Disconnect the battery. Have your code number for your radio handy.
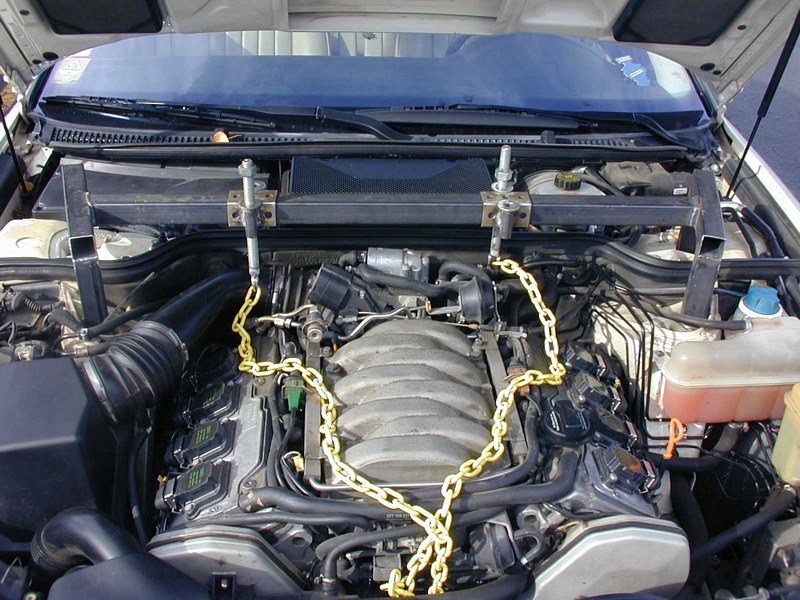
If you will have your car on the lift during the whole removal and replacement, you don't have to secure the engine from the top.
If you have to take the car off of the lift (waiting for the rebuilt transmission, torque converter or any other reason), you will have to support the engine form the top. I've made a simple engine support tool. Remember, your aluminum fenders are not strong enough to hold the engine with a general transmission support tool. You need one that supports the engine by sitting on the struts.
Remove the two plastic covers on the passenger's side (one by the ECU and one by the air box).
Remove the two covers by the driver's side (one by the coolant reservoir and one by the brake master cylinder).
Remove the plastic intake hose (between the air box and the TB). Reach down behind the engine on both sides and disconnect the 2 upper O2 sensors. It is a black, flat plastic connector with 3 wires.
Disconnect the two rear O2 sensors which are located under the front seats, under the carpet.
Now your car is ready to be lifted in the air. Loosen the front wheel lug nuts.
Raise the car at least 20” off the ground.
Take the two front wheels off.
Raise the car up, so you can walk under it comfortably.
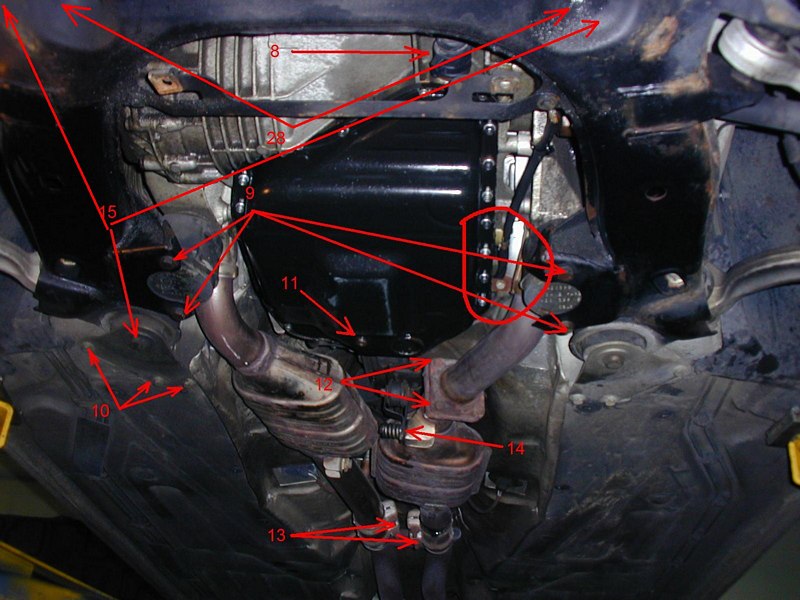
Drain the transmission fluid. (11)
Remove the belly pan if your car has one.
Remove the exhaust system. Start with the O2 sensor cables. Pull the rubber plugs and pull down the cables from the cabin. Loosen the 4 bolts in the exhaust clamps. (13)
Remove the rear part of the exhaust system.
Remove the catalic converter bolts (12).
There is a biscuit between the two flanges. Remove bolt (14).
Remove the two heat shields that protects the drive shaft. Remove the heat shield, that protects the rear transmission output flange (18).
Remove the 6 bolts that holds the drive shaft to the output flange (19). Put a rag over the drive shaft CV joint, it is greasy.

Disconnect the output speed sensor. It is located on the rear of passenger's side on the transmission.
Put a support under the engine by the oil pan.
Put another support under the center differential housing (20).
Put the third support under the sub frame.
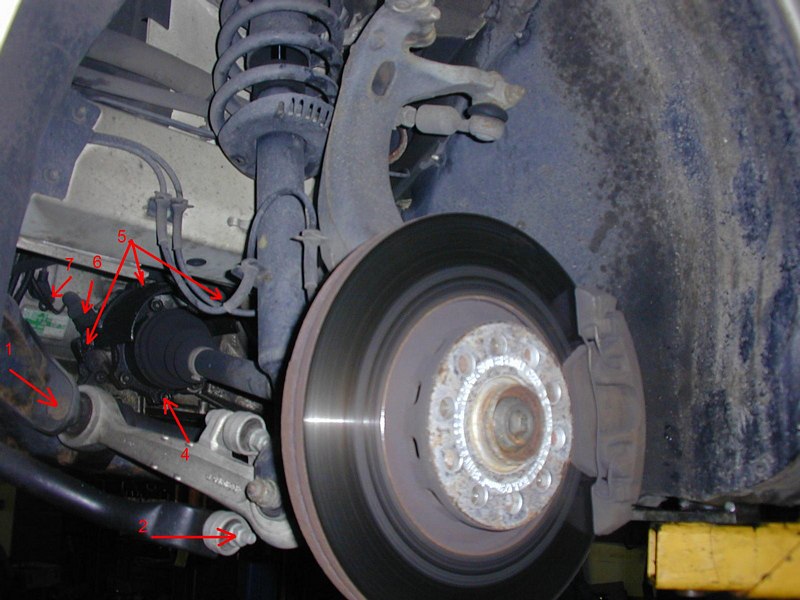
Disconnect the front lower control arm from the sub frame (1). Remove the sway bar bolt (2).
Leave the rear control arm on the sub frame, disconnect it by the wheel by popping the ball joint at the lower shock assembly connection.
Remove (9) 4 bolts, (10) 6 bolts, mark the plate to the body with a sharpie.
Remove (28) 4 bolts, that hold the front engine supports to the sub frame.
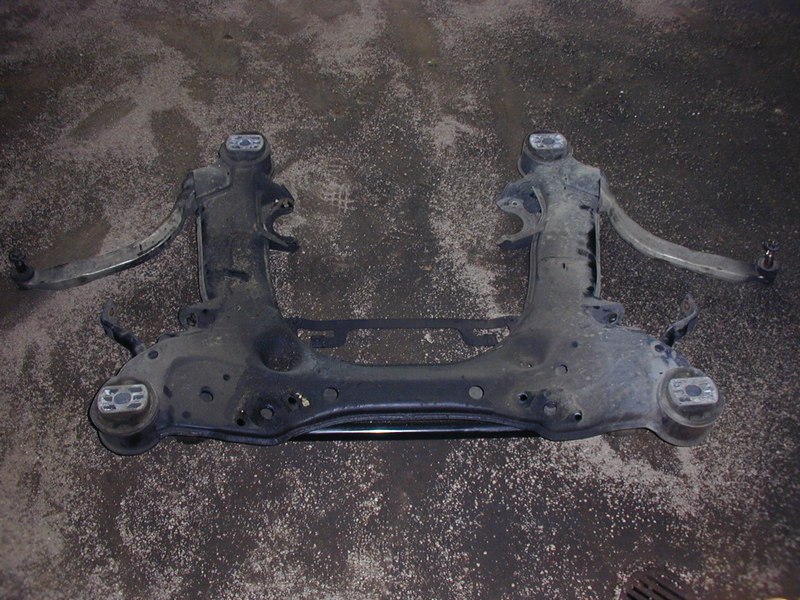
Remove (15) 4 big bolts, that hold the sub frame to the car.
Remove sub frame, the rear control arms and the sway bar stays with the sub frame.
Remove the bolts from the inner CV joints. (4) 6 bolts on each side.
Remove the heat shield from the transmission above the axles. (5) 3 bolts on each side.
Remove the exhaust down pipe on both sides (29). You will need a 13mm socket with a looooong extension. When you have the transmission out you will have great access to the rear cam seals, cooler hoses and the famous center cowl drains.
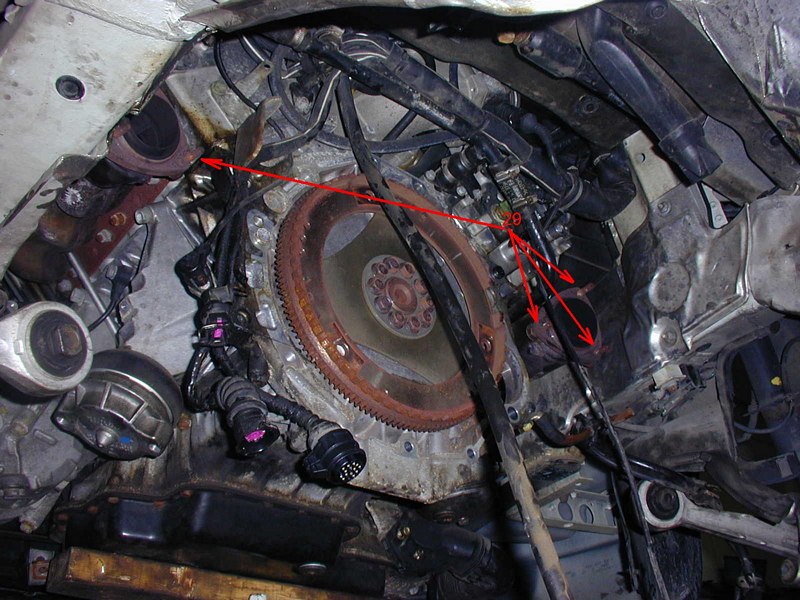
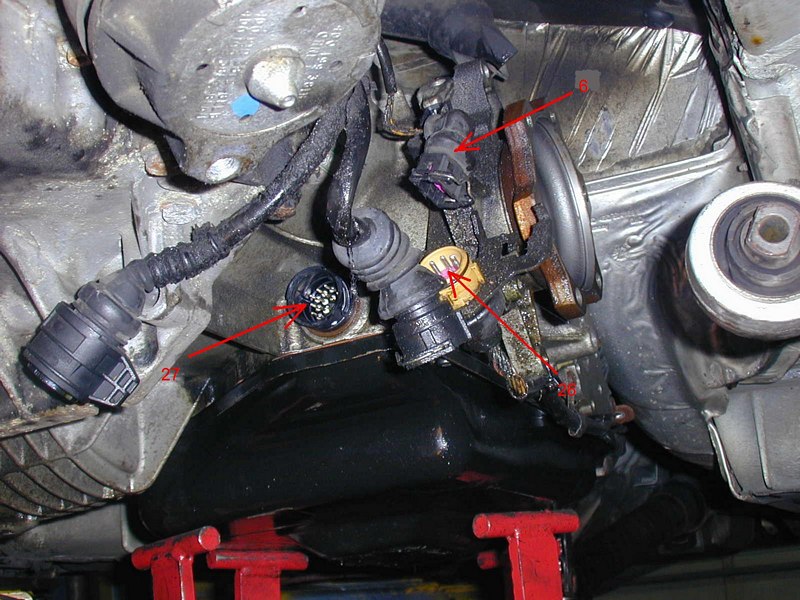
Disconnect (6) wheel speed sensor, (7) engine speed sensor, (27) transmission cable, (26) F125 switch.
Remove the transmission mounts on both sides. 3 bolts each side.
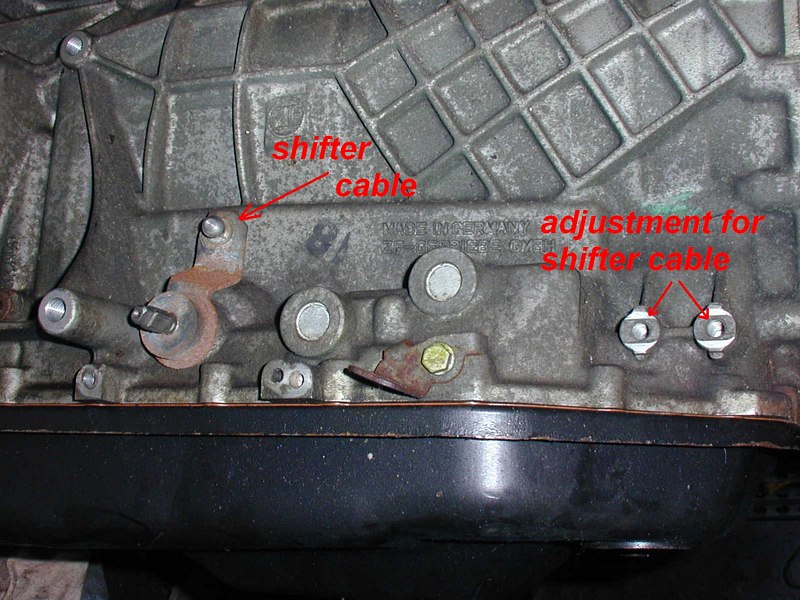
Pop the shifter cable off of the transmission shifter lever, behind the F125 switch. Remove the 2 bolts, that holds the cable to the transmission.
On the driver's side, disconnect the transmission cooler lines from the transmission.
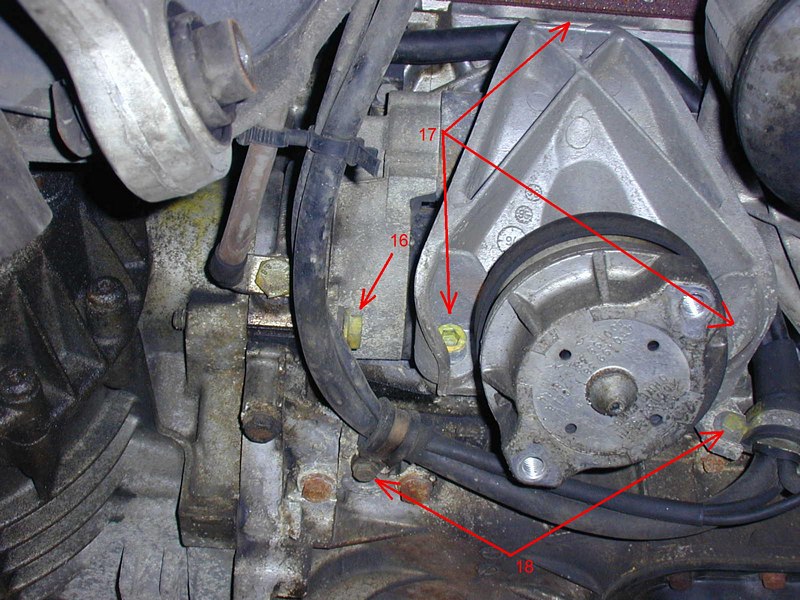
Remove the engine support on the passenger's side (17).
Remove the 2 bolts, that holds the (+) cable (18).
Disconnect the cable from the starter.
Remove the starter. (16) and one bolt from the transmission side.
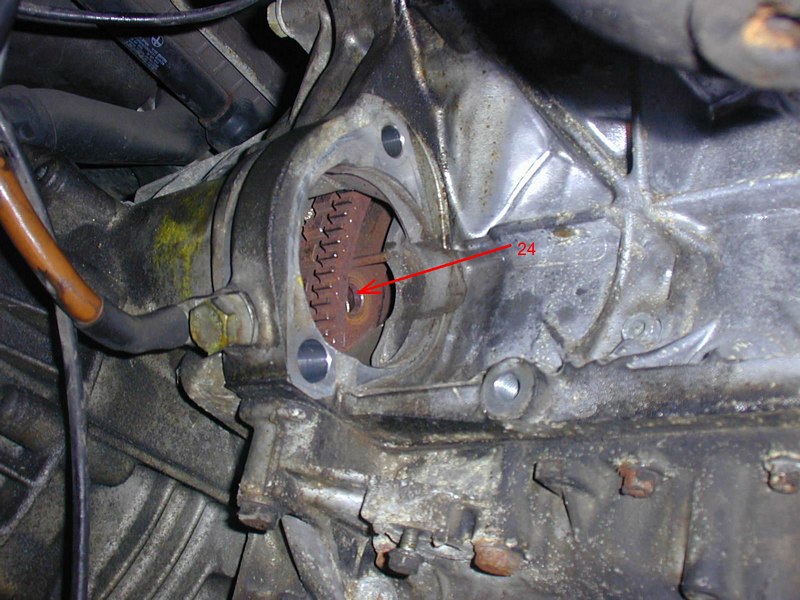
With a long pry bar, carefully turn the flex plate (pushing upwards) until you see the torque converter bolt. (24) Remove it and turn the flex plate 120degrees, then one more time 120 degrees.
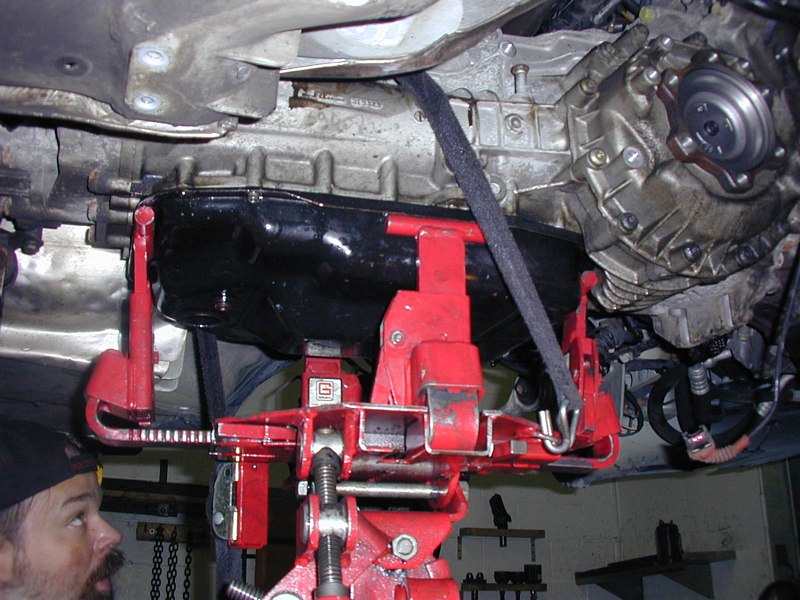
Put a transmission jack under the transmission and secure it. The transmission is 350lbs, so make sure that it will not fall on your toe. That would hurt!
Remove the stand from under the center differential housing.
Remove the transmission bolts around the bell housing. I think there are 9 bolts, 2 or 3 of them are on the front from the engine.
Start to lower the transmission jack. You might have to wiggle it a little, but it will come off from the engine.
Carefully lower the transmission jack. If you have a pre-facelift, watch for the transmission breather hose. It comes from the back of the transmission and goes up right behind the throttle body.
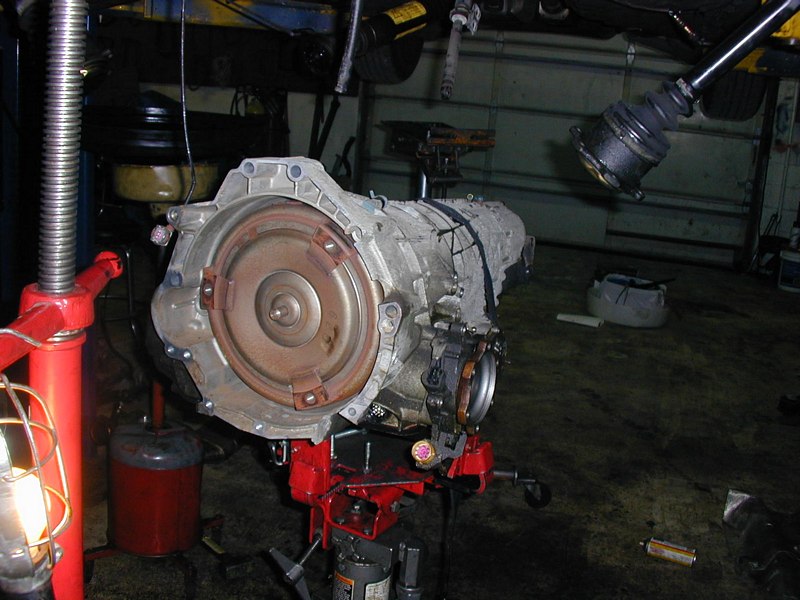
That's it, you've got the transmission out. Now you can rebuild it or replace it with a rebuilt unit.
Don't forget to send your torque converter out for a rebuild.
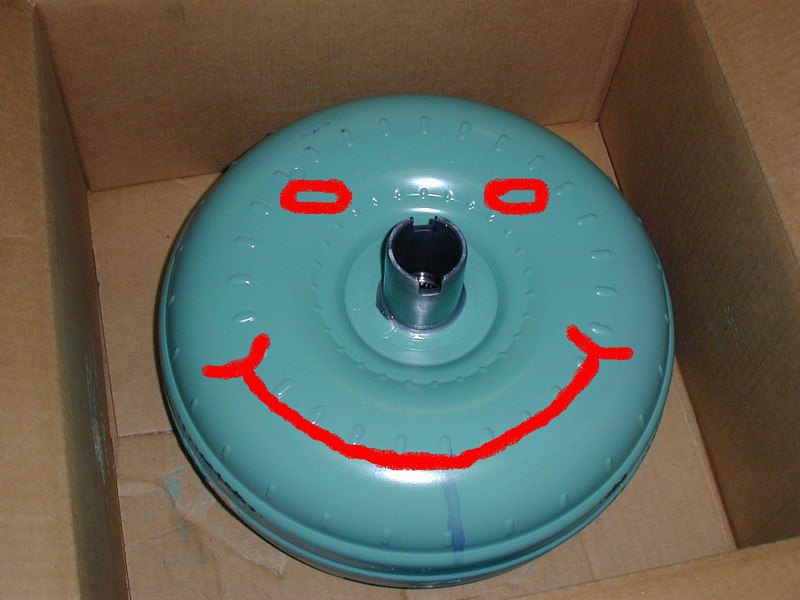
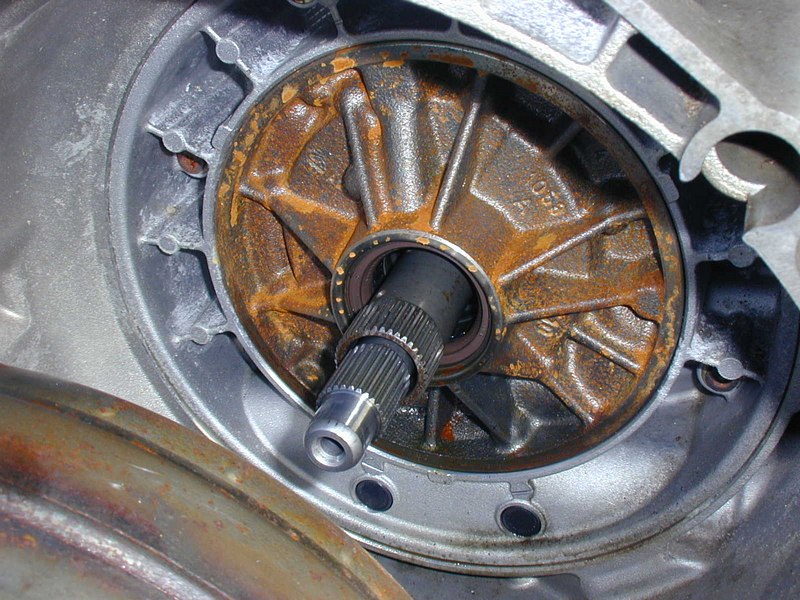
When you have your newly rebuilt transmission on the transmission jack, install the torque converter on the transmission.
Lubricate the TC shaft, put it on the main shaft, hold it by the pilot shaft and start to turn it.
This is very important, it has to go on the transmission all the way. 3 clicks. The first 2 clicks are the transmission shafts.
The last click is the TC shaft engaging with the transmission pump. I have to say it again. THIS IS VERY IMPORTANT! If the pump is not engaged and you try to pull the transmission to the engine with the bell housing bolts, the TC will crush the transmission pump.

Installation is opposite of removal.