Audi DIY, Audi A3, Audi 100, Audi Convertible, AudiCoupe, Audi RS6, Audi S2, Audi A4, Audi S4, Audi A6, Audi S6, Audi A8, Audi TT, Audi Q7, Audi Allroad

2007 Audi S3

Dynamism, sportiness and sophistication – the Audi A3 holds an outstanding position in the premium compact class. Now its top-of-the-range version is ready to go, the new Audi S3 boasting 195 kW (265 bhp) and quattro permanent four-wheel drive.


2007 Audi S3


With its sparkling performance it pursues the ideal of pure driving pleasure coupled simultaneously with excellent everyday practicality – like all Audi S models.


The S3 redefines the standards of its class – at the level of a sports car. The sprint to 100 km/h is accomplished in 5.7 seconds, and acceleration is only halted on reaching 250 km/h. Aggressively hard-hitting, free-revving and with a sonorous acoustic profile, the powerful two-litre, turbocharged four-cylinder unit with FSI petrol direct injection proves to be a smooth, high-performance engine.

This power is transmitted by the six-speed gearbox and quattro permanent four-wheel drive to large alloy wheels with an 18-inch diameter. The new S sports suspension system on the S3 enables an extremely sporty driving style combined with the ultimate in comfort. This sporty compact model responds actively to steering movements, exhibits precise and safe handling characteristics and, thanks to quattro technology, enables maximum acceleration out of bends.

The dynamic potential of this three-door sports car is obvious at first glance. The single-frame grille sports chrome trim, the front skirt has a spoiler with large air-intakes and the side sills have been restyled. There is a contrasting platinum grey diffuser built into the rear skirt, along with two S-style oval chrome tailpipes. Aluminium-look door mirrors and a body-colour roof spoiler give added impact to the visual statement.

Interior: Sporty atmosphere

The interior conveys an atmosphere of sportiness, with materials of the highest quality and painstaking craftsmanship. The elements that dominate the styling are the sports seats with prominent side sections, the black headlining, also available in silver, and the instrument cluster with its special dials and needles.

The pedals, gear knob and air vents are in aluminium look, the inlays are in Piano finish black, or alternatively Aluminium or Fine grain birch wood grey. The red and silver S3 emblem is to be found on the leather sports steering wheel, in the instrument cluster, on the gear knob and on the door sill trims. The seats are upholstered in a combination of cloth and leather or, as an option, in Alcantara/leather or completely in leather. The two-tone leather seats are decorated with stitching in the same colour as their centre section.

TFSI in its most powerful form

The power plant of the S3 delivers all that is expected of a powerful sports engine, and does it supremely well. The 2.0 TFSI, which combines direct injection and turbocharger technology, delivers 195 kW (265 bhp) at 6,000 rpm. And at just 2,500 rpm it already musters up an impressive 350 Nm of torque – this pulling power remains constant up to 5,000 rpm. In the combined driving cycle the 2.0 TFSI displays another welcome character trait, consuming just
9.1 litres of fuel over 100 km – further proof of the forward-looking efficiency of TFSI technology developed by Audi.

Compared with the A3, this engine is an advanced version which has undergone fundamental changes. The new turbocharger with its enlarged turbine and compressor rotor generates 1.2 bar of boost pressure – an unusually high figure. A modified intercooler significantly lowers the temperature of the compressed air, thus increasing the air mass necessary for combustion.

Pistons with stronger pins and strengthened connecting rods with new bearings transmit the powerful forces to the crankshaft. The cylinder block has been stiffened up and the head is made of a new, highly heat-resistant alloy.

The exhaust camshaft timing has been adjusted to accommodate the increased power output. High-pressure injectors with an enlarged cross-section squirt the fuel straight into the combustion chamber.

Despite all this progressive engineering, the high-performance turbo weighs in at just 152 kilos, which is less than comparable power plants from direct competitors, and this has a positive effect on the axle load distribution. The compact dimensions of the 2.0 TFSI make it suitable for transverse installation, which brings benefits in terms of the S3’s interior space and luggage capacity.

To go with its sporty nature and firm handling, the new Audi S3 has a six-speed, close-ratio manual gearbox. Gearshift travel has been reduced for the S3, enabling even sportier and more precise gear changes. As is the case for all
Audi S models, the new S3 drives all four wheels by means of quattro permanent four-wheel drive. An electronically controlled multi-plate clutch, positioned at the rear for the benefit of weight balance, distributes the torque as needed – delivering plenty of grip and maximum driving safety. All the components in the drive train have been strengthened to cope with the high level of engine torque

Handling: Lightning-fast reactions

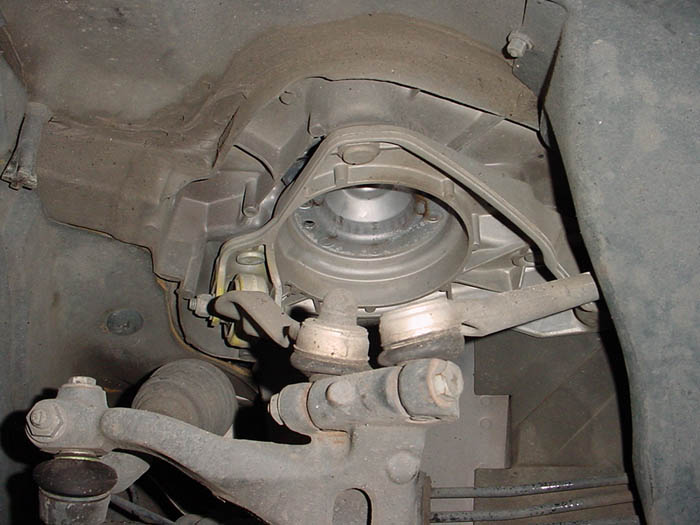
In terms of handling, the Audi S3 exhibits all the qualities of a high-performance sports car; it responds immediately to steering movements and achieves high cornering speeds. The innately sophisticated suspension of the
A3 – with subframes front and rear, triangulated lower wishbones at the front and four-link suspension at the rear – has been further refined.

Springs and shock absorbers are stiffer, and the body sits 25 mm lower than an A3 with standard suspension. Aluminium pivot bearings and wishbones reduce the weight of the front suspension. Stiffer suspension mounts and a sportier characteristic for the electro-mechanical steering convey even greater dynamism and precision. 18-inch alloy wheels and 225/40 tyres ensure firm adhesion to the road surface. A 17-inch brake system with sports brake pads ensure maximum deceleration; the black painted callipers bear S3 emblems.

The extras also include a leather steering wheel with flat-bottomed rim and – in the quattro GmbH range – folding bucket seats. In the infotainment area, Audi is presenting a new generation of audio systems. The premium package is rounded off by universal interfaces for mobile phone and iPod, plus a sound system from Bose. Standard equipment includes deluxe automatic air conditioning, a driver information system with a new lap-timer function, and an anti-theft alarm. Front fog lights and xenon plus headlights with daytime running lights underline the impressive price/performance ratio. The basic price of the 265 bhp Audi S3 in Germany is EUR 35,150.

2008 Audi RS6 Avant

Outstanding top performance and maximum dynamism combined with excellent suitability for everyday use are the impressive features of the new Audi RS 6 Avant, which will be unveiled to the public for the first time at the IAA 2007 in Frankfurt.

A newly developed V10 engine with FSI direct injection and twin turbochargers, permanent quattro four-wheel drive and sports suspension with Dynamic Ride Control DRC set the standard for high-performance vehicles in the luxury class. 580 hp and a maximum torque of 479 ft.-lbs. add up to an unforgettable performance experience. At the same time, the new Audi RS 6 Avant offers a high standard of travel comfort – on long journeys, too.

The Audi RS models from quattro GmbH are the ultimate in sportiness, complemented by powerful and elegant design, exclusive equipment and perfect quality. It has also meanwhile become a good tradition that their sports performance is combined with the high utility value of an Avant: the very first Audi RS2, which appeared in 1993, was only built as an Avant model. Although the unique Audi RS driving sensation can now be experienced in saloon, Avant and Cabriolet models – as is the case with the current RS 4 – customers especially appreciate the combination of dynamism and versatility that an Avant offers.

The new Audi RS 6 will therefore only be available as an Avant to start with, with the unrivalled combination of 580 bhp and a maximum 1,660 litres of luggage space.

The new leader in the performance category

The Audi RS 6 redefines the term “high performance” in the business class. With its 580 hp, it is the most powerful model in the current Audi range and – with the exception of pure racing cars like the Le Mans-winning Audi R10 TDI – the most potent Audi of all time. But not only that: it is also clearly superior to all competitors in the top performance category.

The ten-cylinder V-configuration engine in the RS 6 is based on the V10 powerplants of the Audi S6 and Audi S8, but has been redeveloped in practically every respect to attain the significantly higher level of performance. The twin turbochargers ensure an impressively constant stream of power over the entire engine speed range: the mighty peak torque of 479 ft.-lbs. is available across the entire range from 1,500 to 6,250 rpm; maximum output is available between 6,250 and 6,700 rpm.

The road performance of a super sports car

This powerplant enables the Audi RS 6 Avant to achieve the road performance of a high-performance sports car. It requires just 4.6 seconds for the sprint from a standing start to 62 mph, and reaches the 125 mph mark in a mere 14.9 seconds. Only when the needle touches 155 mph is the propulsive power electronically governed. The power-to-weight ratio, too, matches that of a first-rate sports car: after all, with a vehicle weight of 4,464 pounds – including the dynamic and sure-footed quattro four-wheel drive – every horsepower of the RS 6 Avant has to propel just 7.7 pounds.

The ten-cylinder concept provides the ideal basis for a high-performance unit of this caliber. The V10 is unusually compact with an overall length of 26 inches and is very light with a total weight of 613 pounds. TFSI technology from Audi, the combination of direct injection and turbocharging, ensures efficient power output, based on extensive experience in the field of motor sport: the R8 racing car, a pioneer of TFSI technology, captured a series of victories for the brand with the four rings at Le Mans.

Racing technology for high efficiency

FSI direct injection delivers precisely metered amounts of fuel into the combustion chambers at a pressure of up to 120 bar. This permits a compression ratio of 10.5:1, which is very high for a turbo engine. Remarkably efficient combustion is the result. The engine is thus content with a standard consumption of 13.9 litres – a very good figure in view of the potential offered.

A further feature adopted from racing technology is the dry-sump lubrication system used on the V10. By virtue of the elaborate design of the oil pump module and oil tank, reliable lubrication of all engine components and both turbochargers is guaranteed, even with constant lateral acceleration of 1.2 g.

Thanks to FSI technology and the optimised design of the turbocharger and air ducts, the ten-cylinder unit is extremely responsive and converts minimum movements of the throttle into dynamic acceleration. Yet the twin turbo is by no means a rough-and-ready sports engine: it runs smoothly and with refinement, as is typical of a ten-cylinder unit. When accelerating, of course, its dual-branch exhaust system with two oval tailpipes produces that sonorous sporty, throaty sound – an essential feature of a high-performance automobile. Those who wish to enhance this daily delight for the ears even further may opt for the alternative sports exhaust system.

tiptronic with exceptionally short shift times

The six-speed tiptronic is the perfect complement to the self-confident, powerful character of the RS 6. Its hydraulics and control system have been optimised to achieve exceptionally short shift times; the ratios have been adapted accordingly. It goes without saying that the new RS 6 transmits its tremendous power to the road via quattro permanent four-wheel drive. The latest generation not only provides substantially more driving safety and stability than a vehicle with rear-wheel drive, it also underscores the distinctly dynamic character of the RS 6.

In its basic setting, the centre differential distributes 40 percent of the power to the front and 60 percent to the rear wheels – this slightly rear-biased setup produces particularly dynamic handling characteristics.

Suspension for performance and comfort

The suspension of the Audi RS 6 has been consistently designed for maximum dynamic performance along with good travelling comfort – on long journeys, too. Shock absorber and spring settings as well as the entire elastokinematics of the four-link front suspension and the trapezoidal-link rear suspension have been adapted to the new level of performance. The characteristics of the servotronic speed-dependent power assistance have also been retuned. The steering is consequently very sensitive and delivers optimum feedback from the road.

All in all, in terms of driving feel the RS 6 combines the precision and cornering ability of a sports car with the relaxed straight-line stability of a comfortable cruiser. The standard Dynamic Ride Control DRC, familiar from the current RS 4 and consistently enhanced, plays a major role here. This system reduces pitching and rolling movements about the longitudinal and transverse axis of the vehicle in a particularly ingenious way – entirely without the aid of electronics and solely according to the laws of fluid dynamics.

An individual driving feel

With Dynamic Ride Control the shock absorbers are connected diagonally with each other via two oil lines and two control valves. Body movement – e.g. rolling when cornering at high speed on an uneven road surface – produces flows of oil, which generate additional damping force. As a result, the RS 6 boasts even more directional control through bends and reacts with substantially more precision to the steering inputs of the driver.

Dynamic Ride Control on the new RS 6 can be supplemented if desired with optional three-stage damping. This allows the driver to select the handling characteristics according to his/her personal preferences or chosen route. In the comfort setting, the sports suspension plus provides remarkable ride comfort, in the dynamic program it adjusts superbly to an enthusiastic driving style and in the sport mode it delivers maximum driving precision.

The sporty setting of the electronic stabilisation program ESP is an ideal match here: the point of intervention is very late, permitting a high degree of driving enjoyment whilst fully maintaining driving safety. Alternatively, the ESP may be completely deactivated.

Ceramic brakes for the exceptional athlete

An athlete of such exceptional calibre as the Audi RS 6 naturally requires an outstanding brake system. The standard 19-inch steel discs have been designed for maximum load. They consist of an aluminium brake-disc chamber and a cast friction ring, both connected with each other in a floating arrangement via metal pins. This design increases thermal stability and reduces weight.

Optionally, in conjunction with 20-inch wheels, a ceramic brake system is available: it boasts discs with an impressive diameter of 16.5 inches at the front and 14.0 inches at the rear, which endure the most extreme thermal loads with ease and have a very long operating life. Equally impressive are the tire sizes: the standard 19-inch wheels with the new 10-spoke design are shod with size 255/40 R 19 tires; the optional 20-inch wheels are fitted with 275/35 R 20 tires.

Self-assured appearance with functional features

Its independent design lends the Audi RS 6 a striking and self-assured look – without any hint of aggression. In fact, the clear front-end design with the remodelled bumper and accentuated apertures evidently follows function: the high-performance powerplant requires a considerable amount of air to breathe as well as for cooling. The fact that it belongs to the RS family is emphasised by the matt aluminium-look single-frame grille featuring a highly polished black guard in a diamond design.

The headlights on the Audi RS 6 are miniature works of art in high-tech terms: to create space in the front apron for additional air flow, the halogen fog lights have been integrated alongside the bi-xenon headlights, optionally with adaptive light, the cornering light function. The LED daytime running lights strip adds a distinctive touch: ten LEDs at the lower edge of each headlight unit lend the Audi RS 6 a striking appearance, by day or night. A flat cover at the top of the headlights sharpens the “look” of the business/sports car. The taillights, too, largely employ LED technology.

Striking design derived from the “Ur-quattro”

The rear of the Audi RS 6 is characterised by the oval exhaust tailpipes and the diffuser-look apron. A roof spoiler completes the aerodynamic fine-tuning of this high-performance vehicle. The side outline is distinguished by wide, flared wheel arches. Like the engine compartment lid, the front wings are made of aluminium in order to reduce weight. They accommodate the mighty wheels of the new Audi RS 6, yet are also reminiscent of a milestone in automotive history: the flat tops of the wheel arches with their clear edges were counted among the design elements of the Audi quattro – the pioneer of permanent four-wheel drive from the year 1980. A metallic/pearl effect paint finish is standard; new colors Sepang Blue, Monza Silver and Monterrey Green are exclusively reserved for the RS 6.

Elegant and exclusive interior

The interior of the new RS 6 offers an impressive synthesis of sporty elegance and exclusiveness. The extremely high standard of craftsmanship typical for Audi is complemented by an equally sporty and elegant combination of top-class materials. Carbon fibre, aluminium, leather and Alcantara create an ambience that is unique even in the world of high-performance cars.

The main control element is and remains the steering wheel: on the RS 6 the customer can choose between the multifunction sports steering wheel with a 3-spoke design and the particularly distinctive flat-bottomed RS sports steering wheel, likewise with multifunction controls and shift paddles for the transmission. The cockpit in the typical RS design additionally features a boost pressure gauge. Displays for boost pressure, oil temperature and lap timer can be called up via the driver information system.

The inlays are made of carbon fibre and edged in aluminium, the cockpit trim gleams with its piano black finish. Additional highlights in the interior are provided by the aluminium-colored keys of the MMI terminal on the centre console, the milled-finish door handles and the aluminium-look sports pedals. The highly contoured sports seats are covered in a combination of leather and Alcantara with an embossed RS 6 emblem or optionally wrapped completely in Silk Nappa or Valcona leather.

Extensive equipment, individual options

This high-performance vehicle naturally deserves an appropriate level of standard equipment. In addition to design and technical elements specific to the RS 6, this includes the audio system with powerful Bose Surround Sound, heated seats at the front and rear, a tire pressure monitoring system and Audi parking system plus. Together with the wide range of high-tech options for the Audi A6 series, every RS 6 can be perfectly matched to the driver’s individual wishes. The Audi RS 6 is consequently a sporty business car with great versatility, making it suitable for a variety of leisure activities, too.

2008 Audi A8

The Audi A8 not only offers the sportiest performance of any luxury-class saloon, it also stands out as a model of efficiency. A particularly outstanding example is the new A8 2.8 FSI: superlative performance and excellent comfort make it a joy to drive. But at the same time, with a standard fuel consumption of 8.3 l/100 km, its CO2 emissions of 199 g/km are the lowest in its class.

The new A8 model series features major advancements across the range, which includes the top models Audi A8 W12 and Audi S8, and offers a new driving feel whilst building on traditional strengths. An even more precise driving feel, even better ride and acoustic comfort, and subtle refinements to the exterior and interior serve to strengthen the special status of Audi's flagship model.

Unique character – consistently enhanced

To achieve this, many aspects have been refined in the unique blend of sportiness, elegance, supreme control and sophistication that forms the Audi A8 character. For instance, the more direct steering and re-engineered running gear have produced even more exact handling. Overall travelling comfort has also been enhanced by the modified adaptive air suspension and extensive improvements to noise insulation. These make the Audi A8 one of the world's quietest and most comfortable saloon cars.

The new assistance systems Audi lane assist and Audi side assist promise to make life easier for the driver and considerably enhance safety, especially on long journeys. Their tasks are to alert the driver if the car begins to drift out of its lane and to warn of vehicles in the adjacent lane.

Luxurious, sporty motoring with low fuel consumption

The 2.8 FSI impressively demonstrates how well the Audi A8 combines luxurious, sporty motoring with high efficiency and low fuel consumption. Its efficiency nevertheless comes with exciting performance, as the new high-tech V6 engine produces 154 kW / 210 bhp and delivers its maximum torque of 280 newton metres over the broad rev band of 3,000 to 5,000 rpm. With acceleration of 0 to 100 km/h in just 8.0 seconds and a maximum speed of 238 km/h, the Audi A8 2.8 FSI is an effortlessly powerful performer.

High-tech engine with lightweight design concept

Thanks to its state-of-the-art engine and an exceptionally low vehicle weight of only 1,690 kilograms, the A8 2.8 FSI has a standard fuel consumption of just 8.3 litres per 100 kilometres. That is equivalent to CO2 emissions of 199 grams per kilometre – the lowest value of any luxury-class car. Here the dual benefits of low vehicle weight – thanks to lightweight aluminium design based on Audi Space Frame technology – and low wind resistance make themselves felt, in both excellent performance and equally good fuel economy.

The new six-cylinder engine demonstrates "Vorsprung durch Technik" with FSI petrol direct injection and the innovative Audi valvelift system. This new technology adjusts the valve lift, varying it between two levels. The Audi valvelift system uses sliding cam units mounted on the intake camshaft, which are moved by an electronic control mechanism. Depending on the engine power demand, the valves are opened wide or less wide as determined by the position of the cam units.

The advantage: the required quantity of fresh charge can be very efficiently controlled via the valve opening. Most of the time, the throttle valve remains fully open, thus substantially reducing throttle loss. In combination with a series of additional measures to reduce friction on numerous components, the Audi valvelift system reduces fuel consumption by ten percent.

High power transmission comfort with athletic qualities

The new A8 2.8 FSI is equipped with front wheel drive and the multitronic continuously variable automatic transmission. The multitronic not only offers unmatched power transmission comfort with fully jolt-free acceleration, its tall overall gear ratios make for very fuel-efficient motoring. Nevertheless, the seven fixed ratios available in manual mode reveal its thoroughly athletic qualities.

In Germany the Audi A8 2.8 FSI with its extensive standard equipment costs from 61,900 euros incl. VAT.

Consistently enhanced

The A8 impressively embodies the progressiveness of the Audi brand: its extremely rigid lightweight body based on the Audi Space Frame principle, the powerful FSI and TDI engines, quattro permanent four-wheel drive and the highly acclaimed MMI operating system are a few of the elements that demonstrate Audi's impressive "Vorsprung durch Technik" in the luxury class.

The character of the Audi A8 is formed by a synthesis of dynamic and agile performance and exceptionally refined ride and acoustic comfort. While setting new standards with its agility and steering precision, the A8 displays handling with definite sports car qualities. Even long journeys are both relaxing and pleasurable.

To underscore the unique character of this luxury saloon, Audi has further enhanced the two major strengths of the A8. The rack-and-pinion steering with variable steering ratio and servotronic speed-dependent power assistance has been optimised and engineered for a more direct feel. The dampers, supports and tuning of the adaptive air suspension have been revised. As a result, the A8 shows an even more spontaneous response to steering input, tightly follows winding country roads and effortlessly maintains a smooth straight line at high speeds.

Air suspension with even more sensitive comfort

Gains in performance and handling are matched by those in ride comfort: the standard-specification adaptive air suspension is now even more sensitive in responding to fine bumps. The electronically controlled variable dampers are now fitted with new seals to reduce friction. These are combined with new valves that have optimised characteristic curves, and the entire hydraulics have also been retuned. The A8 absorbs expansion joint grooves with supple ease and without even the hint of a vibration. With the addition of an insulation package to reduce rolling noise and road noise, the luxury saloon from Audi offers outstanding comfort.

Exemplary soundproofing

Even the complete acoustics of the A8 have been optimised with the use of innovative materials – after all, Audi approaches noise insulation as a component of its intelligent lightweight construction. The result: without gaining weight, the Audi A8 achieves the lowest rolling, road and ambient noise levels in its class. Being one of the quietest cars in the world is an important element of the relaxing long-distance comfort that is a hallmark of the Audi A8.

Assistance systems bring comfort and safety

Drivers of the Audi A8 can rely on the support of the most up-to-date assistance systems. They serve to enhance comfort and combat driver fatigue on long journeys, thus making an important contribution to safety. The new Audi side assist in the A8 makes use of intelligent radar technology.

The system is especially designed for lane-changing manoeuvres and warns the driver of dangerous situations: whenever there is another vehicle in the critical zone, a yellow LED display in the exterior mirror housing lights up and remains on.

If the driver of the A8 activates the indicator to change lane even though the warning display is lit up, the LEDs become brighter and flash more quickly at shorter intervals. This signal is almost impossible to miss as the peripheral vision of the human eye is extremely sensitive to changes in contrast.

Audi lane assist warns the driver to prevent an unintentional departure from the lane. A small camera positioned above the interior mirror on the windscreen observes the road ahead of the car and a high-speed computer detects the lane marking lines. If the driver moves towards one of these lines without indicating, Audi lane assist makes the driver aware of this by a vibration in the steering wheel.

Still a step ahead in the luxury class

The clear and progressive design idiom of the Audi A8 stands out for its timeless quality. The exterior design has thus only been accentuated at carefully chosen points – from the modified single-frame grille and new exterior mirrors with integrated turn signals to the new wheel designs and LED tail lights with their innovative night design. To complete the range, the A8 is available in new paint finishes and with sophisticated aluminium trim inserts plus new interior colour schemes and inlays.

The Audi A8 thus resolutely continues its progress on the road to success. With sales of over 100,000 vehicles so far, the current model has already exceeded the total sales volume of its predecessor. And it is continuing to make gains year by year in a market segment that has remained flat overall. How come? Because the A8 steadily attracts customers from other brands with its clear character, while at the same time product loyalty and repurchase rates among A8 drivers are above average.

Audi A8 Control Arm Replacement

Background
This procedure outlines the replacement of the front control arms. They are commonly referred to as “control arms” although Audi has specific names for each one (see below). There are a total of eight arms, four on each side comprised of two “uppers” and two “lowers”.

The Audi translation below will help if you are ordering parts from the dealer or need to search in the Bentley manual.

Guide Link = lower curved arm
Track Control Link = lower straight arm
Upper Rear Link = upper round/straight arm
Upper Front Link = upper curved arm

Let's talk strategy. While it is possible to replace arms individually, it doesn't always make sense from a labor standpoint. In theory, some of the arms hold up better than others. Isolating a particular arm for replacement though is tricky. Once you read through the procedure, you'll understand why audipages recommends replacing all eight as a “set” and changing the sway bar links and tie rod ends at the same time. This approach minimizes the amount of labor and will make your front-end feel like new.

Why replace the arms at all? Telltale symptoms are, squeaking, rattling, groaning over bumps, knocking and alignment issues. If you have the original arms and are over 70,000 miles, consider replacement if you are experiencing any of the symptoms above.

It is imperative that you get an alignment done after performing this procedure. The nature of the Quattro system disguises what normally makes a 2 wheel drive car feel out of line. In other words, just because the steering is not pulling to one side doesn't mean the alignment isn't out of spec.

Changing all of the arms, swaybar links and tie rod ends is easily a $2,000 plus job at the dealer. This particular procedure has one of the highest payback in terms of savings. This is a time consuming job but not overly complicated.

Before Performing the Job
Before beginning this project, it is very important that you spray penetrating oil (PB Blaster) onto the pinch bolt shown below, preferably over several days. If this bolt cannot be removed it has to be drilled out which will add hours to this procedure.

While you are waiting for parts to arrive, keep soaking it everyday. If you plan on changing the tie rod ends, soak those bolts/nuts as well.


Spray the areas shown and tie rod end threads if planning on changing them.


Prior to ripping everything apart, see if the bolt can be partially removed as shown above. If not, you have to determine whether you want to forge ahead with this project. There is no way to remove the upper arms with the bolt in place, so you have to figure out a way to remove it or take it somewhere to have it done.

This is a showstopper if you can't get past this point…..

Time: 7-8 hours if first time and bolt is not frozen Parts: Control arm “kit” which usually contains 8 arms, sway bar links, tie rod ends, hardware. I have had good luck getting the Meyle kit from blauparts.com which has all of the hardware all the hardware (with exceptions below) for around $500.


Tools and Materials Required
  • Usual assortment of wrenches and sockets. An impact gun is a huge help as there are lots of nuts and bolts to be removed.
  • Alignment tool (looks like a tapered center punch)
  • PB Blaster
  • Circlip pliers
  • Pickle fork
  • Circlip pliers
  • Anti-seize
  • Bungee cords
  • Torque wrench
  • Optional - Upper pinch bolts (typically not included with kits that contain hardware)
  • Lower curved arm bolts (these get cut, must have and not included in kits)
  • Closed end wrench, 16mm on one end, 18mm on the other. Sears has them and you'll use it a lot for this job
  • Additional 16mm and 18mm wrenches. Make sure you have one of each AND the wrench above. Sockets won't fit in a lot of places so you'll be using two at a time of the same size.

Procedure
This procedure details replacing all eight control arms, tie rod ends and sway bar links. Refer to the relevant section if you are only doing a partial replacement. I recommend doing one side at a time for two reasons:

  • It leaves one side intact for reference
  • Enables you to finish a side and be able to move the car. The operative word being "move", not drive J
1a) Determine status of pinch bolt described at the top of this procedure. If removable, continue. If not, stop here before proceeding.

1b) Jack up one corner of the car. Leave the jack in place and put a jack stand underneath as a backup. The car will be in the position for many hours so makes sure that it's absolutely stable. Remove the wheel.

2) Remove the belly pan and set aside.

3) Remove the (2) 13mm sway bar bolts on each side.

4) Disconnect the sway bar links from the lower, straight control arms on each side (16mm). You should now be able to remove the sway bar and put it aside.


WARNING
Have a jack underneath to support the entire wheel housing. Once you start removing the arms, the only thing supporting all of the weight becomes the axle and tie rod assembly, which you don't want to do !


5) Remove the bolt that connects the bottom of the strut to the straight arm. The strut will stay connected to the car from up above.

6) Remove the nut/bolt that connects the lower straight arm to the frame. Once removed, take a rubber mallet and knock it down so that it is only connected by the ball joint end.


7) Under the hood, remove the plastic cover so you can access the two rubber plugs the cover the strut nuts. There are (2) 13mm nuts that need to be removed with a deep socket. Put your hand on the strut while removing because that's all that is holding the strut in place.

Optional method: you can leave the strut in place and remove it along with the sub-frame. It makes it a little heavier and obviously a little bigger to maneuver out but there is room. The advantage to doing it this way is that the strut nuts are much easier to access when on the ground.

Once the two nuts are removed, the whole strut assembly can be removed and set aside. While not covered here, this is a perfect time to change your struts if needed.


8) Remove the balljoint end of the lower straight arm by removing the nut on the bottom and use a pickle fork to get it out. Another method is to loosen the nut so that it's even with the top of the threads and use a hammer to drive it out. This gives you a bigger area to hit with the hammer.

BOTH methods are destructive so only use when replacing the arm with a new one.


Status Check: At this point, the swaybar, strut assembly and lower straight-arm should be removed.

Note: I have changed the order of this procedure after doing it a bunch of times. I think it's easier to swap out the upper arms first before removing the lower curved arm. The only reason is that it helps keep the strut housing supported a little more.

9) The two upper arms are pretty easy because you actually remove the whole “sub - frame” which they connect to. Also, the hardware is a little more protected and therefore rust is not an issue.


Upper Sub Frame Nut Locations


Under the hood, there are five 18mm nuts that need to be removed (see pic below). They are what hold the sub frame to the body of the car. Remove the two black covers so you can access all of them (you should already have at least one off already to remove the strut bolts). At least one on the passenger side is obstructed by a hose, so hunt around a little.

You can see the relative positions in the picture below and the Bentley diagram above. The Bentley pic is almost looking straight down at the strut tower.

  • Remove all five nuts.
  • Remove upper pinch bolt and disconnect upper arms from housing. Have bungee cords handy because the whole wheel bearing housing will want to flop around. The upper arms are what keep it in place.
  • Remove the nut & bolt inside the wheel well that hold the add'l brace shown in the pic below.
At this point, the whole sub frame will drop down and out (a little wiggling required). Move it onto the floor or bench to swap the arms.


Upper Sub Frame Removed


Depending on the year, you might have an add'l brace shown above - it is not “required” to be reinstalled according to the Bentley. If you do not reinstall, put the bolt and 18mm nut in the hole where the brace was located as shown above.


10) The straight arm has a circlip, which needs to be removed first. The circlip is put in at the factory to help during production. It is not required for reinstallation but I put it back on anyway. Reinsert the special bolt for the straight arm and the clip will hold it in place until you get the sub frame reinstalled.

NOTE: Both arms have a metal spacer with a taper on one side where the bolts go through the sub frame. They might fall out when the sub frame and/or arm is removed. No big deal - the taper faces downward. Just make sure that they are there when you reassemble. If one or more of the spacers are “missing” look up into the hole and it might be stuck inside.

11) The upper curved arm removal and reassembly is pretty straightforward. The only thing you need to be aware of is the position of the arm in the sub frame before tightening the nut. This is important because if the arm is in the wrong position it will stress the bushing prematurely. Once it's in position, torque to 37 lbs + ј turn BEFORE you install the sub frame (you won't have access to the nut otherwise).


Dimension “a” should equal 97mm (+/- 2mm) or 3.81”


At this point, the straight arm will be fairly loose in the sub frame only being held by the circlip and the curved arm will be locked in position. Time to reinstall the sub frame.

STOP: Make sure the tapered spacers have been reinstalled and that the curved arm has been torqued to spec.

12) Reinstall sub frame. Torque 5 nuts to 74 lbs.

13) Connect the upper arms to the wheel bearing housing by reinserting the pinch bolt. Use anti-seize in case you need to do this again. Tighten to 37 lbs.

14) Reinstall strut assembly, torque 13m nuts to 15 lbs. Pop rubber grommets over holes and reinstall plastic covers. You're done under the hood for this side.

15) Reinstall lower straight-arm on the ball joint end first and hand tighten the nut. Lift up the arm into position so that you can reattach to the frame and also to the strut. This will take a little trial and error to get everything lined up so the bolts go through. The tapered alignment tool is a big help here.

I would re-use the factory nut with the large washer. If your kit came with a lock nut, it's too small and will torque down on the insert inside the wheel bearing which can slide out - Hand tighten for now.

Did you lose the orientation of the bolts? That's why you do one side at a time!

Ok, now that the uppers arms are swapped out and the lower straight arm is removed and installed, it's time to tackle the lower curved arm.

16) The curved arm is a little tricky because the nut is inaccessible without loosening the sub frame and prying it down to allow clearance for removal. Someone came up with the idea of reversing the new bolt, which eliminates this step.

In order to do that, you have to cut the old bolt off. There are many ways to do this - body saw, grinder, dremel tool, and sawzall. The bolt is extremely hard and will take a little time to get all the way through. Trust me, even if it takes you 15 minutes a side, cutting the old bolt is a much better option all around.

I bought an expensive air body saw for this job and it just doesn't have enough torque for this kind of cutting. A cutoff wheel on a grinder is the quickest but access is a little harder. Although bulky, a sawzall with a good metal blade works well. Cut roughly 1/3, rotate, and repeat until you're all the way through.

Tip: You can gain more access by loosening the fender liner and peeling it back out of the way. Remove three 10mm plastic bolts (one on the bottom and two inside the wheel well) and remove and the Philips screw on the side. Pull the liner off of the three metal studs and use a bungee cord to hold it out of the way.


Due to sub frame interference, the curved control arm bolt won't come out and it is easiest to cut with a die grinder and cut off wheel.


Lower curved control arm bolt cut for removal.


17) At this point, you can reinstall the new lower arm. Installation is the opposite of removal with the exception of inserting the new bolt in the opposite direction. Where you saw the nut previously would now be the bolt head. Working the bolt through the hole in the frame is a little tricky but you'll get it.

Install the ball joint end the opposite of removal. I would re-use the factory nut with the large washer - same issue as the straight arm.

· Tighten both ends basically hand tight. All final torque settings will be done on the ground.

18) Reinstall sway bar links to the lower straight arm. Don't connect the sway bar end just yet until you complete the other side. Torque to 52 lbs.

Everything should be back together now. It cannot be stressed enough that you have to put the car back on the ground, bounce it up and down a few times and begin torquing all of the loose nuts/bolts. It's tedious but necessary to do it this way so you get the maximum life out of the new arms. Refer to the torque specs below.

The only thing left to complete one side is the tie rod end. They are pretty straightforward but like the pinch bolt, seized hardware could be your biggest obstacle.

Tie Rod End Replacement
  • Use an 18mm wrench on the tie rod end to lock it in place while using a 22mm wrench to loosen the nut on the threaded shaft. Once it's loose, leave it in place for now.
  • Remove the 13mm bolt on top of the tie rod. This one should come out very easily.
  • Remove the nut on the horizontal bolt. Tap out the bolt with a hammer. These tend to get frozen too so use anti-seize on the new one.
  • You should be able to disconnect the tie rod from the housing with a couple of taps downward with a hammer.
  • Now, either take a measurement, or count the threads so you can get the new end installed reasonably close.
  • With the nut backed off, start unscrewing the end from the threaded shaft. Keep going, it might take quite a few turns.
  • Installation is the reverse of removal, refer to torque specs below.
Tips:
  • If the horizontal rod bolt doesn't go through it's because the tie rod is keyed in the wrong place. Put a 10mm hex socket on top (where the 13mm bolt goes) and turn it so that it lines up. You should be able to see clearly through the hole. If not, turn it until you can.
  • If the rubber boot starts to bind up when doing the step above, use a small pick and run it around the inside of the boot so it will flex back into position.
Repeat the process for the other side.

Torque List
Some of these are for reference; you can't fit a torque wrench on every fastener.

Upper sub frame nuts - 74 lbs (same for vertical brace if applicable to your year and you decide to reinstall it).

Tie rod - top bolt (7nm or x inch pounds = not tight at all)

Horizontal pinch bolt – tie rod end - 37lbs

Upper short/curved arm nut - 37 lbs + 1/4 turn

Lower straight and curved arms (ball joint end) - 92lbs

Curved arm (bolt you cut) - 66lbs

Shock bolt - 66lbs

Lower straight arm - 66lbs

Upper control arm pinch bolt – 37lbs

Sway bar links:

- link to arm 52lbs
- link to swaybar 66lbs

Strut nuts - 15lbs

Wheel - 89lbs

Audi A8 Audi A8 Transmission Output Flange Seal Replacement

Symptoms of Seal Replacement
The transmission output seal is the seal that seals between the rotating output flange (which is bolted to the drive shaft) and the distributor gear chamber. This distributor gear is filled with gear lube, it has the gears that drive the the transmission output flange and the final drive - front, on the forward bottom side of the transmission.


The seal that rides on the output flange can leak gear lube across it. Once it drips out, it falls on the left side catalytic converter. This produces a nasty gear lube oil smell when it burns off. It is most noticeable during hot weather after shutting the car down. If you smell gear lube burning (it has a very distinct smell), this is most likely your problem.

If you get under your car, you'll be able to see burned oil on the left hand catalytic converter. That will confirm your problem.


Parts Needed
  • 018 409 399 B Seal (about $20)
  • 1 litre of gear lube (use only Audi product)
  • (6) Output flange to drive shaft bolts (or you can reuse if you'd like, I replaced mine)
  • (4) 8 x 40 mm high grade bolts
  • (4) 8 mm high grade nuts
  • (8) 8 mm washers
The 4 nuts, bolts and washers are to be used on the left hand side exhaust flange. The old hardware will be rusted and in need of replacement. I also purchased the exhaust donut which sits between the two flanges on the left hand exhaust, but it is most likely not needed. I did not use the replacement, the part is manufactured from steel, so it doesn't wear out.


Special Tools Required
  • T40 torx (3/8" socket drive)
  • T45 torx (3/8" socket drive)
  • 8 mm (3/8" socket drive)
  • 6 mm (3/8" socket drive)
  • Rubber mallet
  • 3/8" metric socket set with extensions
  • 12 mm, 13 mm combination wrenches


Procedure
If you don't have a lift, or access to a lift, you can complete this procedure, but it will be much more difficult. Find somebody with a lift to help you out!


Paul Waterloo's A8 on the way up to perform the job. If you don't have a lift, you'll need to put the jack up on four jack stands so you'll have clearance to drop the exhaust and fill the distributor gear.


Put the car up on a lift or jack the car up and place on four jack stands.

Pull the exhaust system from converters to tail pipes as an assembly. Disconnect at crossover immediately behind catalytic converters.

Using penetrating oil, spray all four nuts. Loosen nuts about 5 or 6 turns, but don't remove from bolts. Make sure you loose all four nuts, the pipes will seperate where they want to. Use smooth, even, torque on the nuts so they break loose, then let them stand for a minute or so before unscrewing them. This will prevent excessive heat build up in the bolt causing it to break.


Loosen all four nuts, this allows the exhaust to come off any of the four pipes when removing the exhaust.


Once all four nuts are loosened, open the clamps with a large screwdriver. With help of a friend, drop the exhaust by removing towards the rear. It is held up by four rubber hangers, it's best to spray with a soap solution and they just pop off with via hand pressure if you push up on the exhaust. If you are doing this on jack stands, place a jack under the exhaust and support it.

Pulling exhaust towards the back of the car, the exhaust pipes should pull out and move it out of the way.


The exhaust hangers just pop off with a little force. It's easiest to remove/install them by pushing up on the exhaust and sliding them off. Lubricate them with some soap solution for best results.


Remove the four left hand exhaust flange bolts. On the 97's it was a 13mm bolt head and a 12 mm nut, on the 98 it was 13 mm on both sides. If they strip, you can cut them with a sawsall. Use penetrating oil on the threads. The exhaust donut will fall out when they are removed. Move the cat off to the side and rest on something suitable so the O2 sensor does not have to be removed.


Left hand catalytic converter removed. What a nice design lift to do this job on! Rest it out of the way so the O2 sensor wire does not have to be removed.


Remove three heat shields, with the most forward one shown in the picture below first. They overlap forward to back. So when removing, remove the forward shield first. When installing, install the rear shield first. They are held in place with 13 mm nuts over studs, just bend them over the studs.


Remove heat shields (3) forward to back, install back shield to front. Note all the burnt oil on the bottom of the shaft output shield.


Remove the alloy front CV joint splash shield shown in the picture above. It is a Torx 45. Use a long extension to get to the two screws. Loosen one side, then loosen the other side, then remove the bolts, this will prevent movement of the shield protecting it from breaking during removal.

Loosen the driveshaft to output flange bolts, using a 6 mm hex on a 3/8" socket. If the wheels are in the air, use the parking brake to hold the drive train still.


Removing driveshaft to output flange bolts. Use the parking brake to hold the drive train in place if the wheels are in the air. The forward end of the drive shaft is actually a CV joint.


Gently tap the CV joint (forward end of drive shaft) with a rubber mallet to unseat it. Take care not to damage the flange gasket.

Remove the shield just aft of the drive shaft center bearing. Remove the center bearing shaft support, noting position of mounting and very carefully remove the drive shaft rearward. Support it with a piece of wire to the forward right exhaust hangers so it doesn't get damaged. It is carbon fiber and must be handled carefully. Keep exposed CV joints and flanges absolutely clean. Cover them with plastic bags if they will be left open for an extended amount of time. Do not wipe off the CV joint grease.


Remove shield and center support bearing. The center support bearing location should be noted prior to removal. You should be able to see the washer marks after removing it. Support it with a piece of wire to the forward right exhaust hangers so it doesn't get damaged.


Remove the final output flange using a Torx 40 socket. To hold the flange still while removing it, install two flange bolts and use a large screwdriver to hold the flange still. Before removing the flange, make sure you have an oil catch pan below, about 5 oz of gear lube will dribble out.


Use two bolts to hold output flange with a screwdriver when removing Torx bolt.


Pry out the seal using a screwdriver, take care not to score housing. Just bang on the screwdriver handle with your hand, using the housing as a fulcrum point.


Transmission output shaft seal after removing output flange. Make sure an oil catch pan is in place.


Remove the seal with a screwdriver.


Install the new seal flush to the housing. Tap in with a small hammer and seat with a large socket (1.5" or something suitable). Lube the inside diameter of the seal with a small amount of gear lube after it is installed.

Inspect drive flange. Polish seal surface with 1000 grit sandpaper or 0000 steel wool. Clean well. Reinstall flange and install center retaining bolt. Use lock tite on threads.


Clean the seal running area with 1000 grit sandpaper or
0000 steel wool to remove burnished area.


Remove the gear lube fill plug on the right hand side of the distributor gear with a 8 mm hex wrench. Open the gear lube bottle, it has a long nipple built in. Put the nipple in the distributor gear and fill the cavity until oil starts coming out, probably about 8 oz or less. Put the fill plug back in place and torque.


The Audi gear lube bottle has a built in nipple,
just squeeze the bottle and fill the distributor gear cavity.


Installation is reverse of removal. Torque the Torx bolt holding the output flange to 18 lb-ft of torque. Use new output shaft to drive shaft bolts. If using the old bolts, use loctite on them. Torque to 45-50 lb-ft.

Mount the rear support bearing in the same place as where it was removed.

When hanging the exhaust, first mount the left hand catalytic converter, and hand tighten the four flange nuts/bolts using new hardware. Then hang and mount the exhaust before tightening anything. After everything is in place, tighten all exhaust bolts. Use soap solution on hangers. Start car and ensure there are no exhaust leaks.

Audi A8 Audi A8 F125 Transmission Switch Replacement

Problem
The F125 switch is a multi-function, multi-wafer electrical switch mounted on the side of the transmission. It is in the following circuits: gear selection through the TCU, cruise control, back up light, mirror dipping circuit and maybe more. This procedure was developed because the transmission was going into "limp home mode" on occassion. The fault code showed that it was a problem with the F125 switch. It can corrode over time or get soaked with oil.

Time
There was plenty of trial and error since I do not have a Bentley, but I have worked on cars throughout my life and I was able to figure it out. I started pulling tools and jacking the car up @ 4:30pm and was done putting tools away @ 12:30am. I did have take a few brakes and had some dinner during this time. Working with my step by step procedure it should take no more than 5 hours total.

Parts Required
The part is about $300 and can be bought from www.ecstuning.com.

Tools Required


A= 16mm socket
B= 6mm hex head socket
C= 8mm hex head socket
D= 3/8 universal
E= vise grips to hold G (ground down torx)
F= 1/4 socket to hold G (ground down torx)
G= ground down torx (in open end wrench)
H= 1/4 open end wrench
I= 16mm open end wrench
J= extensions
K= 3/8 craftsman ratchet
L= 3/8 snap-on ratchet
M= pry bar
N= regular screw driver
O= pick

Procedure
Ok, so after I cleaned all of the oil out of the connector. I noticed a lot of corrosion on the contacts within the plugs.


Old F125 switch, notice the corrosion on the contacts.


New F125 switch.


I plugged in the new F125 switch and tried it using a screwdriver to turn the switch, while my assistant sat in the drivers seat and told me what I was doing. The old unit did not work after I cleaned it very well, and the new unit worked 100%.

For bolt torque, please refer to your Bentley, or ask someone with a Bentley.

1) I did this on the ground, jacking the car up. The F125 switch is on the driver side of the car, so make sure to jack up that side.

2) Place jack stands at the rear and front locations.

3) Take off front wheel. This will make access to the areas much easier.

4) Turn the wheel to the left which will help with access as well.

5) Remove the CV joint shield:


There are three 6mm hex head bolts. Using the 6mm hex head socket (tool B) remove them. The left and right ones are very easy, but use a long extension (tool J). The top most one is slightly blocked so I used a universal joint (tool D) at the bolt location which worked perfectly.


Remove shield. Access to the transmission support bracket will now be easier from the wheel well now.

6) Support the drivers side of the transmission with a small jack.

7) Remove the 16mm nut that holds the transmission mount to the transmission bracket:

This is a tight fit. I removed it with a (tool I) 16mm open end wrench, 1/6 of a turn at a time. Turn it as far as possible, then flip the open end over to change its angle, turn is again. Repeat over and over.


Once it is loose you can turn it with your fingers. Remove the washer under the nut you just removed. The transmission mount stays here for now.

8) Removing the transmission bracket:

There are three 8mm hex head bolts on the bracket but before we get to removing the transmission bracket, I want to let you know the top most bolt is a huge PITA. It is very far up, and it can barely see it. This requires patience, but is completely possible.

Top one:


With just the 8mm hex head socket (tool C) in hand, I reached up and placed it into the bolt. Then I stuck my shorter craftsman 3/8 drive ratchet (tool K) on it. The motion to remove it is pretty easy, just pull it down to loosen it. Once it gets loose you can unscrew it with your fingers.

**This is harder to put back in and tighten than it is to remove. Be very careful when reinstalling it because if you drop the bolt, or the socket, you have to remove the bracket to find it (it always fell onto the top of the F125 behind the transmission bracket). I recommend when putting the bracket back in, do the top most bolt FIRST, so if you drop it, you do not have a lot of work to remove it to find the socket (I dropped the socket twice). Also, when putting it back in, screw in the top most bolt with your fingers as far as possible. Then stick the 8mm hex socket into the bolt, and turn it in further with your fingers. This will save time when reinstalling. BE CAREFUL NOT TO DROP IT. **

Right and left:


These are simple. Remove the left one with the same 8mm hex head socket (tool C)on your long extension (tool J). Note the left one is longer than the others. The right most hex bolt is right above the transmission mounts threaded shaft.

Once all three are removed the bracket will be loose, push it UP and out of the way.


There is a way to place it so it will be out of the way, so you can remove the transmission mount easily during the next step.

9) Remove transmission mount:

Below the transmission mount there are two 16mm bolts you need to remove.


Once both are removed (using either tool A or tool I), and if the transmission bracket is out of the way, you can angle the transmission mount down and out of the car.

10) Remove the Transmission bracket:

Now that the transmission mount is removed, the transmission bracket will come out through the same place.

11) Remove the F125 switch:

There are two small torx bolts holding the switch against the transmission. Each bolt has a bracket to keep the wiring for the F125 away from the exhaust, NOTE the way they face before you remove them.


Front most torx:
The front most one is easy, just remove with torx (tool G with tools H, or F or E). I am unsure of this size, only because I ground it down past the size written on the torx to work on the rear torx. Sorry:O

The rear most one:
This is very close to the exhaust.


I chose to grind down the correct size torx instead of removing the exhaust header. I spent 2 minutes on the grinder, much easier than taking the exhaust off.


Removing it from here is easy (tool G with tools H, or F or E), but you might swear a few times. I also used a pry bar to give me a little more room to work on this by moving the exhaust over a little.

** When reinstalling the new F125 switch, be SURE TO NOT DAMAGE THE NEW SWITCH BY FORCING THE NEW ONE ONTO THE TRANSMISSION SHAFT!!! ALIGN IT BEFORE, AND TAKE YOUR TIME.**

12) Unplug the f125 and remove from car. I used a screw driver and pick to get the plugs apart (tools N and O).

All of the parts I removed to access the F125 switch:


Installation is reverse of removal. Pay attention to step 8 for helpful hints when reinstalling.

Audi A8 Tiptronic Shifter Removal

There are several reasons why you might want to remove the shifter and surrounding wood trim in an A8. Possibilities include:

  • Removal of the wood trim to polish and remove scratches. This area usually takes the most abuse from items getting placed on top of it.

  • Removal of the aluminum shifter trim for polishing.

  • Repairing /replacing LED backlighting for the shift indicator lights.

  • As part of doing a Tiptronic upgrade on a 1997 US bound A8.

  • Cleaning of the rubber “tractor” shift guide. If your shifter is getting harder to move through the gears, cleaning might help. In my case, this was necessary due to a spilled drink, but I'm sure they all get a gunk build up over time.
The main objective of this procedure is to show you how to get the shifter assembly apart so that you can do any of the above. I'll share some of the polishing techniques that I used in my project as well.

Time
Varies widely depending on what you do. Figure 45 minutes or so to get it opened up.

Tools Required
  • “T” handle 6mm hex works best although an Allen wrench would work too

  • Trim removal tools
Procedure
You can find the instructions on how to remove and reinstall the side panels here. If you have a facelift car, you'll need a 5mm allen wrench to remove the switch under the gas pedal.

Remove both the driver and passenger floor mats AND the sound insulation underneath. The sound insulation is the same shape as the floor mat only it's much thicker and heavier.

On the driver's side, remove the two plastic inserts in the knee bolster below the steering wheel. They pop right out and will expose 6mm hex screws. Remove those screws and the whole piece will tilt down out of the way. Carefully prop it against the floor. You don't really need to remove it entirely for this project. Don't break the OBD harness, it will still be attached. Pictures and detailed description can be found here.

On the passenger side, look for a rectangular Velcro section on the transmission hump carpeting. It's around ankle height on the left side as you are sitting in the seat. Pull that back, remove the small plastic cover (pry off with a screwdriver) and remove the Philips screw.

In order to get the shifter assembly apart, you now need to remove the side panels to expose 6mm hex screws. Two of them secure the wood trim and two secure the aluminum shifter piece. Pull the side panels down and out on both the driver and passenger sides. They have tabs that catch behind the center console.

Once the side panels are out of the way (get them out of the car), look on each side, behind where the side panels were installed, for the 6mm hex screws and remove them. If you are taking out BOTH the shifter and wood trim, remove all four.


What is being shown in this picture are the tabs that are attached to the wood trim. Some of you have been successful in just “prying” this piece out. PLEASE check and see if the 6mm screws are installed (and remove them) before you try and pry it out. Otherwise, you will break it for sure and something tells me this isn't a $10 part J


Once the screws are removed, you can pry up on the wood trim and remove it. There will be some friction from the rubber gasket but it will come straight up and out.

If you have removed the screws for the aluminum shifter, it will pull straight up as well but will NOT come out until you do two more things. Depending on what you're doing, this might be far enough do get what you need done. If you want to completely remove it, go to the step below.

Completely Removing the Shifter
If you are at this step, the wood trim has been removed and the aluminum shifter should be loose but still connected. If you want to remove it completely, do the following.


Disconnect the two wiring harnesses on the left hand side. You'll probably need to cut the zip ties that hold the connectors in place.

Remove the shifter. This can be a little tricky but let me explain. Just below the leather part of the shift knob, there is an aluminum collar that you need to loosen. Carefully wedge a screwdriver between the bottom of the leather and the top of the collar and press down. It's pretty tight but mine came off right away. I don't think you can “pull” it down with your hands so I came up with the screwdriver method. It goes without saying to do this carefully in case the screwdriver slips. I did it in one shot so hopefully it's no big deal.

Once that's done, pull the shift button OUT and pull UP to remove the shifter. Just to clarify, the shift selector button is the one you push in with your thumb before selecting the gear. Note when reinstalling: you will need to use a pair of needle nose pliers to “grab” the shift button in order to pull it back out so you can reinstall it.


At this point the disassembly is complete and you can access pretty much everything related to the center console and shifter. Assembly is the reverse for all steps.

A couple of notes that might be helpful:
  • I used a combination of wet sanding and 3 grits of polish on the wood trim. If yours is in pretty good shape you might be able to just polish or use Meguairs scratch remover. This is probably trial and error until you are happy with the results. The clearcoat looks pretty thick so there's a lot of material to work with. Reinstalling with the 6mm screws is optional. The rubber surround holds it tightly in place. This also means you'll be able to pop it right back out without all of the disassembly the next time.

  • If you're polishing the aluminum trim, I would recommend removing the shift indicator buttons by peeling off the white tape and pushing them out. You will also need to remove the white plastic piece on the back by prying out the four circle clips that hold it on. If you got this far, you won't get stumped with these details. At this point, you be left with just a machined piece of aluminum. I started with 240 grit sandpaper (deep scratches), 320, 400, 500 and then #00, #000, #0000 steel wool. There's either an anodized coating or clearcoat that you will need to get through before you hit the aluminum. I think any of the grits of sandpaper will get through this pretty fast. I did mine in more of a brushed aluminum look by making the #000 steel wool the last step. If you want to get back to a highly polished finish, you will need to do some buffing too. I replaced these screws but you will notice that this piece is keyed when you reinstall it. You could probably get away without these too, which would eliminate most of this procedure if you wanted to this again.


  • The rubber “tractor” looking piece has a pretty tight tolerance and needs to be clean in order to work smoothly. While you have everything opened up, clean it well and use some armor all so that it's slippery. I had to do a more extensive cleaning on the plastic guides as it kept getting stuck. Unfortunately, you can't really “test” it until the shifter is reassembled. It needs to be held down in order to work correctly.