The evaporator is the A/C heat exchanger in the passenger compartment that the HVAC blower motor blows air over to cool and dehumidify the cabin (it's a direct expansion [DX] coil). While dehumidifying, water condenses off the coil and drains to a condensate catch pan below. This pan has two drains (left and right) which are connected through drain lines that drain outside the car. This is the water that you see under the car while the A/C is running.
The water can also come from the engine compartment. This would be due to the engine compartment drains not draining properly. When this happens, the water under the hood rises to a level above the fresh air intake under the hood and fills the condensate catch pan (in the cabin) with water. The engine compartment drains need to be unclogged. See the bottom of the procedure for more information.
If the cowl drains are plugged (procedure below), it can fill the cowl area with water to a height where the water leaks into the back of the electronics box (ECU, TCU, etc.) and floods it. This can cause misfires, stalled engine, transmission going into limp home mode, etc.
Symptoms of Clogged Evaporator Drains
The drain lines that carry the water from the drain pan to outside the car can get clogged and fill up with water. Once they fill up, the drain pan fills up.
After the drain pan collects water and a corner is taken while driving, the water spills out of the drain pan on the left or right side. This causes the carpet to get soaking wet or have water literally fall on passengers in the car.
Cleaning out the Clogged Evaporator Drains
Cleaning out the clogged drains is easy. It requires removal of the console side panels and using compressed air, blowing out the drain lines.
There is a drain on the left and right side. To remove the right side panel, the following is performed.
Remove the side panel. The carpet and side panel are all one piece. First, remove the floor mat, then the floor carpet. You'll find a hole in the side panel carpet for a screwdriver. Remove the one screw that goes into the transmission tunnel. The other two screws are phillips head that hold the cover on the relay panel. The following picture shows where the screws are located.
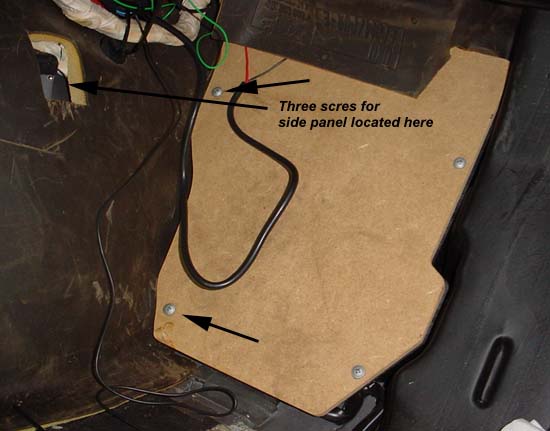
Put the passenger seat all the way back. Once you have removed the screws, slide the panel forward and lift the carpet up and over the seat track. The tab on the panel needs to clear the black trim by pushing the panel forward. Once it is clear, lift it up and over the inboard seat track and pull the bottom out towards the door. The front will then follow. Bring it out bottom first, disengage the top, then pull the top out.
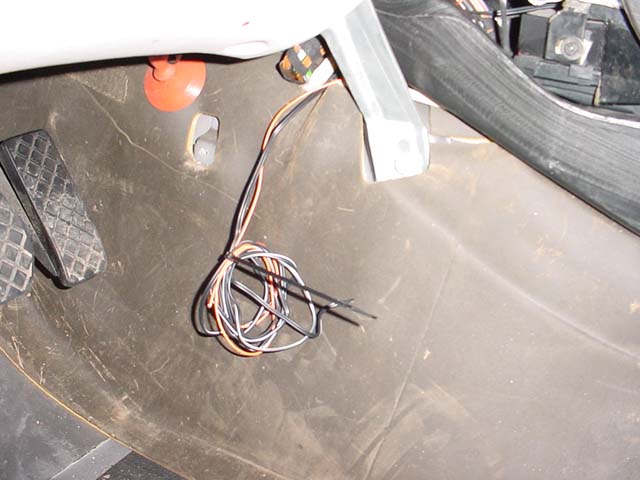
To remove the left hand panel, the procedure is similar to above. Rotate gas pedal stop (carpet hold down) 180 degrees or unscrew completely as shown below.
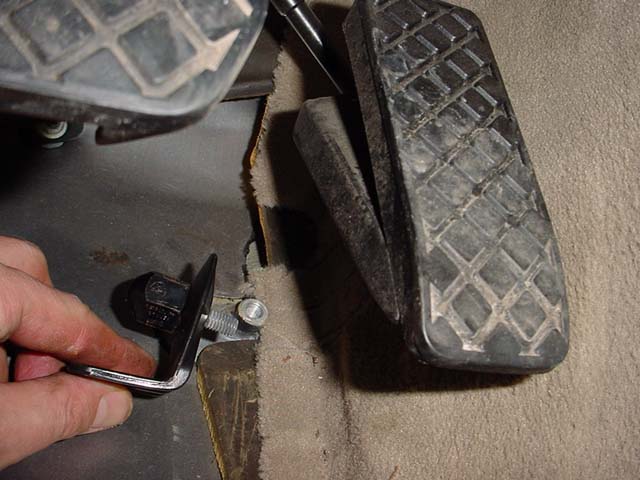
Either rotate the gas pedal stop (carpet hold down) 180 degrees or remove it as shown here. It is easier to remove the side panel with it removed.
Remove the two screws holding the panel in place, 1 and 2 in the picture below.
Remove screws 1 and 2.
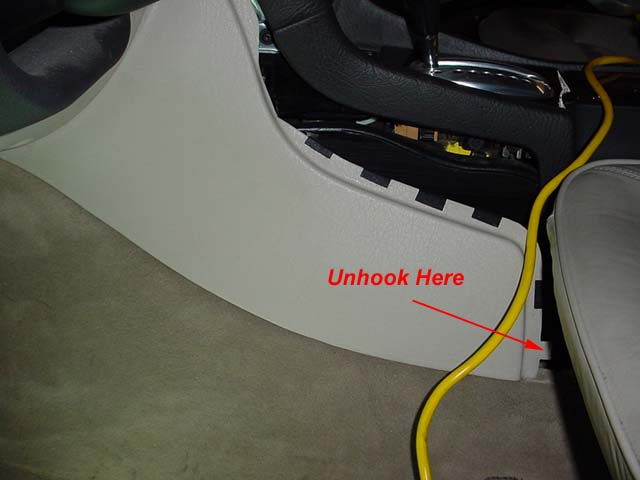
Remove the driver's side trim by sliding forward and unhooking in back.
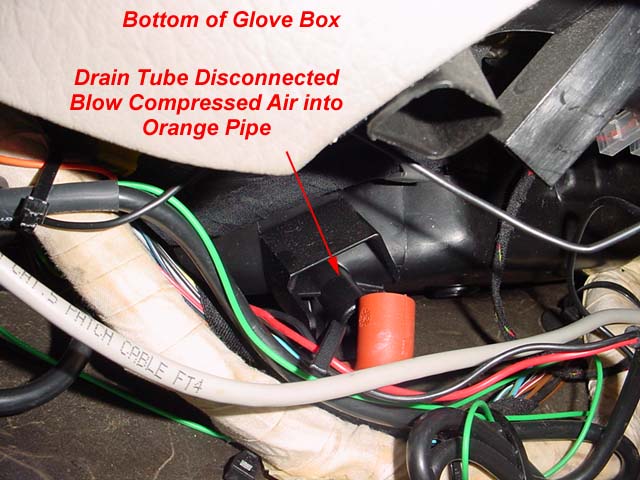
Once the trim is off on both sides, locate the drain lines. They are the large orange circles tucked on the side a little lower than ash tray level. Disconnect the orange drain tube from the black evaporator drain and using compressed air, blow it out. This is done by blowing air down into the orange drain tube. This opens the passageway from the passenger compartment to outside.
Orange evaporator drain tube on driver's side. There is also one on the passenger side.
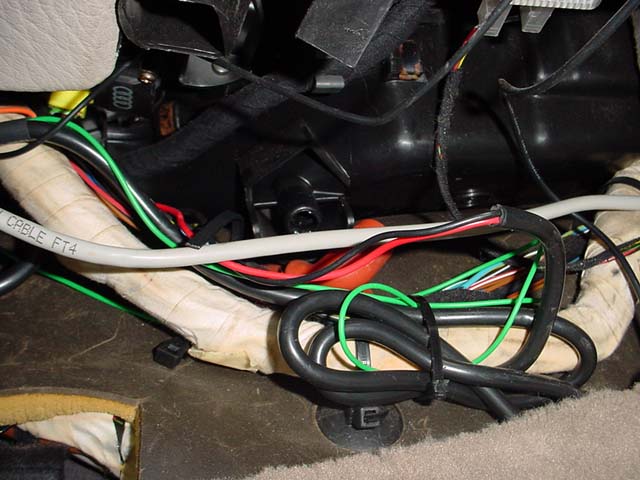
The following pictures are a close up of the passenger side drain tubes. Notice the location of the glove box bottom left corner relative to the drain. They are easy to see if you put your head under there. Don't mind all the extra wiring, those are the results of many modification to Paul Waterloo's A8.
After opening up the lines, simply reconnect them by hand.
Reinstall the side panels, when reinstalling it is easiest to slide the rear tab in from under NOT like the picture shows by going forward with the panel. It's a bear to get the first time, but you'll get it.
Slide the panel back in, top of the panel goes in first, with the bottom of the panel angled back towards the passenger's door. Slide the panel between the black trim and the aluminum plate shown in the picture below. The panel has a tendency to go behind the stainless steel plate. Most likely the aft end of the panel will need to be pulled over the passenger seat inboard rail.
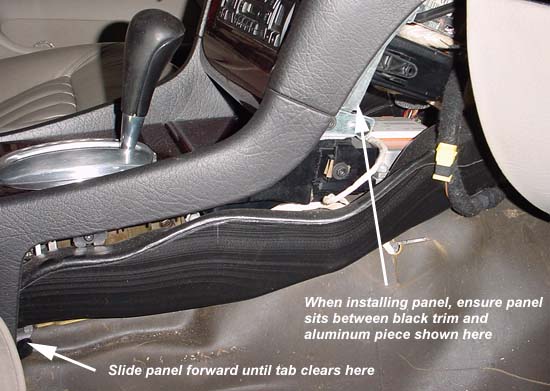
Once the top is in, the back side of the panel must be slid forward until the rear tab clears the black trim piece. Once this is in (and you will most likely struggle with it), install the three screws that hold it in.
Reinstall the driver's side panel and you're all done!
Checking the Engine Compartment Drains
The two aft corners of the engine compartment are where the rainwater collects after it runs down the windshield. If the engine compartment drains are not open, this water can rise to a level above the fresh air intake and run into the HVAC system in the cabin. If the evaporator drains are clogged, it will eventually pour out the HVAC vents onto the cabin floor.
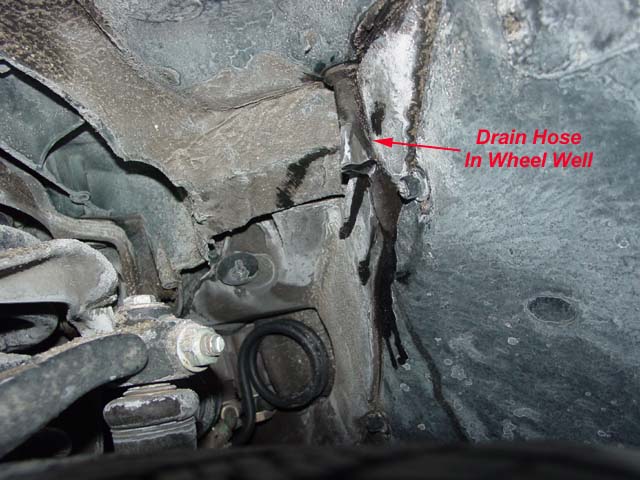
There are drains above the wheel wells. They can be gunked up which will not allow them to drain. To check if they are draining, open the hood and fill the aft areas of the engine compartment with a hose. If it does not drain out the wheel wells, the drains need to be cleaned.
To clean these drains, pinch the exit valve a few times on each side and they should drain water freely. These drain pipes are in the wheel well behind the outer tie rod ends.
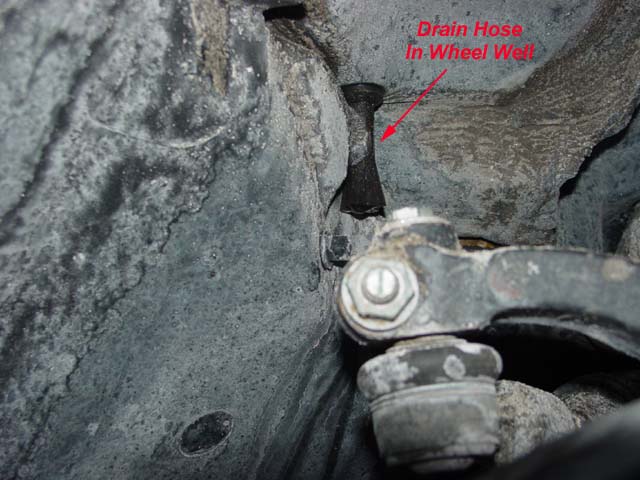
Pinch the drain pipe a few times in the wheel well and it should unclog.
Checking the Cowl Drains
If this drain is not open, the cowl area under the black cabin air intake box with fill with water and can flood the ECU/TCU/electronics box.
You can't actually see the drain, but with some luck and a piece of 1/4" flexible copper pipe, you can open it.
You will need:
- Air compressor with air nozzle on hose
- Flashlight
- 1/4" flexible copper tubing
- Water
7 comments:
Hi! I love reading your lovely comments, so please go ahead.......
clogged drains toowoomba
Good one information.Thanks to share this information.
Septic Plumbing Toowoomba
nice...I have read your blog and found that the information provided is very helpful for me. Thanks for shearing such a useful information with us. septic tank cleaning toowoomba.
Don’t waste your time with sewer problems! Let Bronx Sewer Cleaning handle it.
Made this video yesterday on my car 2007 Audi A8. Hope it helps. https://youtu.be/KT73rNO8pTc
Made this video yesterday on my car 2007 Audi A8. Hope it helps. https://youtu.be/KT73rNO8pTc
Post a Comment