If brake fluid is not changed out, it absorbs moisture and creates corrosion products in the brake fluid system. If you track your car or overheat your brakes, the fluid will boil and change the physical properties of the fluid, which can lead to a soft brake pedal.
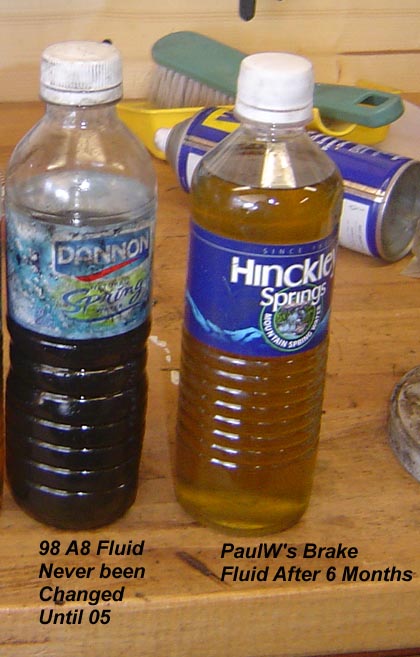
Brake fluid from a 1998 A8 changed out in 2005.
The fluid on the right was in the system for about 6 months.
Tools and Supplies Required
- Pressure bleeder
- 1 liter of brake fluid
- Container to catch fluid
- 11mm flare wrench
- Shop towels for clean up
Procedure
There are many ways to bleed brakes including the two person method of using the brake pedal, vacuum bleeder and others. This is a method that works well for me and can be completed when alone. It requires a pressure bleeder to pressurize the system.
When I bleed the system, I like to change all the brake fluid. I would normally do this when changing pads, but I complete it before changing the pads and after the new pads are installed, adjust the final fluid level to the "max" line on the reservoir.
In order to flush the reservoir, I start at the front left wheel because it has the shortest run of brake line going to it, therefore, lowest pressure drop. This helps speed up the flow of the old fluid while changing it out.
Jack up and remove front wheel. Hook up the pressure bleeder to the reservoir, DO NOT add fluid at this time. Remove dust cover from bleeder nipple. Attach a drain line to the bleeder nipple and prepare catch container.
Pressurize the bleeder to approximately 10 PSI. Using an 11mm flare wrench, crack the bleeder nipple approximately 1/2-1 turn and the fluid will flow to the catch container.
Watch the fluid in the reservoir, and close the bleeder nipple when it reaches the tapered part of the lower reservoir.
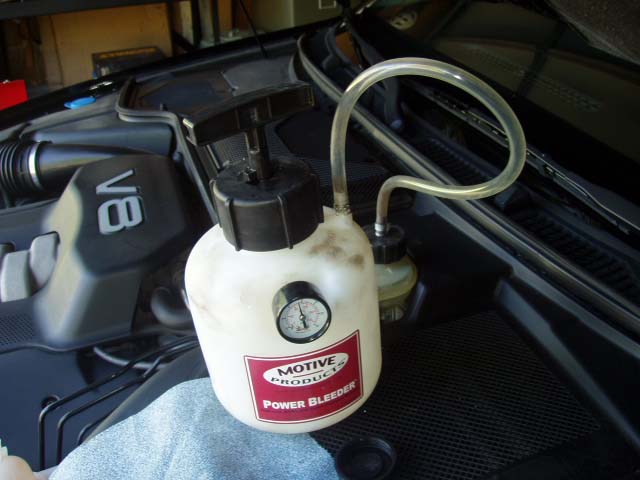
Pump the pressure bleeder to approximately 10 PSI when bleeding.
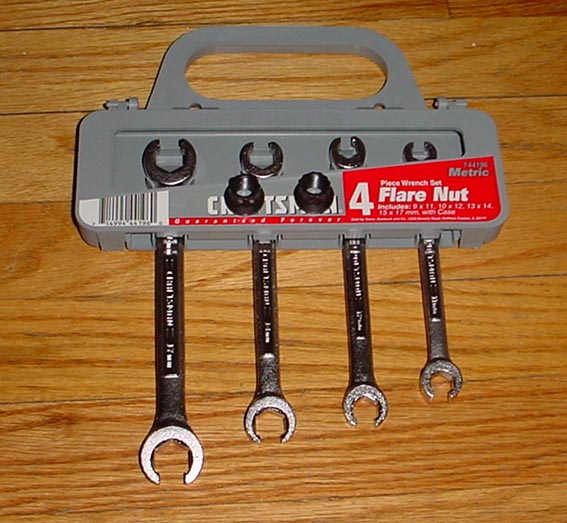
An 11mm flare wrench is absolutely necessary.
You will strip the bleed nipple if you use a standard wrench.
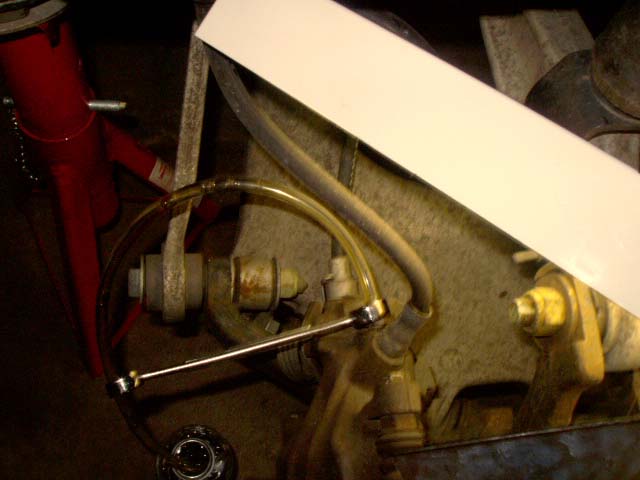
Brake bleeding set up on back brakes.
Remove the pressure bleeder from the master cylinder. Using new brake fluid, fill the reservoir to the "max" mark. Install the pressure bleeder again and bleed the reservoir down to the top of the tapered section. Closer the bleeder valve on the caliper.
At this point, you should have changed out all the fluid in the reservoir and the front left line. You should have about 10-12 ounces of brake fluid in your catch container.
Now repeat the processes for the other wheels. It really doesn't matter which wheel you do first or last. You have to bleed enough fluid on each wheel to change out the entire volume of the brake line. This is not much, about 4 ounces each. Watch your catch container and monitor fluid level to see when you catch 4 ounces.
After each wheel is complete, take the pressure bleeder off and add more fluid to ensure the master cylinder doesn't empty.
I use ATE Gold and Blue fluid, they are the same fluid, but different colors. If you have Gold installed, you bleed the system until it changes to Blue and then you know you have all the fluid.

ATE Gold and Blue, they are the same fluid, but different colors.
Once you are done bleeding the system, adjust the master cylinder to the desired level. If you have brand new pads, the level should be at the "max" line. This allows the brake pads to go to minimum thickness and still not bring the master cylinder level to below "min".
No comments:
Post a Comment