If the front brake pads are worn down, the rears are probably not far behind. Check them while doing the fronts. The rears DO NOT have wear sensors. When the brake pad backing plate comes in contact with the rotor and metal to metal contact is heard, you will know it's time to do the rears! Here is the procedure for the rear pads.
NOTE: This procedure does not cover bleeding of the brakes, which is recommended every time you change pads on your car.
Tools Required
- Small and large flat screwdrivers
- Brake cleaner and rags
Procedure
Take lug nut caps off and loosen lug nuts. Jack the car up and put front end up on jack stands. Raising the entire front end makes the job much simpler and safer. Remove wheel.
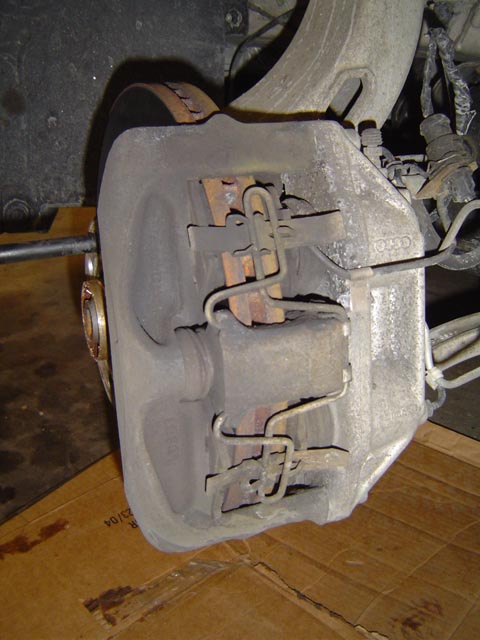
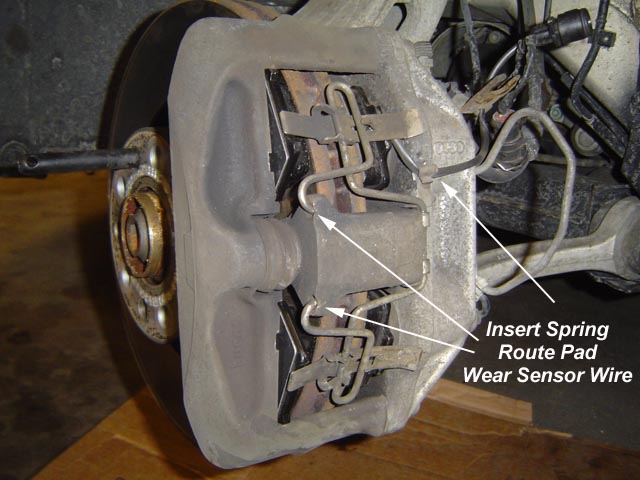
The HP-2 Twin Piston Aluminum Caliper
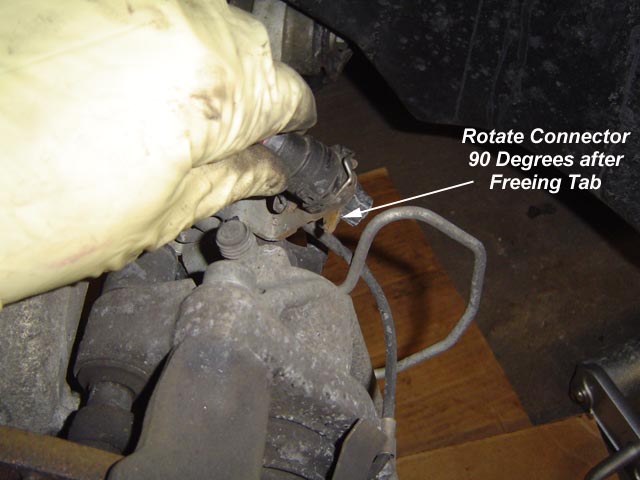
Remove the brake wear sensor electrical connection. It's a 90 degree turn to disengage.

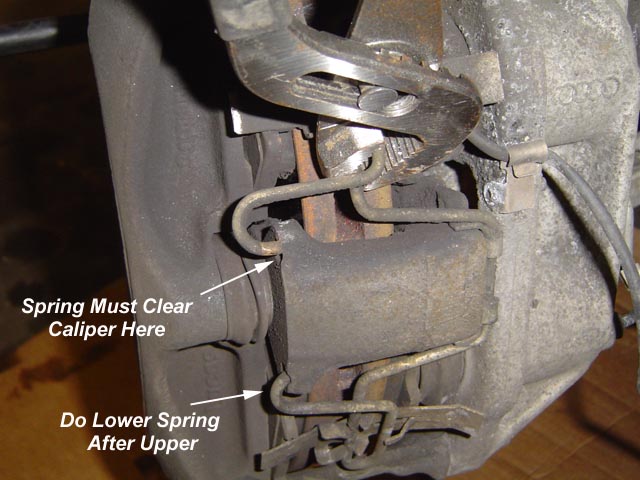
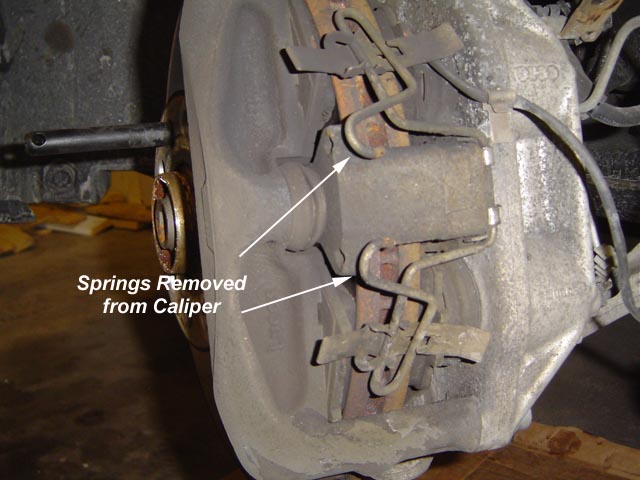
Remove spring by depressing with a pair of pliers. Remove the top and bottom, then hinge the spring out of the way towards inboard.
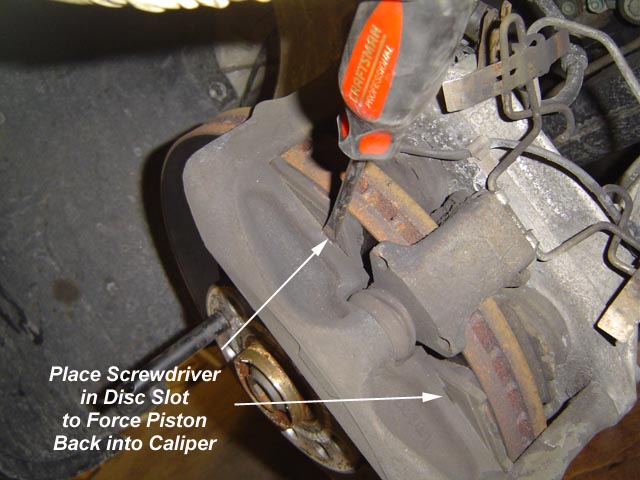
NOTE: Because the new pads are much thicker than the old pads, the pistons will need to be pushed back into the caliper fully. Prior to doing this, check your brake fluid level. If it is high, it could overflow. You will need to remove brake fluid, if necessary. This is normally accomplished by bleeding the brakes. Brake fluid should be bleed every two years. audipages.com recommends that you bleed it every time you change the pads.
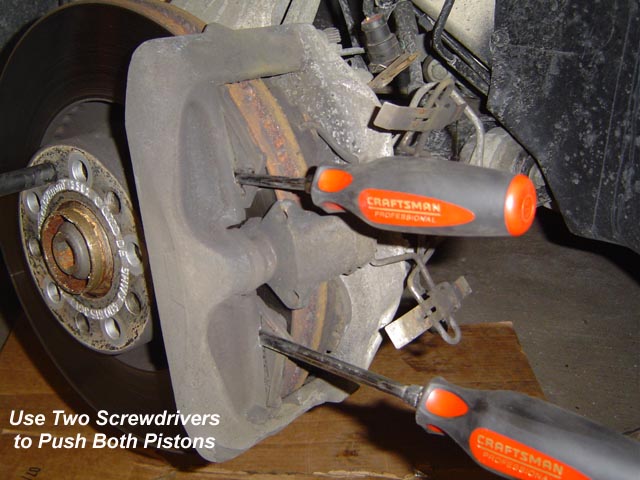
Using two flat blade screwdrivers, push the pistons back into the caliper. You will need to apply pressure to both pistons at the same time to prevent one piston from pushing the other one out.
After the pistons are pushed in, the outboard pads will fall out. Pull the inner pads out and disengage the pad wear sensor wiring from the caliper.
If Pads Will Not Drop Out Due to Rust
This seems to be caused by rust building up on the edge of the pad backplate. This causes the pad to be completely stuck and only by working the pad around with a pair of pliers or vice grips is it possible to remove it. You may have to use a flat blade screwdriver to start the old pad moving at all.
It is then necessary to remove any corrosion from the pad location area inside the pad housing before fitting the new pads. Then apply some anti-sieze compound or similar before fitting the new pads to prevent recurrence.
Using brake cleaner, spray the caliper and pad contact area. Using compressed air, blow everything out. Wipe up with rags.
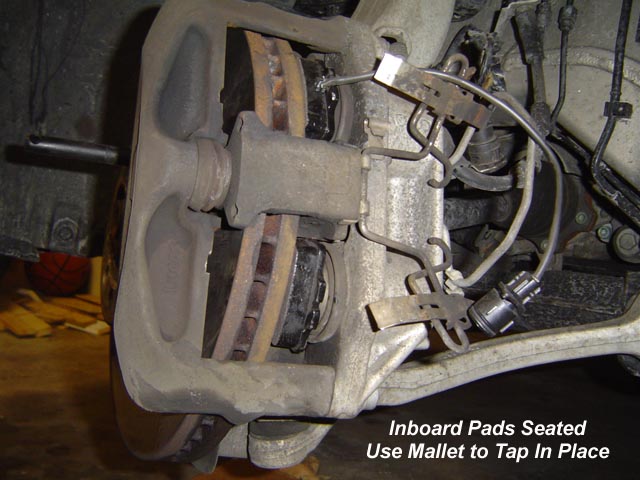
Install new inner pads. The pads have two pins that sit inside the piston hole, and one cutout on the bottom that engages a tab on the bottom of the caliper. Insert the new pads, seating them with a mallet into the tab at the bottom.
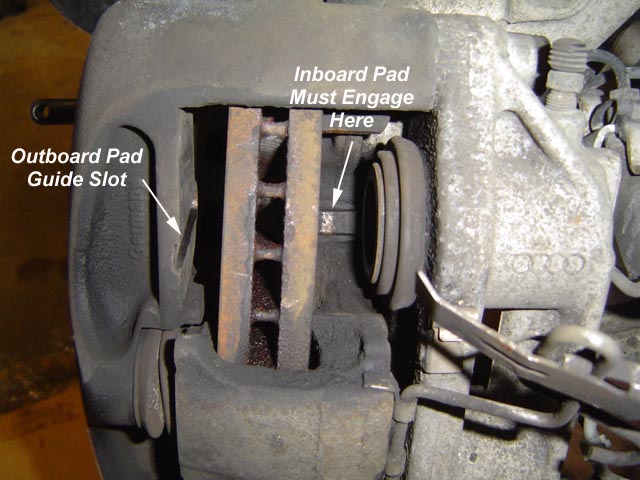
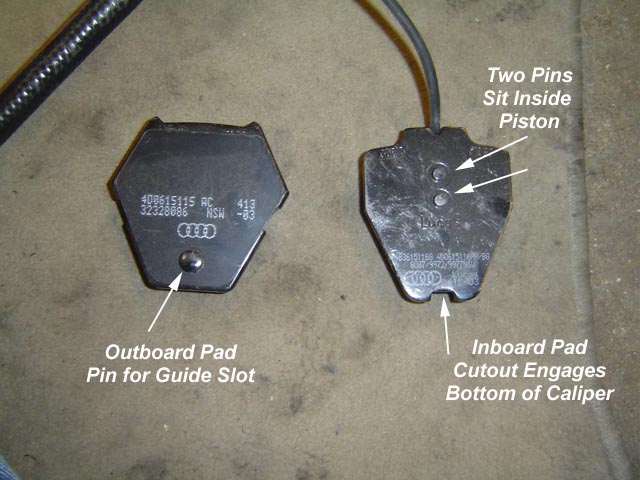
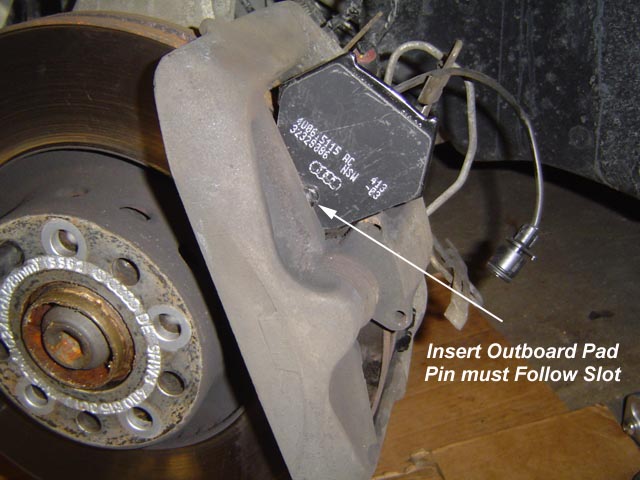
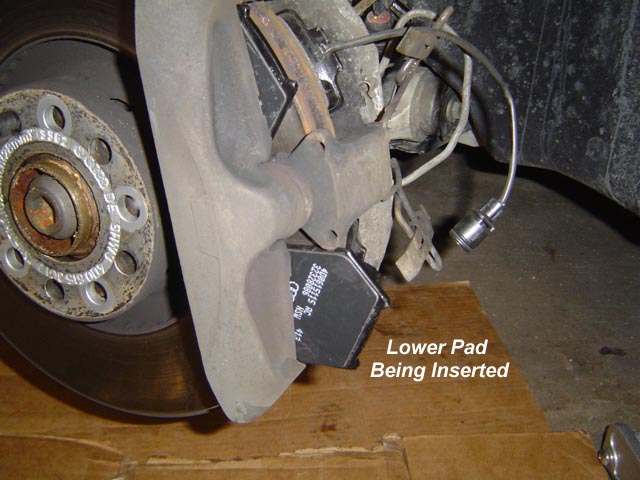
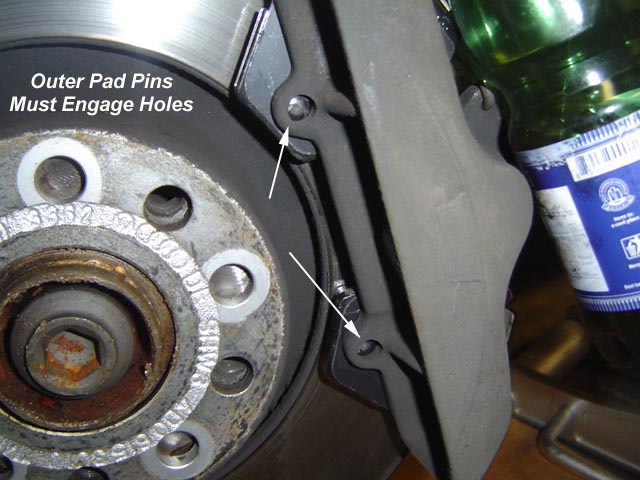
Insert outer pads. They sit skewed in the caliper. The pad pin engages the caliper guide slot. At the bottom of the slot, there is a hole that the pin rests in. The pads might not fit into the slot between the caliper and the rotor, if this is the case, use a screwdriver to push the piston back into the caliper a little more until there is adequate clearance. Nothing has to be forced.
After the pads are correctly inserted, install the spring. Route the pad wear sensor wire correctly and reconnect.
Press the brake pedal a few times to take the slop out of the brake pedal. This is pushing the pistons back out to its required position. This will also lower brake fluid reservoir level. Install wheel, torque lugs to 88 lb-ft of torque.
Repeat for second side, checking brake fluid level. Adjustments should be made by bleeding the system or adding fluid.
When complete, test drive your car around the block slowly. Take it easy on the brakes for the first couple of days or per manufacturer's instructions. The pads will require seating and braking won't be back to 100% for a few days.
No comments:
Post a Comment