The following procedure is to be used on the A8 4.2 32 Valve (ABZ) motor. This engine was found on the 1997 to 1999 U.S. bound A8's. This procedure can also be used for the 3.7 V8 engines. Much of this procedure is applicable to other 4.2 motors as well. Please consult the Bently manual when using this procedure.
Determining Replacment
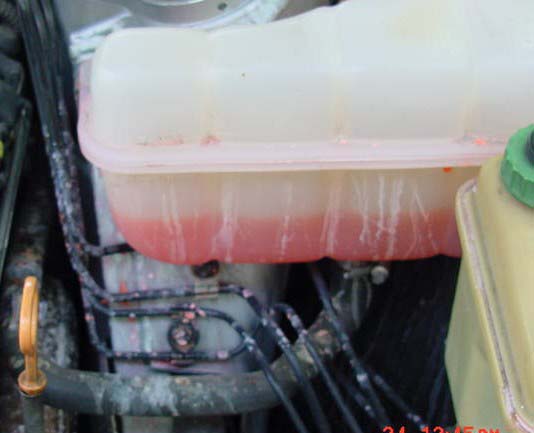
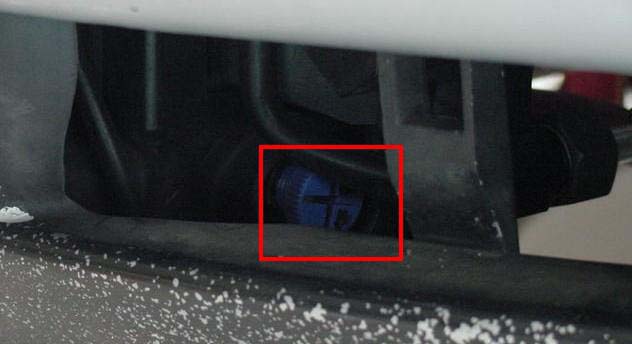
If you have the leak pattern shown below, or your tank looks like the one below, it's time to replace it. While you are at it, replace the bleeder O-rings.
Tank leak pattern
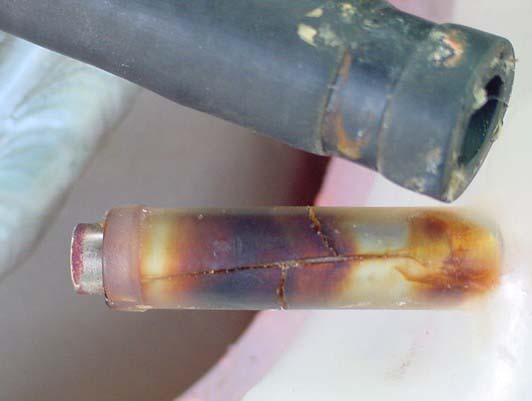
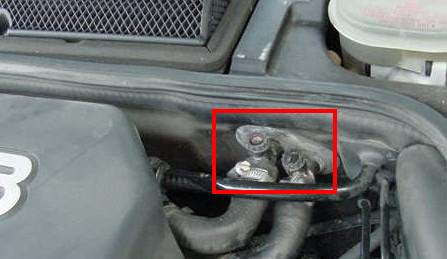
Tank return hose fitting cracks
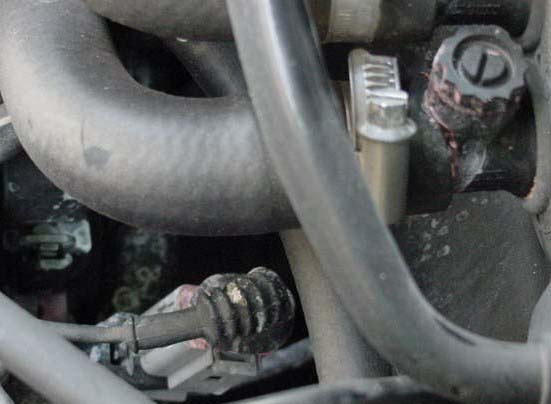
Bleeder screw leaks
Standard Tools Required
- 15 mm 12-point socket (must be 12-point), 1/4 or 3/8 drive, with a 3-inch extension, coupled with a and screwdriver-type handle.
- Number 2 Phillips screwdriver
- Number 2 Flat-tip screwdriver
- Pliers or Channel-Locks, etc. (Something to remove the pinch camps)
- Allen wrench to remove plastic engine covers
- Jack and jackstands, or lift
- 3/8" ID hose, approx 1.5 - 2 feet long
- Extremely clean 5 gallon bucket.
- Coolant expansion tank ($100.00 from dealer)
- 2ea O rings from Hardware store, from the plumbing dept, size: 7/16 X 1/4 X 3/32 (#78 o ring)
- replacment hose clamps for pinch clamp
- Raise the car on the driver's front, high enough to fit the 5 gallon bucket underneath, and support with jackstands.
- Remove the plastic pan under the engine using the flat-tipped screwdriver.
- Pop off the grill in the driver's front bumper.
- Remove the expansion tank cap, place drain hose on radiator drain, place other end into 5 Gal bucket, and open petcock valve.
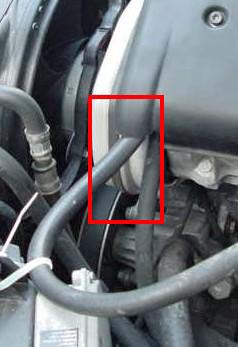
- Using the 15mm socket, carefully remove the 2 bleeder screws, located on the driver's side firewall.
- Disconnect the top hose from the expansion tank.
- As the fluid drains, remove all three plastic engine covers, unscrew the expansion tank mounting screws, and remove the plastic cover that is currently holding the top expansion tank hose.
- Lift the tank slightly and tilt to allow full drainage.
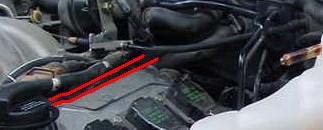
- Re-route the top hose from on top of the intake manifold, to route along the front of the engine. This also allows for more room for non-standard clamps when replacing the oile breather hose.
Old hose route
- Disconnect the coolant level sensor lead, located on the bottom of the expansion tank.
- Make certain that the coolant is sufficiently drained, and disconnect the bottom hose.
- Remove the tank.
- Connect bottom hose to new tank.
- Connect the coolant level lead to coolant level sensor.
- Mount tank and plastic hose cover. Remember, the hose is no longer is routed through this cover. Also reinstall the plastic engine covers.
- Connect the top hose.
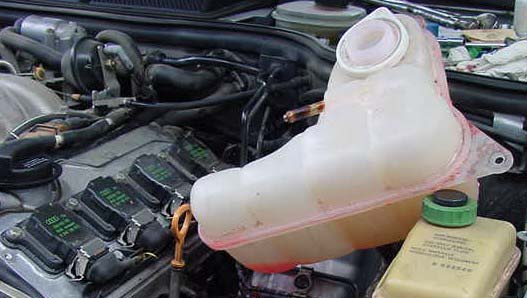
It should now look something like this: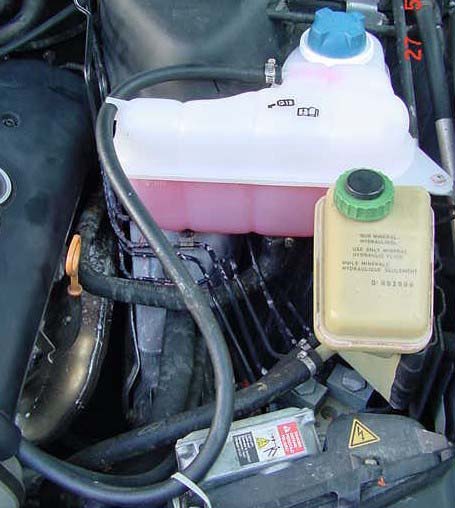
- Close Radiator petcock valve, but leave grill piece off for now.
- Remove old O rings from each of the bleeder screws. Replace with the #78 O rings. This will be a very tight fit, but they will go on.
- Carefully screw bleeder screws back in, but leave the O ring portion exposed. This is to allow air to escape while refilling
- Using a clean funnel, (I made one from a plastic milk jug), refill with drained radiator fluid. Audi recommends changing the fluid. However, if your fluid is still in good condition, (no discoloration), and you used a clean drain hose on the radiator, and used a clean bucket, I see no reason to purchase new.
- Check for leaks.
- Tighen down bleeder screws.
- Reinstall expansion tank cap.
- Start & run the engine up to operating temperature.
- Check for leaks.
- Turn off engine, wait 5 - 10 minutes, and repeat steps 7 through 13 until fluid reaches proper level, but make sure to relieve pressure via the expansion tank cap.
- Reinstall grill piece.
No comments:
Post a Comment