Has your older style armrest broke at the center bracket for armrest? The pot metal in the leather arms can break over time and you might be stuck going to the dealer to buy a very expensive new leather arm.
Or you can do what Martin Stary did to his 1999 A8, by changing it out to the 2000 and newer style. These large armrests can be found on German Ebay. Martin paid $175.00 including shipping from Germany.
The newer large units can be mounted in place of the older style armrests. The following explains how to retrofit the new armrest.
Remove the Old Armrest
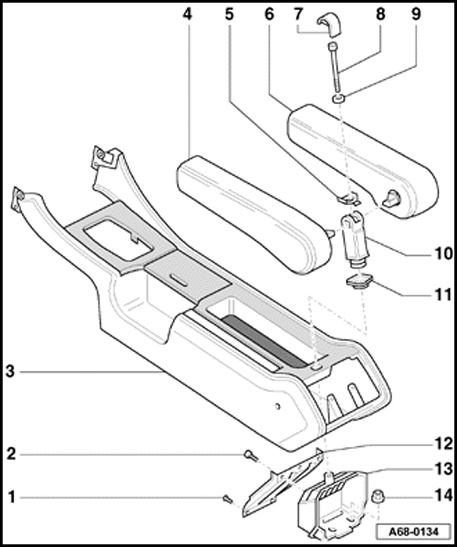
First, move both front seats all the way up. Pop the cover off the armrest stainless post (item 7 in diagram), by using a flat screwdriver on the forward side of the stainless post. The cover pops right off and the bolt will be exposed that holds it to the center console (item 8).
Using a flat head screwdriver, pop the cover off
the armrest stainless post, Item 7 above.
This exposes the allen head screw holding in the armrest. Unscrew it completely and remove.
The leather armrest pieces pull out on each side of the armrest post.
Then the stainless post must be removed (item 10 in the diagram above). The stainless post is a tapered fit onto the main assembly (item 13 in the diagram above). The key word here is TAPERED FIT.
To break the taper loose, you will need to strike it with plenty of force using a lightweight rubber mallet on each side. It must be struck a couple of times with the rubber mallet on the left side, then a couple of times on the right side, then the left side, etc. It will start to break loose, once it breaks loose, you can lift it right off the main assembly shaft. When you see it move, it will be loose. If it is not struck with a rubber mallet on the side to break the taper fit, you'll never remove it trying to pull it straight up.
Taper fit of post to main assembly. Each piece is slightly tapered. This allows the post to lock onto main assembly, providing support for the armrest. The taper fit must be broke before they separate. This is accomplished by using a rubber mallet and striking it on the left and right.
Here's a picture of the '00 and newer armrest from German Ebay, note that it has the stainless post already installed. The stainless post and rubber grommet are different for the new armrest. The new armrest will have wiring in it for a phone and a light for the left hand compartment. The phone wiring was removed and the light wiring was tucked down in the center console during installation in case Martin ever wanted to hook it up.
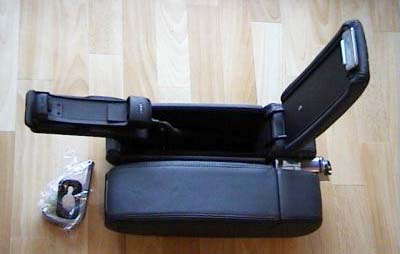
New Armrest from German Ebay. The wiring harness was removed.
The phone cradle was not removed.
The following is the diagram for the '00 and later armrest. There are slight differences. One is the bolt length, a shorter bolt is required. A new hex head bolt was put in place of the allen head. The stainless post foot print is slightly larger, therefore, the rubber grommet is different. A new rubber grommet will be needed, which should be included with the armrest.
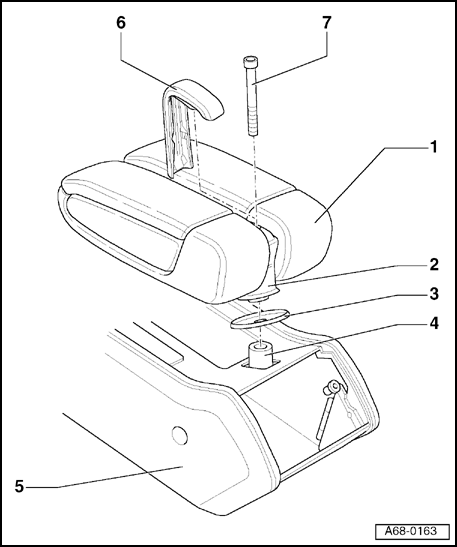
2000 and later large armrest diagram.
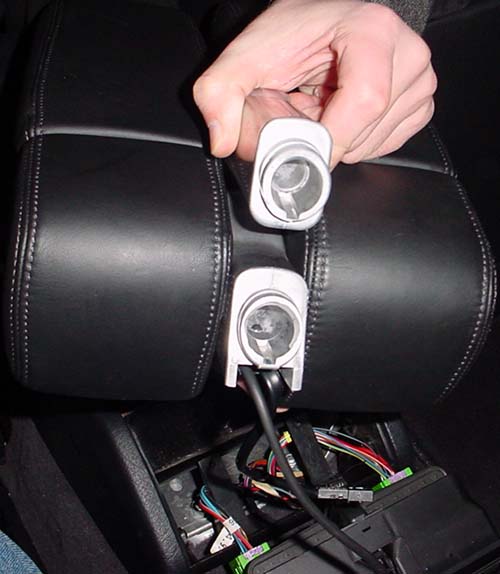
New armrest with comparison of old style stainless post to new style. The bottom as shown in this picture is the front side of the post. The fit is exactly the same, but the footprint is slightly different because of wiring harnesses in the newer style. One of the two wiring harnesses was removed. The one removed was for the phone, shown on the left in the picture above.
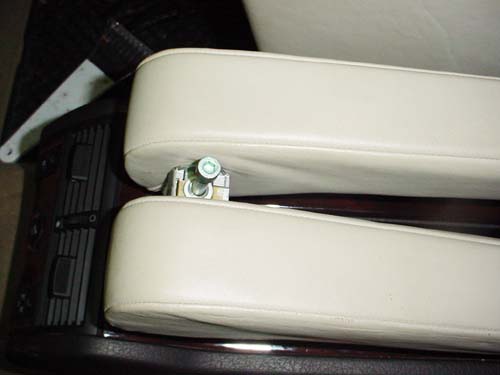
A new, shorter, bolt will be needed. It's a metric thread and can be found at the local ACE Hardware store in the metric bolt drawer section. The size that is required is: 8 x 1.25 x 80 (diameter x pitch x length). You MUST get a allen head or phillips head screw if you do not take the side panels off. If all you can find is a bolt, then the side panels will have to come off to get a socket in place to tighten the bolt.
If using a bolt (versus allen head of phillips head), the inner leather covered side panels of the arm rest must be removed. Open the armrest, exposing the inside compartment. Using a flat head screwdriver, pop the inner leather panel off. There are three "pop in" fastners holding it on. Be Gentle! This is required to get adequate clearance on the inside of the unit to put the stainless steel cover back on.
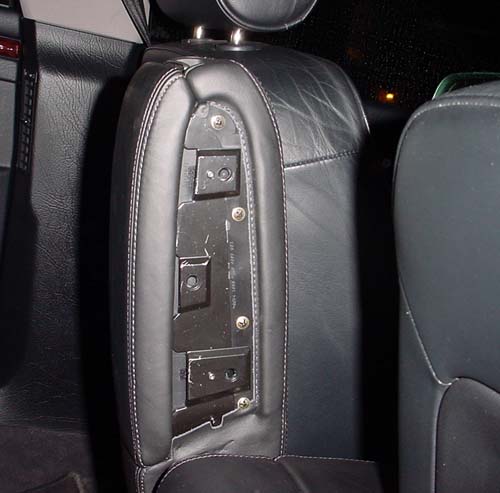
If using a allen head or phillips head screw, DO NOT remove the side panels, it's not required. Remove the inner leather covered side panels of the armrest on each side prior to bolting it down. There are three "pop in" fastners holding it in. Be gentle when removing.
Once both of the two inner covers are off, then slide the new style grommet around the base and wiring. Set it down on the base and screw the new shorter bolt in. Before tightening it all the way, ensure the rubber grommet is aligned. Tighten it up, but do not over tighten! 25 lb-ft of torque should be more than enough to set the taper fit. The taper fit is actually what supports it and holds it in place.
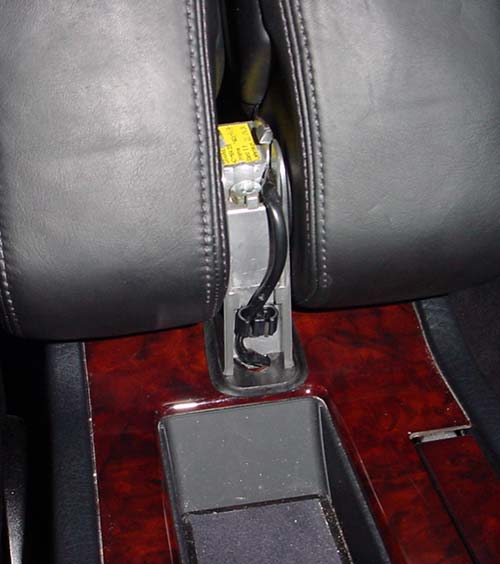
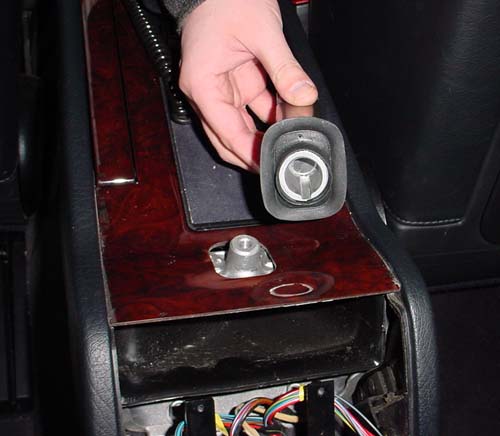
View of new armrest installed from the passenger front seat. The stainless cover has not yet been installed. Note a hex head screw was used instead of an allen head screw. A new, shorter screw is required. There is adequate clearance to use a standard socket on the hex head screw if the side panels are removed. The wiring harness for the left hand side compartment light was routed into the center console in case it is ever hooked up.
Install the stainless cover on the post. Replace the inner leather covered side panels. The new style is very comfortable on the arm and has a ton of storage space!
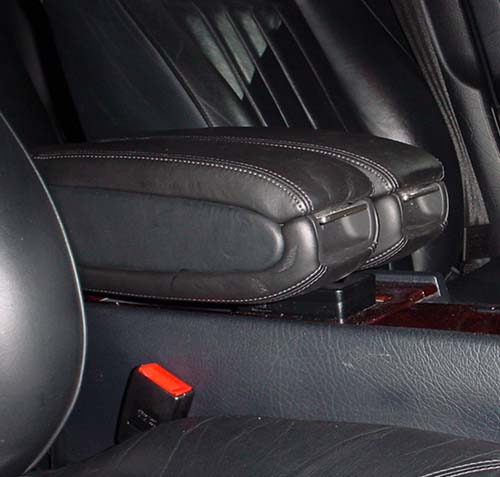
New '00 and later armrest installed on a 1999 A8. Looks great and is really comfortable!
No comments:
Post a Comment