Background:
For those that don't know about the Phatbox... it's basically a purpose built digital audio player supporting MP3s, WAV, WMA, etc. The Phatbox hardware runs a slimmed down Linux kernel and it interfaces directly with the Audi factory CD-Changer wiring through a custom Blitzsafe adapter. A 20GB laptop hard drive encased in a Digital Media Storage cartridge provides the storage space. A USB cradle allows you to sync MP3s between the Phatbox and your home collection using the inlcuded software.
The Blitz adapter basically fools the headunit into thinking a CD-Changer is connected while passing control inputs from the headunit back to the Phatbox. The operation of the unit is pretty simple... the disc selection buttons (1-6) on the Symphony headunit activate different modes on the headunit, allowing you to search by artist, album, playlist, etc.
Here's a pic of the whole system as I received it from Phatnoise.

The Phatbox uses the pre-existing CD-Changer wiring. The logical place to install the Phatbox was in the CD-Changer rack. The CD-Changer connector is wrapped up in the grey foam wrapping behind the rack.

Space around the rack is pretty tight so it's best to remove the whole assembly to work on it. The rack is secured by five 7-mm hex head screws. Unfortunately these five screws are hidden behind the trunk liner, and you can't really get tools back there without at least partially removing the liner on the driver's side. This required removing the interior rear bumper fascia so that the liner could be removed, freeing up access to the rack. It's not hard, but it is time consuming. I was able to use a power screw driver and a flexible extension to remove the screws once I unclipped the back half of the liner. Once you have the rack free you have to carefully turn it over until you can get to the small box that is attached to the bottom of the rack. I don't know what this small unit does but it is held on the rack by three small phillips head screws.

Once you've got the rack free you can wiggle it out of the opening in the partially detached liner. Here's a shot of the trunk after I removed the rack. Note that the liner is partially loose and the carpet in the trunk floor is pulled back.
I used some industrial strength Velcro (the stuff you see on David Letterman) to secure the Phatbox in the rack. Initially I was going to drill holes and use the included self-tapping screws to secure the box, but the geometry of the rack doesn't allow you to drill the necessary holes, and besides, this Velcro is good stuff, it sticks like superglue and the Phatbox doesn't budge at all.
After reattaching the black box to the bottom of the rack I positioned the rack back in its spot in the trunk.
I connected the necessary adapters before securing the rack in the trunk with the screws (again using the handy powered screwdriver and flexible extension). The adapter was secured in the lowest portion of the rack with some leftover Velcro.
The slightly concave shape of the toolbox door easily clears the DMS cartridge sticking out of the front of the Phatbox. There's also just enough room behind the Phatbox for the cables to run without binding. Incidentally there is a *ton* of space below the rack... you could install all sorts of goodies there...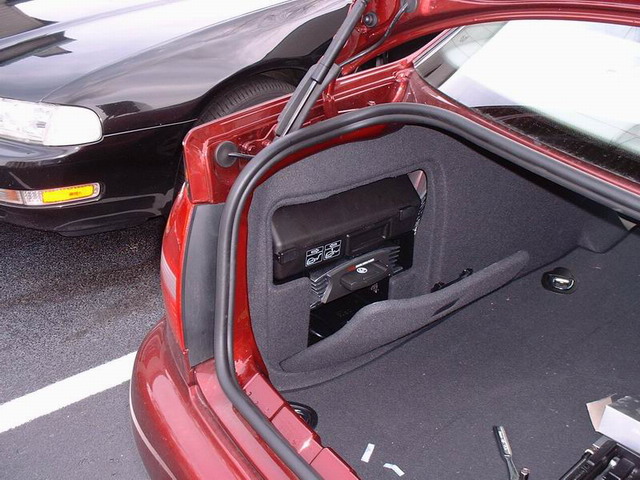
After I cleaned up my mess and restored the trunk liner you end up with a perfectly stealth installation. Just like I wanted. The car's sixth chakra is glowing in approval.
Audi A4 PhatNoise Installation
Subscribe to:
Post Comments (Atom)
No comments:
Post a Comment