I first have to say that at the time of this article HID4LESS's Stage III HIDs are not out yet. I am the first TT to test them. I was given a great opportunity to test them so I took it.
Lets start off and discuss a few factors that are important regarding HID's.
1. Projector-lenses are a vital factor for proper HID conversion. Projectors give the xenon light that bluish-white color when viewing them slightly off axis. Audi makes the
best projectors in the industry. This is why so many boy-racers are buying up wrecked Audi headlights. If you have factory projector-lenses your half way there, If not you
can get them from HID4LESS.
2. Quality of xenon bulb. The rule here is if the bulb isn't German (ie. Philips/Sylvania) pass them up. German bulbs have a much higher standard of quality.
3. Quality of Ballast. German ballast are a must. Hella makes a good ballast for stage1 and stage2 (35Watt). Auerswald is the only company (as of now) that makes a stage III 50Watt ballast. Auerswald is a German company that makes ballast for Submarines, Race-cars, etc.. Their Ballast are extremely durable.
4. Color of xenon bulb. Regardless what anyone claims, 4300K Philips bulb is the BRIGHTEST bulb available. It burns a bluish-white color when used with a projector-lens. Pure white without projector-lenses.
6000k Philips Ultinon bulb has a slightly less output and burns a Bluish-purple, with or without projector-lenses. This bulb was designed for cars without projectors. It gives that projector light-show to cars without projectors. Any bulb higher in color temp is not a German bulb and will cause glare and diminished output.
This is Important. True bulb color is achieved after a burn in time of 100 hours. Philip 4300k bulb makes the most change from whitish-blue to a more bluish-white color.
Many people put in a 4300k Philips bulb and are un happy with the color. They don't give the bulb time enough to burn-in to the Bluish-white everyone wants.
There are other factors like bulb placement etc.. but better companies like HID4LESS
takes care of those issues.
Now that I got that out of the way I will explain what HID4LESS's Stage III HIDs are.
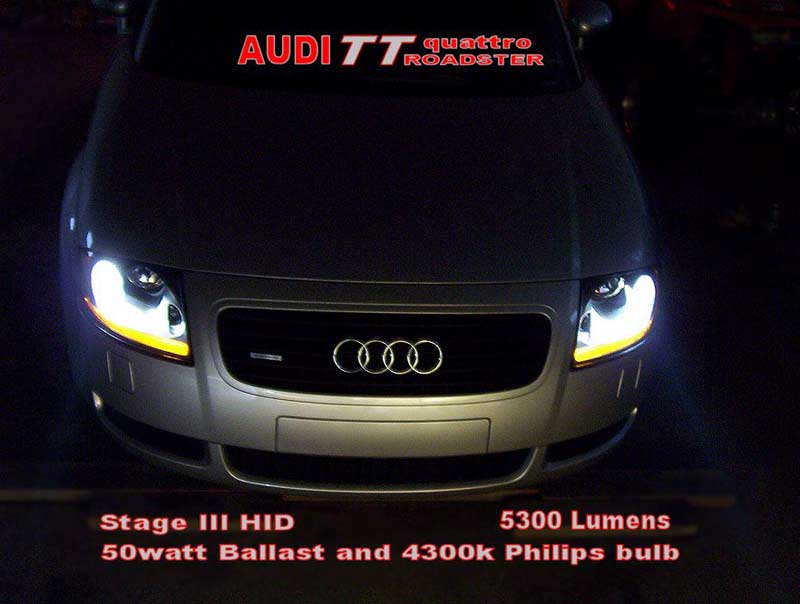
Stage III use a 50W Auerswald ballast and a 4300k Philips bulb. (without any decrease in bulb life) The factory HIDs use a 35Watt ballast and a 4300k Philips bulb.
Output of the Stage III is around 5200 Lumens. (Lumens is a true measure of light output) AWESOME! Output of the factory HID is around 3200 Lumens.
This photo shows a pre burn-in comparison
The TT Roadster quattro Twin-Intercooled Turbo is tight to work in but it can be done without taking the bumper off.
Step1. Open hood and take the battery and coolant cover off.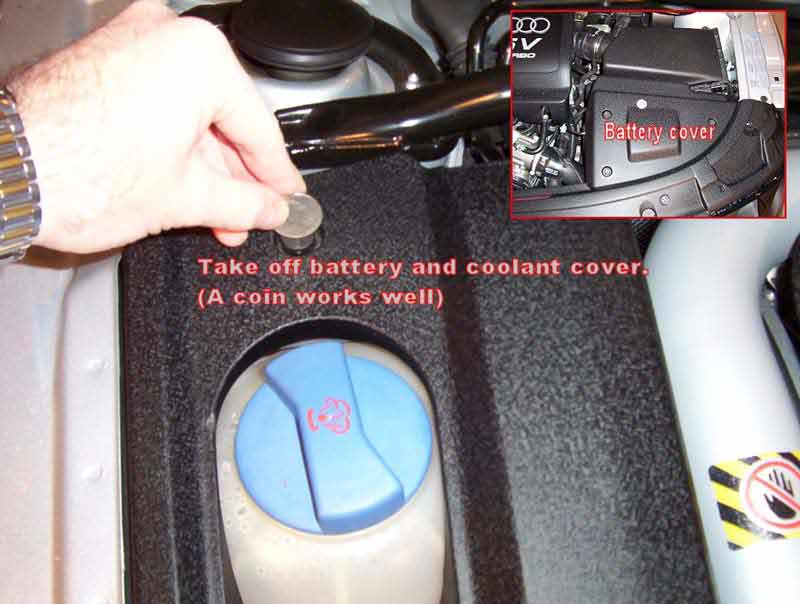
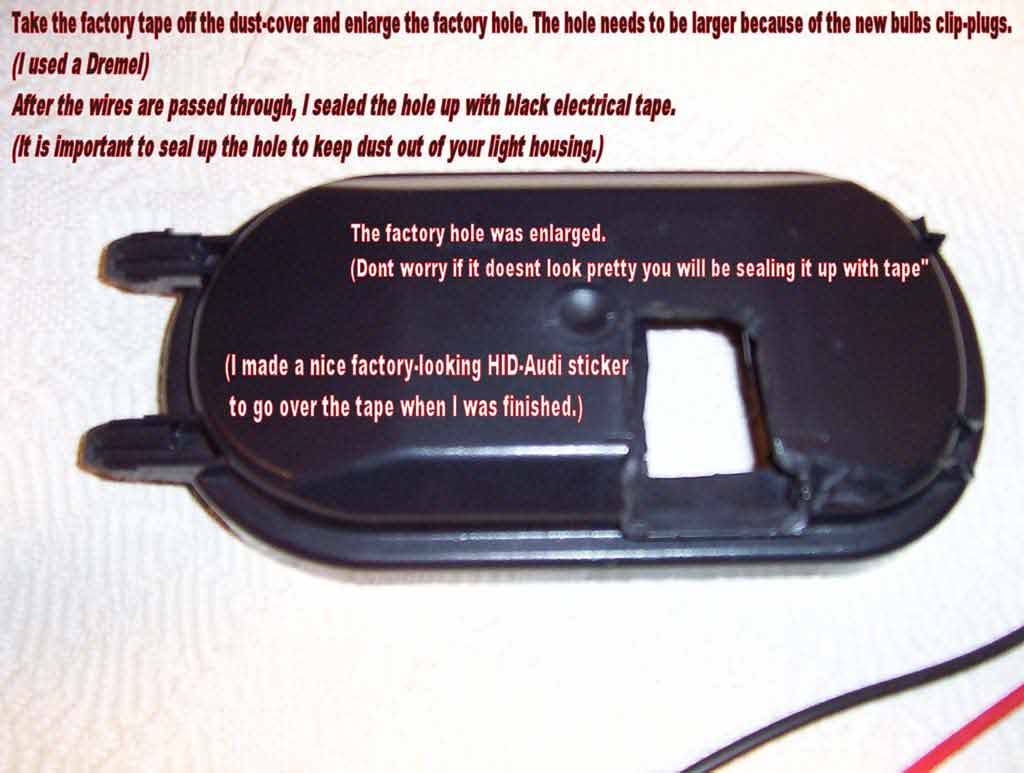
Step 2. Take the dust-covers off by snapping the wire retaining clip off. Remove H1 or H7 bulb by unsnapping bulb-wire clip.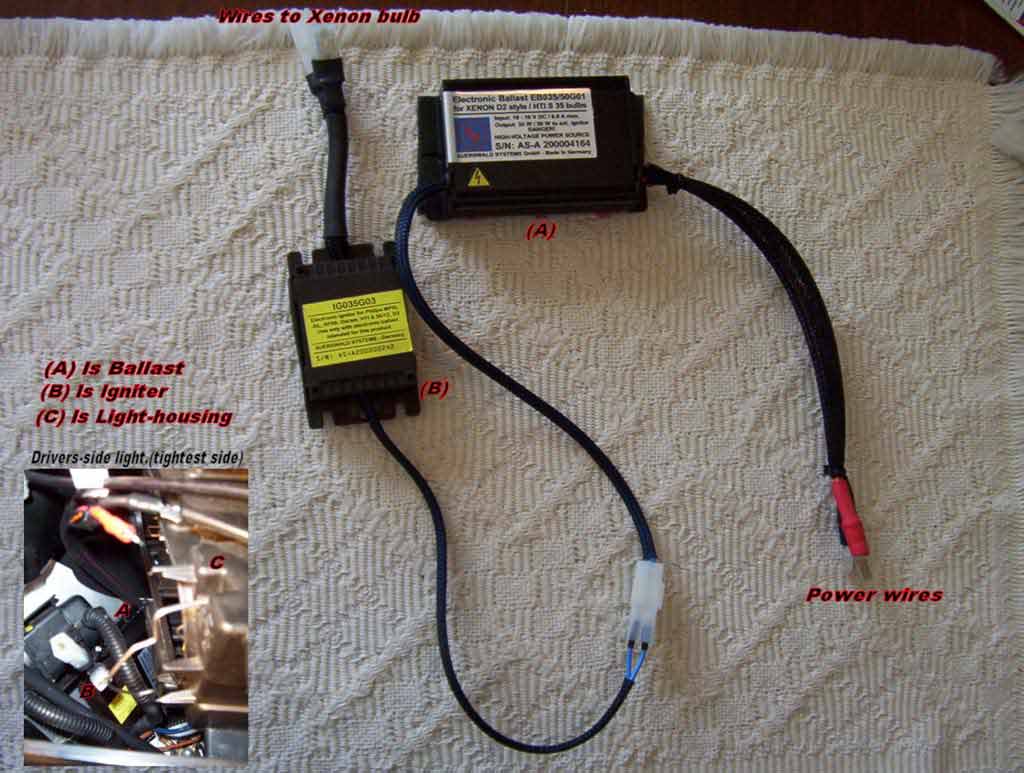
Step 3. Cut larger holes in dust-cover.
Step 4. Install xenon bulb carefully in light housing. (make sure wire on bulb faces down.) There should be little indents in the base of the bulb that should fit into the factory housing. This insures proper bulb alignment. 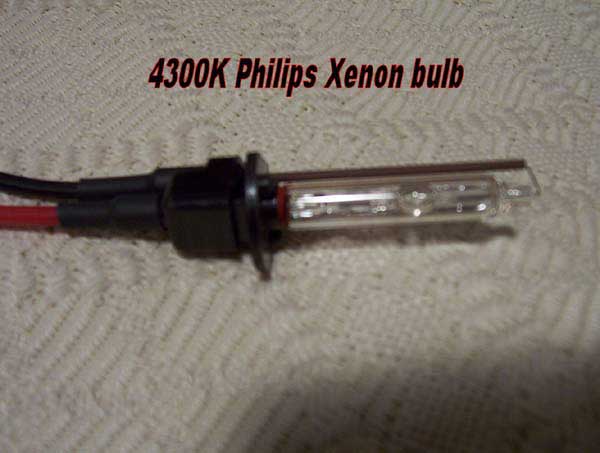
Step 5. Bend bulb retaining wires so the new xenon bulb fits snug. I wont lie to you, this take some effort to bend it just right. I used needle-nose pliers. Have a little patients and don't brake the wire retaining clip. The TT Twin-intercooled motor is real snug under the hood and the driver side light does not give you much room to work. Any other model should be easier.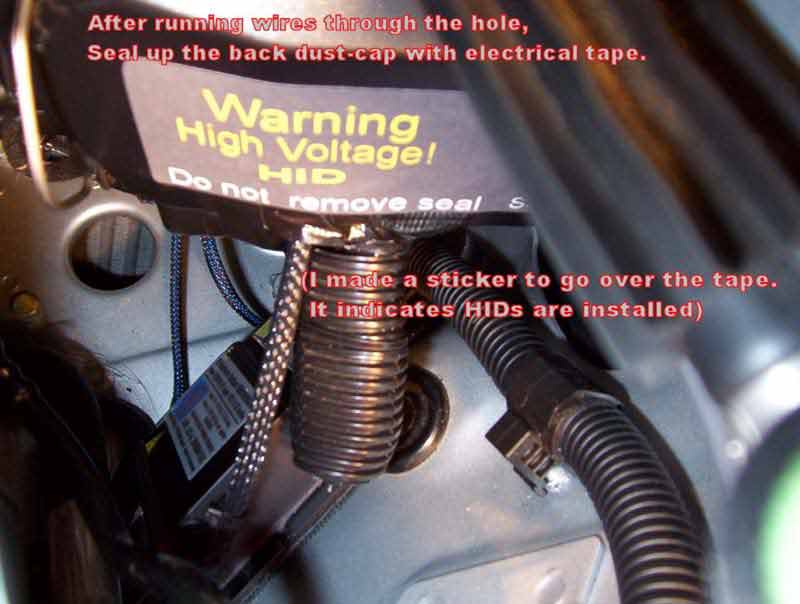
Step 6. mount the ballast and igniter near the light with Velcro. I mounted it on the fender-well.
Step 7. Run your wires through dust-cap and snap bulb and power wires to the new harness. HID4LESS suggest taping all wire-connections with black electrical tape.
Some cars might have to bend the factory female -neg. power supply a bit larger to
accept the new HID male spade.
Step 8. Tape up dust-cap as good as you can and reinstall battery and coolant covers.
Adjust your new STAGE III HIDs.
I found taking photos of the STAGE III HIDs hard to do. Its like taking a picture of the sun.
The photos don't do the new STAGE III justice. The are much, much brighter in person.
ALL HID PHOTOS ARE PRE-BURN-IN COLOR
The new output of these lights is much greater than the factory HIDs. The light is crisp and bluish-white. with 4300 Philips bulbs. The draw rate to start the new 50w ballast is only 6.8amps and 3.3amps to run. It does not set off the "bulb out" light either. HID4LESS uses heavy gauge wires. They are the industry leaders in my opinion.
The cost of the new STAGE III isn't yet determined but they are the ultimate HID system.
If your after greatest light output with the factory bluish color. Use the 4300k Philips bulb.
If your looking for a cosmetic look of purple, use the 6000k Philip Ultinon bulb.
This lighting system makes a great impression on the road. Everyone moves out of your way when passing. (and I'm sure that's often for most of us!)
No comments:
Post a Comment