I changed my BPV / DV (bypass valve / diverter valve) today (710N), so I snapped some pics and thought I'd post in case anyone was interested.
I have a 1997, so the BPV is NOT in the same spot as most A4s. It's located higher up, and you really can't get to it from below. So, there is no need to jack up the car for this.
Tools needed:
1. Flathead and Phillips screwdriver.
2. Size 30 Torx socket attachment (for the headlight removal).
3. Small Hands.
Optional:
- Extra Vacuum hose. Size 3.5mm or 5/32".
- Little clamps for vac hose that you replace (can get at www.ecstuning.com). Or just use zip ties.
STEP 1: Remove airbox cover pieces.
Just pop off the plastic covers over the air box (you DO NOT have to remove the airbox, just the covers). The cover pops off, and the flex snorkel too. The little snorkel piece in the front has two screws holding it in.
STEP 2: Remove Headlight.
There's three torx screws holding in the headlight. First pop out the sidemarker (this if for those with 2-piece). Then you'll see the side screw. The other two are right on top of the headlight.
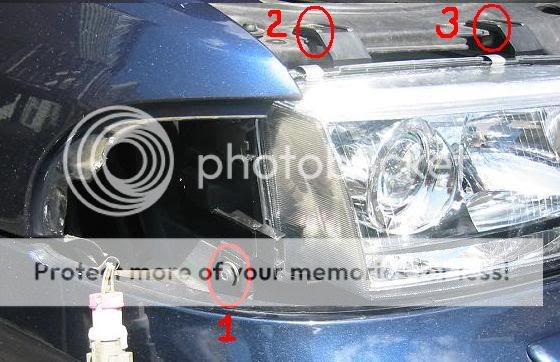
You can then pull out the light, and can easily pop off the wiring connector (just push the little silver clip down, and the plug comes out) then you can completely remove the headlight housing.
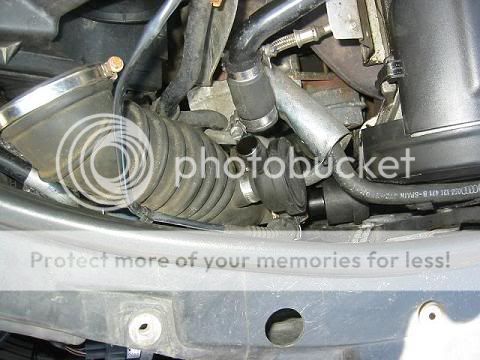
Here's what you see when you look in:

STEP 3: Loosen clamps to move the hose from the air box out of the way.

Just loosen the two clamps (number 1 and 2 in the pic) enough to you can move that big flex hose enough to get better access to the BPV clamps. Number 3 is optional if you think it will give you better access. That is the connector to the N75 valve. There's a silver clip you can push in and pop off that connector. Just be careful with it.
Here's the hoses removed:
STEP 4: Get to the BPV!
Now when you hold that big hose out of the way, you should able to get a decent view of the BPV (which is behind the fan).
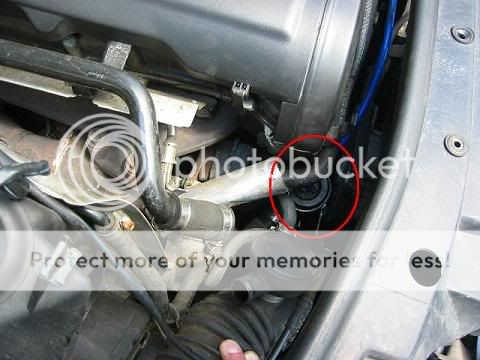
There's two flathead screw clamps holding the BPV on to each hose attached to it. One of them you cannot get to yet. The first is a bit tricky. I put one arm in through the headlight hole to hold the BPV and clamp at an angle where I could get the screwdriver on it from above. It's a bit frustrating but very do-able. After you loosen it enough, pull that end of the BPV out of that hose. The other end (towards the IC piping) of the BPV is still attached. You should now be able to weasel your way over to that clamp to loosen.
Now the BPV is basically free. The only thing still attached should be the vacuum hose going to the manifold.
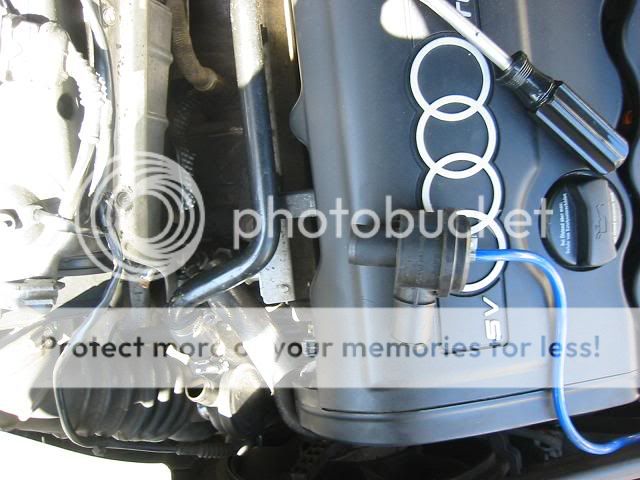
Remove that vac hose. If the hose is old/brittle then you should replace it now. The hose size is 5/32 inches (available at Autozone), it's also the same as the 3.5mm ID hose.
Now hook up your new BPV to the vac hose, and put it all back together and check for leaks via your boost gauge. If you don't have a boost gauge, stop modding your car and get one before you bother modding!

search terms: changing BPV bypass valve DV diverter valve 710N '97 how to change BPV write-up install installing installation instructions puting in new BPV
No comments:
Post a Comment