The Quattro TT's rear drive-train consists of two components; the Haldex Coupling, and the Rear Final Drive. The Haldex coupling is a multi-plate, wet clutch system that engages upon slip and transfers power to the rear final drive. The Haldex Coupling is a separate component from the Rear Final Drive, but is directly attached to it, and requires service every 20k miles (new fluid and filter).
Parts:
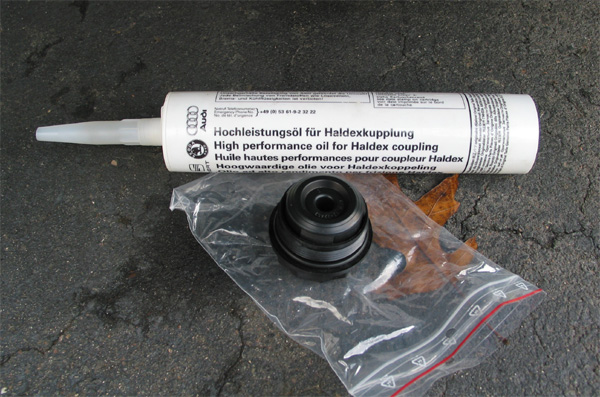
I purchased a new Haldex Filter and a fluid cartridge for this project.
Fluid - Part# G052175A1
Filter - Part# 02D525558A
Tools:
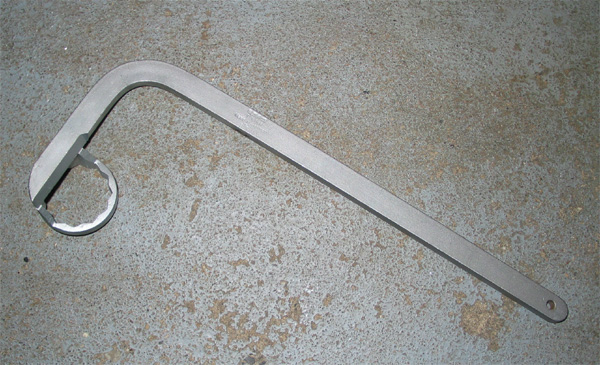
Haldex Filter Wrench (#T10066) I found this at Impex for $45.
5mm hex socket - drain plug
Oil Drain Pan
NAPA Suction Gun or Standard Caulking Gun and a short piece of Ѕ" vinyl tubing
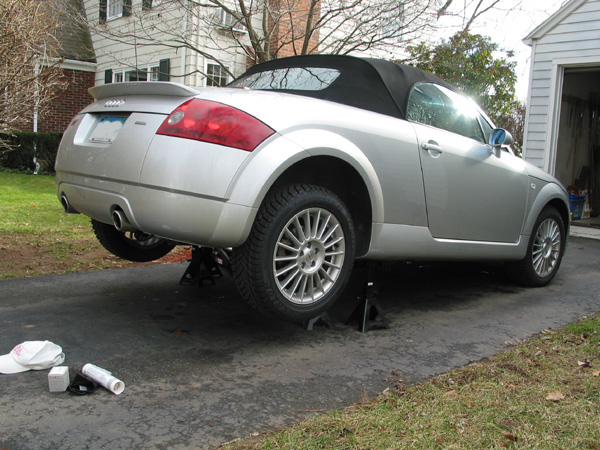
I jacked the back of the car up, and let the rear control arms rest on the top of the jackstands. Ramps would work for this, too, if you backed the car onto them. The Bentley indicates that the entire contents of the Haldex fluid cartridge are injected into the coupling, so I didn't need to make sure the car was level, as you would with a typical transmission fluid change.
Filter Change
To get the filter wrench onto the filter and be able to move the wrench enough to loosen the filter, you need to move a plastic guard that is attached to the bottom of the gas tank. I didn't remove this gaurd completely, I just spun off three flat, round discs that are pressed onto the screws that protrude through the guard - note the arrows in the pic. I was then able to hold the guard down enough to move the wrench.
Here's a pic of the guard moved out of the way - note the arrows in the pic - these point to the location of the retaining rings that you need to remove:

The filter came off easily - you have limited movement and space to work, but the wrench works well. Some fluid spilled out of the filter after it was completely removed.
Here's a close-up of the coupling without the filter installed:

Note what the old filter looks like - this is the metal cased filter that came on the car from the factory. If you've had this service done by your dealer, you should have a nylon filter - otherwise your dealer may have omitted the filter change as part of the service, not uncommon.

Getting the new filter on was easy. I made sure it was threaded correctly by hand, and then used the wrench to tighten it (Not too much torque - it's made of nylon!).
Here's a pic of the filter wrench in place:

Drain and Refill Coupling
Once the filter was changed, I opened the drain plug using a 5mm hex socket, and let the old fluid drain out. Much less fluid came out than what was in the replacement cartridge, so I was glad to be replacing it.
Note the arrow in the pic pointing to the plug:

You have a couple of options for filling the coupling back up - I chose to use a NAPA suction gun that I had instead of putting the cartridge into a caulking gun. This cartridge will work just fine, by the way, with a caulking gun - you just need to use a piece of vinyl hose at the end of the cartridge so you can angle the cartridge's plastic injection tip into the drain hole. If you don't do this, the gun and cartridge will probably be longer than the space between the driveway and the bottom of the car.
Here's what I used:

I injected the entire contents into the coupling, and quickly pulled the gun out and replaced the plug - tightened to 15Nm (according to the Bentley). I lost a very minimal amount of fluid doing this. I cleaned up the bottom of the coupling with a rag - lowered the car, and took it for a drive.
What I would do differently in hindsight:
The Bentley says to apply a small amount of fluid onto the new filter's rubber seal - just like you would with an oil filter. I forgot to do this.
5 comments:
The drain hole is much smaller than a conventional drain hole on a sump or gearbox, hence it easy to swap from putting the oil in and putting the drain plug back without any spillage.
The drain hole is much smaller than a conventional drain hole on a sump or gearbox, hence it easy to swap from putting the oil in and putting the drain plug back without any spillage.
NO need for a applicator, the car has to be raised quite high to cope with one. It's only oil being injected which is not lie a sealant and all you need are two socket extensions with which you can push up the plunger inside the actual cartridge. Use a short extension first and then connect the longer one, until you have ejected all the oil. Simple.
NO need for a applicator, the car has to be raised quite high to cope with one. It's only oil being injected which is not lie a sealant and all you need are two socket extensions with which you can push up the plunger inside the actual cartridge. Use a short extension first and then connect the longer one, until you have ejected all the oil. Simple.
Play casino - No.1 for the Casino Guru
No longer have the opportunity to go to the casinos https://deccasino.com/review/merit-casino/ or read the reviews of https://febcasino.com/review/merit-casino/ the sol.edu.kg slots you love. But they're not 토토 사이트 도메인 always the same. Sometimes titanium earrings you have a new online
Post a Comment