Two preliminary (optional) steps:
1. Jack up the car and remove the belly pan. Completely optional, but save yourself the trouble and expletives when you drop stuff down through the motor.
2. Unhook the battery cable. Also optional, but probably a good idea since you are working with a part of the electrical system. I didn't do this, but my battery was dead after driving the car home 35 miles with a non-functional alternator. (So dead the window couldn't roll itself up after opening and closing the door.)
Now down to business. Remove the plastic trim on the passenger side.
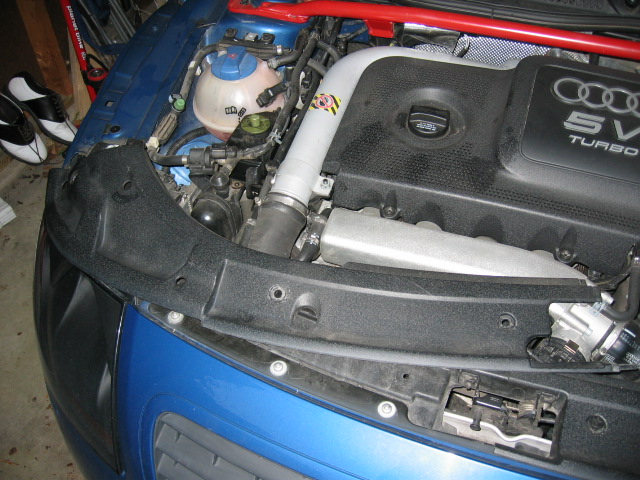
Now remove the manifold trim.
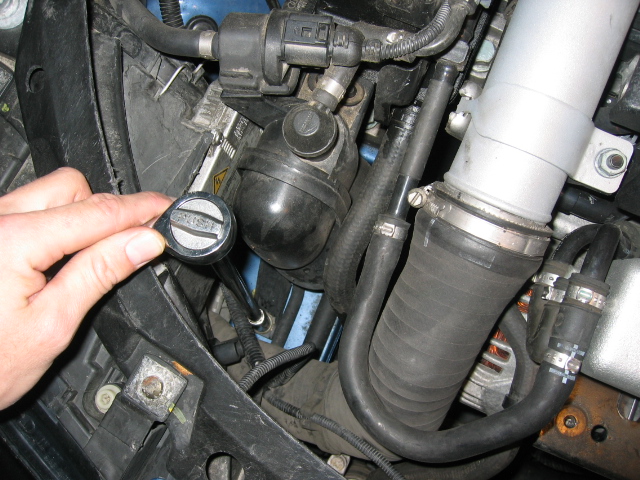
Take out this black plastic canister thingy.

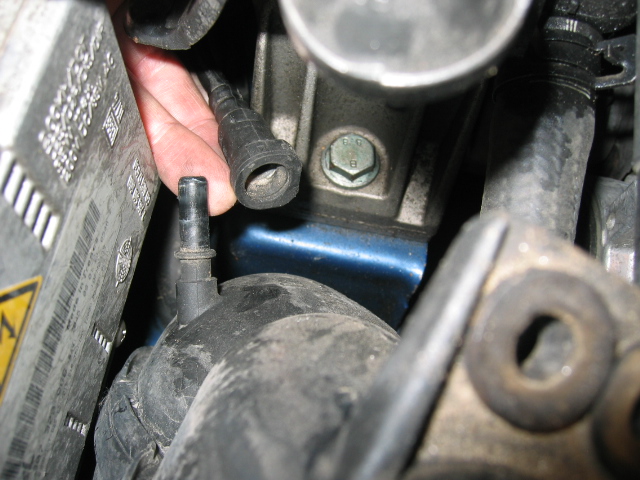
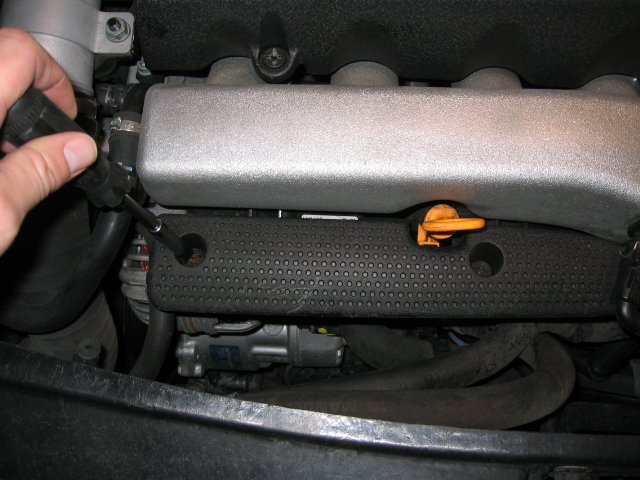
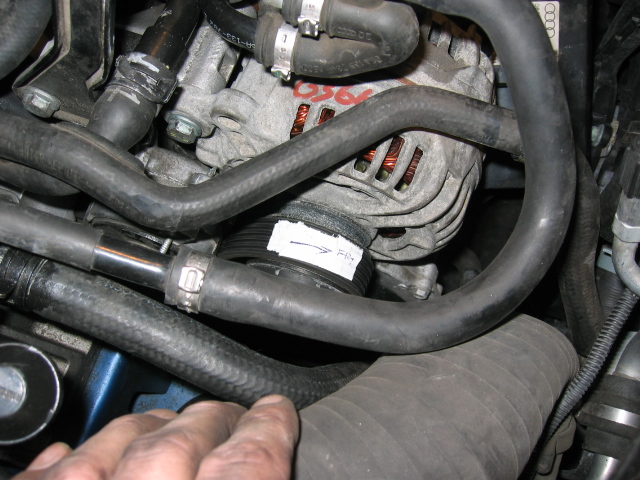
Remove these clamps and move the hoses out of the way.
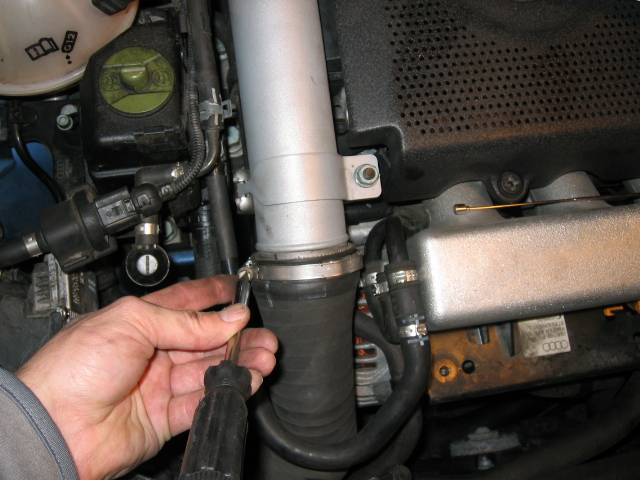
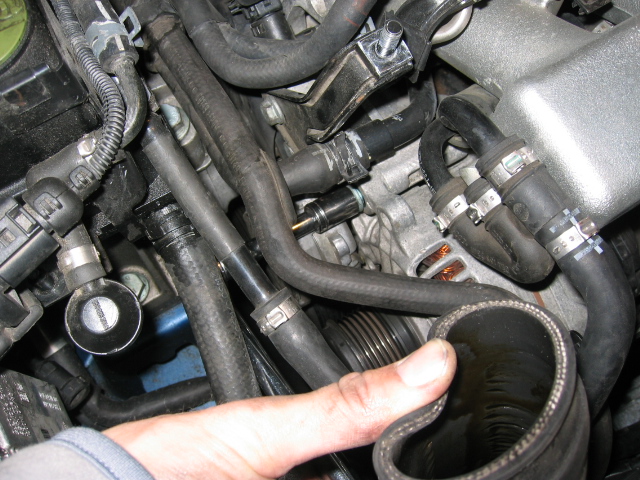
Unbolt this metal plate - two 5 mm allen bolts. Be careful when you move it, since there are hoses connected to it underneath. Doesn't need to be completely removed, just loose so it can be moved around. You'll want to disconnect the hose on the left side (passenger side) of the plate.
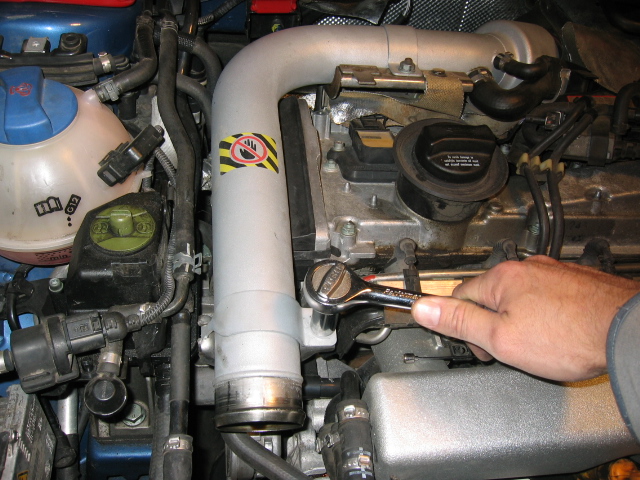
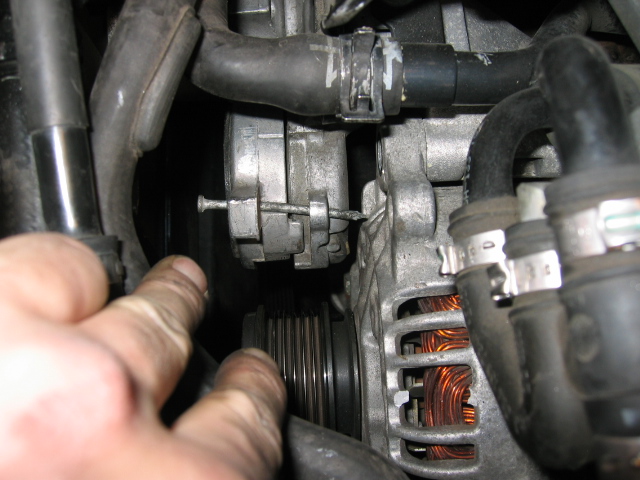
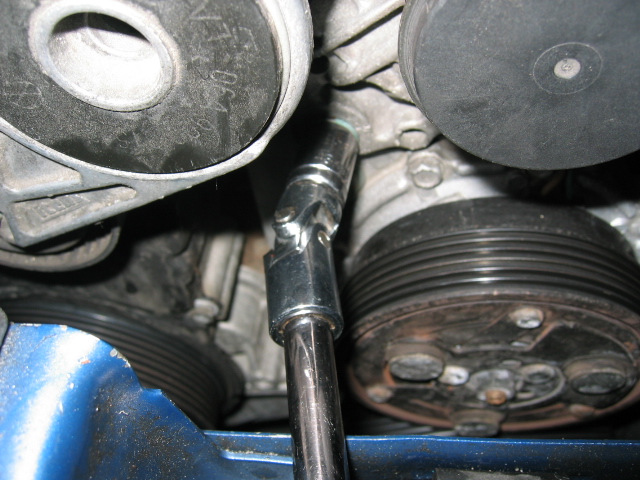
Using a 15 mm open end wrench, pull the belt tensioner toward you to slacken the belt. (Can't really tell in this picture, but that's what I'm doing here - wrench is in my hand.)
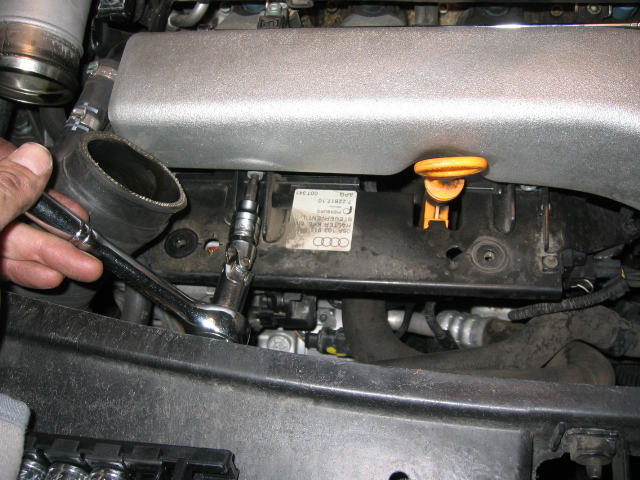
If you pull the tensioner far enough toward you, there are two holes that line up and let you slide something through to hold it in place. (You actually have to get it this far to get the top alternator bolt out.) I used a nail.
Now remove the belt. But before you do, somehow mark it so you know which direction it was going. It needs to go back on the same way it came off (according the Bentley manual). I used a piece of duct tape.
Remove the top alternator bolt. 13 mm.
Remove the bottom bolt. 13 mm again. I used a u-joint on an extension.
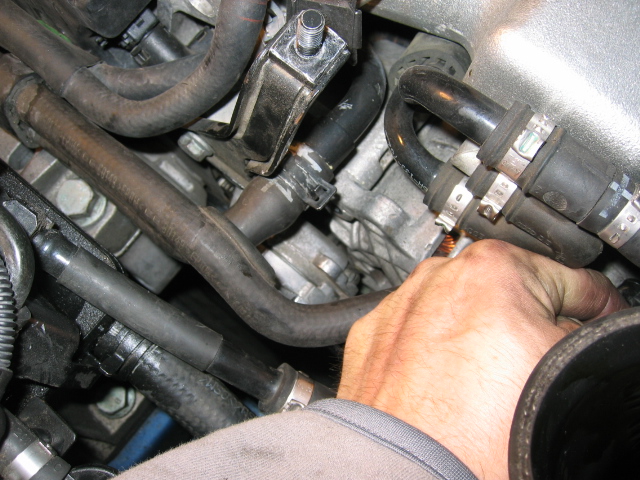
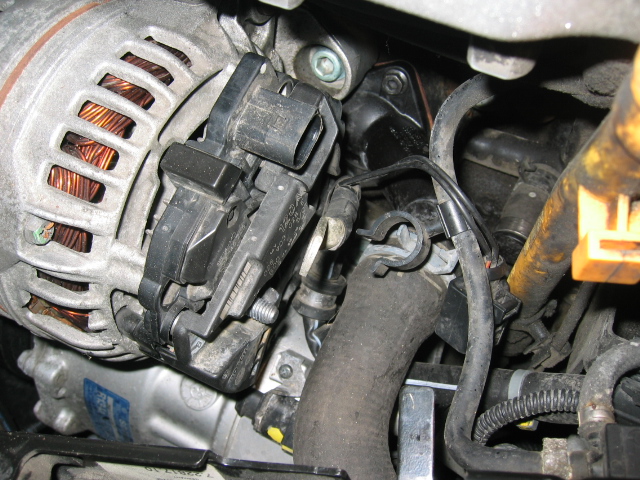
Remove the wires. One is a socket that unclips, the other is bolted on (I think a 13 mm, can't remember) covered with a plastic nut cover (that pulls off). That same wire is also held on by a clamp at the bottom of the alternator (8 mm nut). That clamp is easier to get to once the alternator is loose from the bracket.
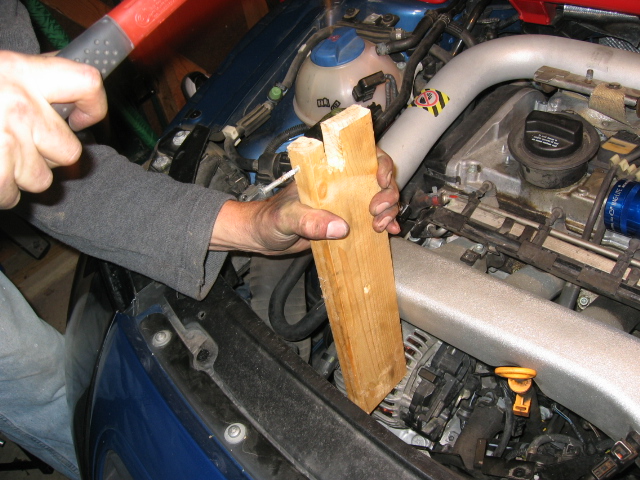
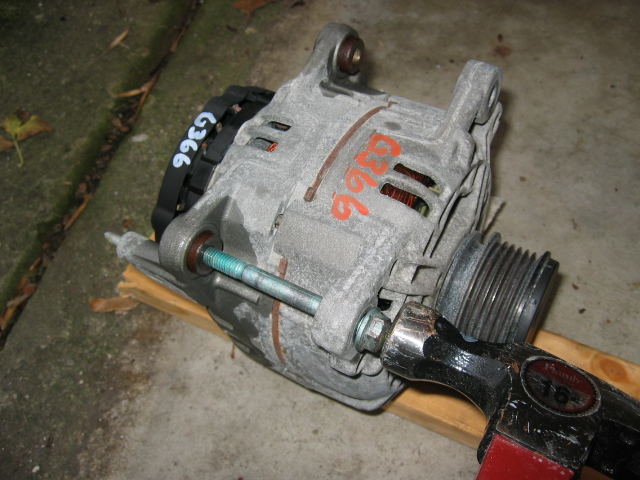
Now for the tough part. There are bushings that hold the alternator to its bracket - tightly. It won't budge. First thing to do is spray some penetrant (PB Blaster is what I used) on the bracket where the alternator attaches. Let it soak; spray some more if you want. Then do whatever you can to get it to move. I whacked it with a scrap of wood and hammer. Be careful doing this - try not to rest the block of wood on the splines, since they will break off! (I really didn't care so much, since the alternator was dead anyway.)
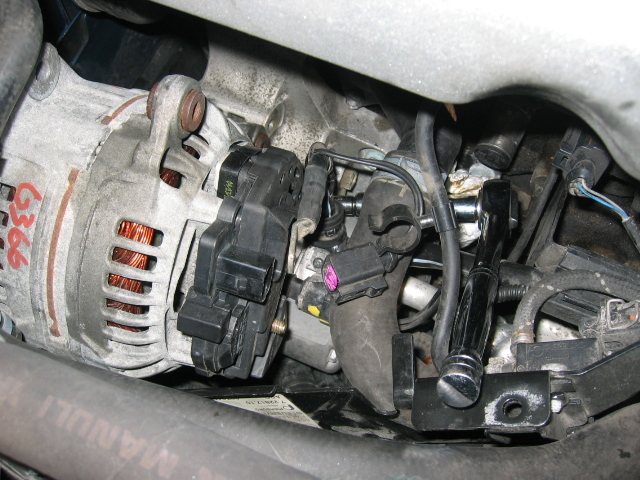
Eventually, it will start budging, a little at a time. You just have to get it past its bushings and it will free up. Now remove the wire clamp from the bottom of the alternator. Then work the alternator up out of the engine bay, towards the passenger side, clearing all the hoses. (It won't fit up through the manifold side).
On the replacement, you have to edge the bushings out a little to give clearance to get it into the bracket. I shot them with penetrant, inserted one of the bolts, threaded a few turns, and rapped on it with a hammer until it moved a bit. You only need a millimeter or two of clearance, so don't go crazy with the hammer.
Work it back into the engine bay the same way the original came out. Before you bolt it back into the bracket, attach the wires and the cable clamp to the bottom with the 8 mm nut.
Don't forget the plastic nut cover.

Now start reattaching everything. Put the belt back on (noting the direction you marked earlier), remove the nail from the tensioner, hook all your hoses back up, reinstall the canister, replace your covers, and start it (or, in my case, jump start). That's it.
I picked up a salvaged alternator on eBay from a '00 parts car for $85. My car has over 132,000 miles on it so I didn't feel like investing $250 plus the core for a rebuilt model. But so far, it's running great! Here's the voltage display on the Passport 8500 a minute or two after starting - charging away. It eventually settled down to about 12.8-13.0 V (with the lights on -- little higher with them off).
16 comments:
Hi, do you know how to replace just the voltage regulator on the back of the alternator while still on the car?
Hi there, whats the trick to getting the bottom hose off the black canister? Does it screw or pull straight off? I dont want to pull on it too much, as it seems to be resisting a lot of force.
Well, I broke it :( Any idea what the canister is for, or called, in order to replace?
Just completed this job using this guide. Brilliant, although getting the old one out of the engine bay was fun. New one on and all running OK. About two and a half hours total.
Excellent walk through. Total job took me under two hours.
Excellent walk through. Total job took me under two hours.
This guide was great! Thank you!
Great guide, thank you! Couldn't find the shop manual in the local library, but this was even better! I just replaced mine in under 4 hours, which included driving to the auto parts store to get the new (remanufactured) alternator after pulling the old & busted one.
For any future visitors, I'll say that I also had a hard time getting the bottom hose off the black canister. I didn't want to put too much force on it trying to get it off, for fear of breaking it. So instead, I simply maneuvered the whole thing, with hose attached, out of the way. There was a clip just under the coolant tank holding the hose down - once I popped the hose out of that clip, it was pretty easy to move the whole assembly (with hose still attached) out of the way.
I agree with James comment about not having to disconnect the hose on the bottom of the canister just leave it and move it out of the way. It didn't really take all that much to get the alternator loose from the mounts for me, i suggest spraying some penetrating oil where the bolt spans through the bracket on the top, give it a shot with a 2x4 and hammer like he shows till you see it move a bit, then take a really long screw driver and put it between the brackets and pry it lose, be careful because there are things that can break but leverage is a great thing. Also, on the back of the alternator there was an additional nut holding a clip that secures wiring harness to the alternator (this took the most effort for this job for me) It takes a bit of patience to get the old alternator out through all the hoses etc but it can be done as he states. All in all took me about 1.5 hours, but i have all the tools and mechanical know-how. Thanks for the write up
Very helpful. Thank you for taking the time to do this. I don't work on cars much but this gave me the confidence to do the job and save myself a good few hundred bucks. A couple of things I'd note, mainly for the less-experienced types like me.
First, I puzzled a bit about how the black canister should be removed (or as the other posters mention, moved out of the way). It is attached to the car with with an 11mm nut (bottom front of canister). After removing this (I used an extension) the canister can be pulled off the two grommeted studs at the top.
Second, even though the belt came off fairly easily I couldn't for the life of me get the thing back on again. It just seemed to have become just a tiny bit too small even with the tensioner pulled beyond the pinned position. No idea why, unless the replacement alternator was not an exact form/fit of the original. Anyway, after faffing around for a couple of hours or so checking the routing and alignment, consulting the interwaves and using up my (considerable) expletive vocabulary desperation set in and I tried removing the new alternator from its mounting and putting the belt on first.
Somewhat to my surprise, this worked. As anticipated it was a little tough to get the alternator back on the mount but I was helped in this regard by the fact my replacement came with the bushings fully backed out so there was a decent amount of play. Wouldn't recommend this as a first option but if all else fails it would certainly be worth a try.
Last, as suggested by a YouTube video (https://www.youtube.com/watch?v=V-Uc0Yb8yCY) I made the removal/replacement a bit easier by cutting away a little of the black plastic cover underneath the front trim. I used a jig saw, being careful not to cut the wires that are clipped to the underside of the cover. Undoubtedly cheating but the evidence is hidden by the trim so no-one need know.
With all this I think I handily broke the record for longest time to complete (about 5 hours) but still worth it. Thanks again.
It's been a long, long time since I've looked through premium quality material much like your post. You have carried out incredibly good work on this and I'm impressed with your viewpoint. Really decent work. Audi service Greensboro
Thanks for a great guide. As I was fitting a recon that required the old one back, I didn't want to start clouting the old one with a piece of timber etc. I found a gentle bit of leverage with a pry bar eased the unit off no problem.
Perfect! Thank you such a good write up. You saved my day and my money. CHEERS TO YOU!!!!
Nice directions,I'm a auto painter and figured I'd check the old inter-web and came across this,good job.thnx for the onsite helped a bunch.thnx jr
Hi, great stuff, took me 2 hours to complete, thanks.
Hi im stuck at almost the first hurdle the tray canister thing in pic 2, mine has a square bolt stuck fast i have tried everything cant get the screws out, any tips or is it ok to trash it? Thanks in advance 😊
Post a Comment