Checked your CV boots lately?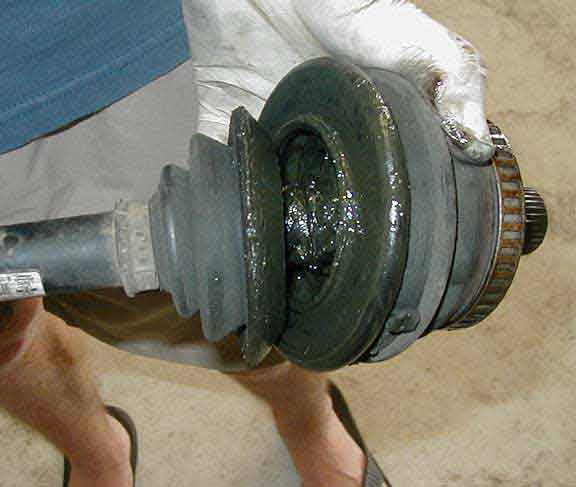
I must give big thanks to JustDave for his assistance.
Tools List:
-Lots of latex....gloves.
-23mm socket
-14mm allen socket
-8mm triple-square (12 point)
-16mm open ended wrenches / sockets
-circlip pliers
-breaker bar
-torque wrench
-CV boot kit (25 bucks at ClairParts)

First off, here's what we'll be dealing with:

1. Pop out center cap and remove collar bolt for drive axle. If you have a standard hex bolt, it will be 23mm. If you have an allen bolt, then it is 14mm. My '97 had the 23mm bolt, and the 14mm allen bolt will be included in the CV boot kit. It should always be replaced, never re-used.

2. Remove wheel.
3. Disconnect the axle from the drive flange on the transmission, by removing the six (6) bolts with a 8mm triple square bit [12pt] (only 3 are visible in the pic).


4. Pull out the ABS sensor from the wheel bearing housing.
5. Disconnect both upper links (control arms), with two 16mm wrenches or a socket.

6. After removing the bolt, gently tap out the control arms from the bottom. Do NOT use a screwdriver (or similar) to pry open the slots.

7. Turn the steering wheel to the left, as far as it will go. You should now be able to manipulate the hub assembly in order to pull the driveshaft out.
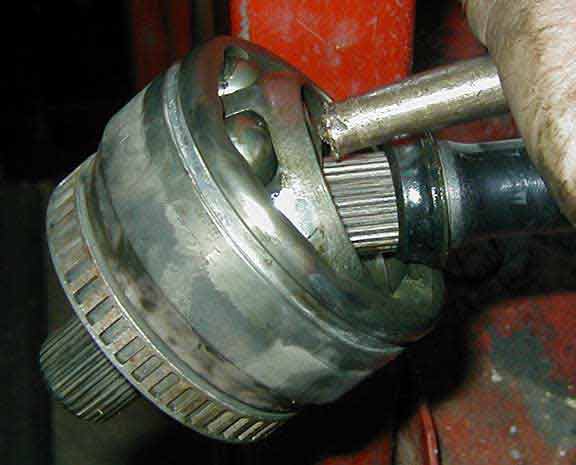
8. Put the driveshaft in a vice on a workbench.

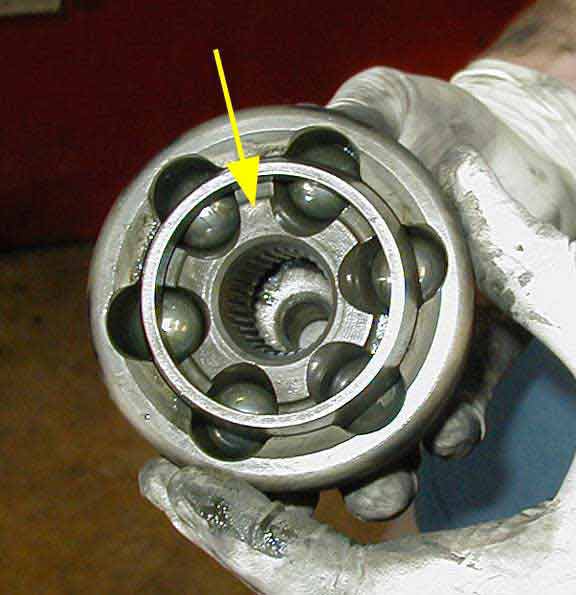
9. Clean off some of the grease, so you can see what you're doing. Drive off the CV joint with a drift. Place drift on one of the points of the "star," as seen by the yellow arrow.
10. Clean the CV joint thoroughly of all dirt and grease. If you use a solvent to clean it, be sure it is completely dry (compressed air works well) before re-greasing.

11. Slide the boot and clamps over the driveshaft. Replace the "washer" with the one included with the kit and re-use the other.
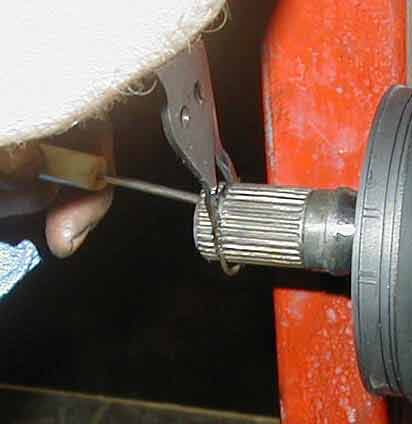
12. Remove and replace the circlip.
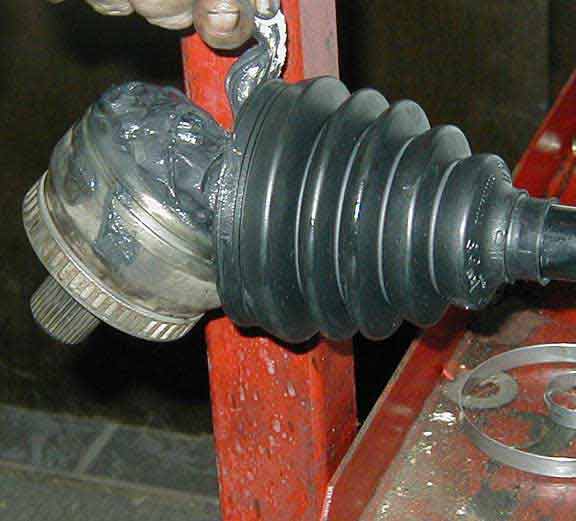
13. Pack the grease, as demonstrated here by justdave :-) Be sure and apply grease inside the joint as well as some on the driveshaft. Save some grease to put in the boot.


And the money shot....

14. Drive the CV joint back on the driveshaft. Bently says use a plastic hammer, FWIW. Squirt any extra grease inside the boot.
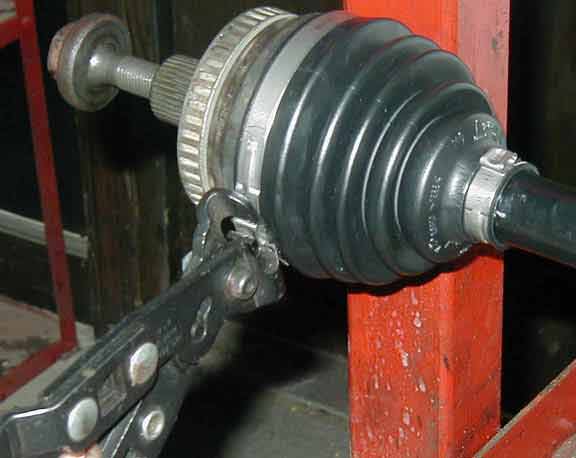
15. Clamp the boot, using the special tool. If you don't have one of these in your garage--be creative.
16. Now re-install it. It's easiest if you put the driveshaft through the hub first, and THEN bolt the other end to the drive flange on the transmission.
IMPORTANT: Just as you loosened the collar bolt for the axle while the car was on the ground, you must tighten it while the car is on the ground. Why? I don't know, but Bentley claims that you risk injury if you do it while the car is in the air. Using the new, 14mm collar bolt, tighten it to 85 ft/lb + 1/2 turn.
Tighten the nut on the bolt of the upper links (control arms) to 30 ft/lb. Tighten the bolts connecting the driveshaft to the drive flange on the transmission to 30 ft/lb.
And the final product...

Here's a tip from Rob Andrews:
You don't even need to remove the half-shaft if it is the outer boot. Once you get the CV joint seperated from the wheel bearing housing, stick the bolt back through the CV joint and just keep tightening it down. It'll pull the joint right off the shaft. In fact, the "special" audi tool does, the same thing, except it has a dimple on the bolt to center it on the driveshaft. If you look at the end of the driveshaft, there is a recession in it for that dimple. But that special tool is not necessary. I've done tons of joints with this method.
If you understood that, you can do it his way. Personally, I think it's much easier to work on the shaft while it's in a vice on a bench, rather than still on the car. Rob's way probably saves you about 20 minutes.
Questions? You're looking at maybe a 1-2hr job. Not too hard. Good luck.
1 comment:
I have a 2003 Audi TT 1.8 with the drivers side bad cv boot. Your step by step procedure is good. My question is about the cir clip. This obviously keeps the cv joint to the Axel. Installing the new cir clip is where I am not sure of. When tapping the cv joint back onto the Axel, does it compress this clip? Does the cv joint pop back on? Just need some clarification here.
Thanks,
Ed
Post a Comment