bearing installed. The noise started to impede normal conversation in the car.
I ordered a hub tamer from an online store at a reasonable price. I also then ordered 2
wheel bearing kits from Blaufergneugen (sp?).
Captions follow pictures:

Picture of hub bolt, mine was a 14mm hex (Allen) head bolt.
To remove, I took the wheel off, popped out the center cap, put the wheel back on,
lowered the car * this is necessary because of the torque this bolt is speced to, more on
that later.
Remove bolt (I used a breaker bar) then jack up car that side of the car.

Basically follow the tech on how to do an A8 brake upgrade to remove the caliper,
carrier, and disc, but if you cannot figure this part out you probably should be doing a
wheel bearing change
Pic shows hub with brakes removes
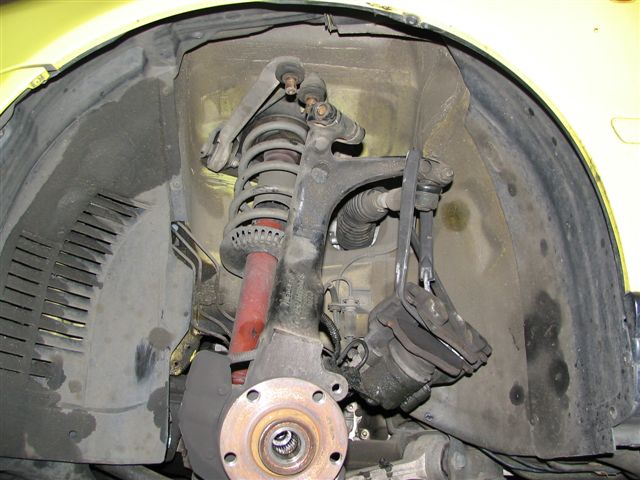
Remove bolt that connects the upper control arms to the knuckle assembly. Then tap out
the control arms.
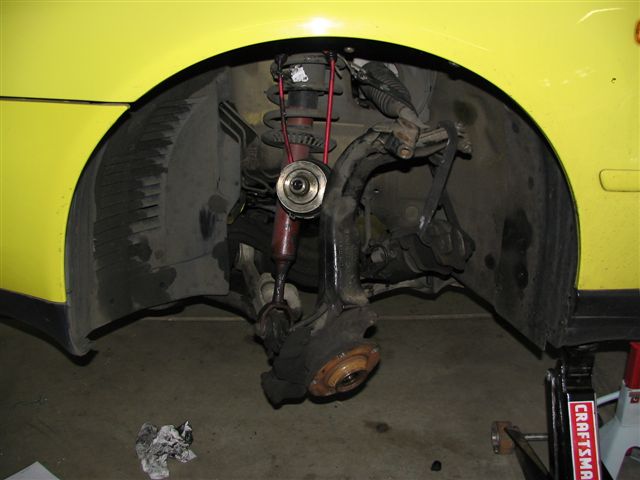
At this point you need to turn your steering wheel all the way to the left for more
clearance. To remove the axle from the hub, put your old hub bolt in and turn a few times
to engage the threads, then tap it out with a hammer or rubber mallet. Hang it with
something, I used bungee cords.
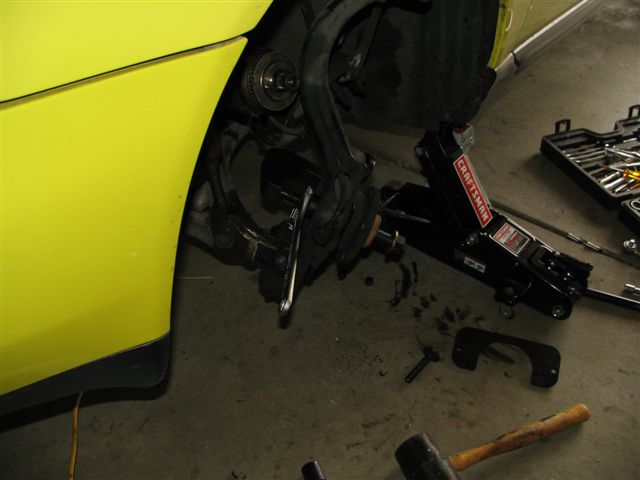
Grease your pinch bolt! Hub tamer in action now, follow the instructions word for word
in the manual of the hub tamer. Crank on the outer bolt with a 1" socket, preferably using
an impact wrench. I do believe you could do this job without one - though I sure would not
want to. The hub will slowly pull out of the knuckle/bearing.
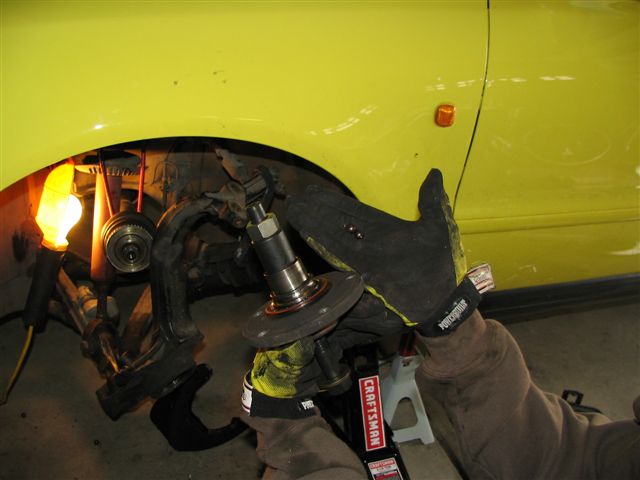
Hub removed with outer bearing race attached. The hub tamer comes with a puller that is
supposed to be able to remove this but it did not fit in the tight space between the race
and the bolt flange. I called a local shop to ask if they could do it, so I had to run out and
have it removed, 30 minutes round trip. The method they employed was crude but
effective, they took an air chisel and carefully hit the end of the bearing race, this moved
it out enough to pry it off, whatever works right?
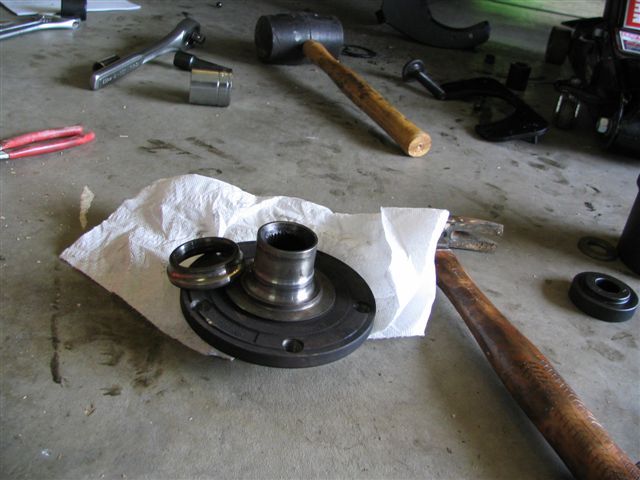
Bearing race removed from hub.
My old bearing exploded while removing the hub, I would expect this for anyone,
bearings are only pressed together and they are not held together by anything else but
pressure.
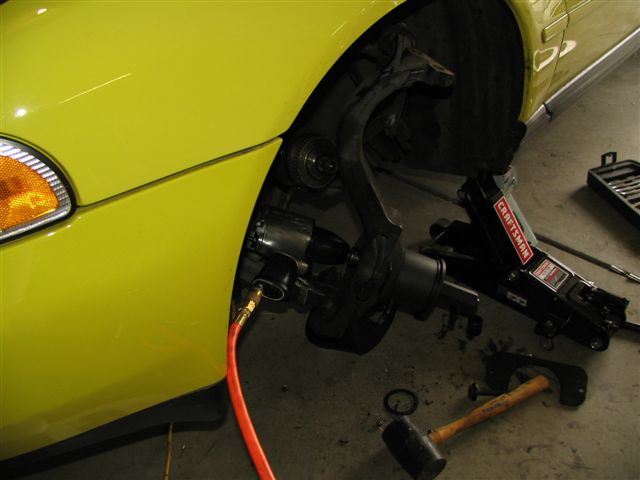
Hub tamer bearing removal assemble, let me reiterate to follow the manual to a tee,
basically at this point there is an inner disk that is pushing on the inner large diameter
bearing race. The pressure from tightening the pinch bolt moves the bearing outwards
into the large diameter cup. Outer bolt on this is something like 1 1/8 inch. I did not have
the right size socket so I just used an adjustable wrench to hold it while the impact
wrench did its thing. The threads on the hub tamer pinch bolt are fine, so it took many
turns to remove the bearing. I had to wait for my compressor to catch up at least twice
during this part. I have a 22 gallon compressor.
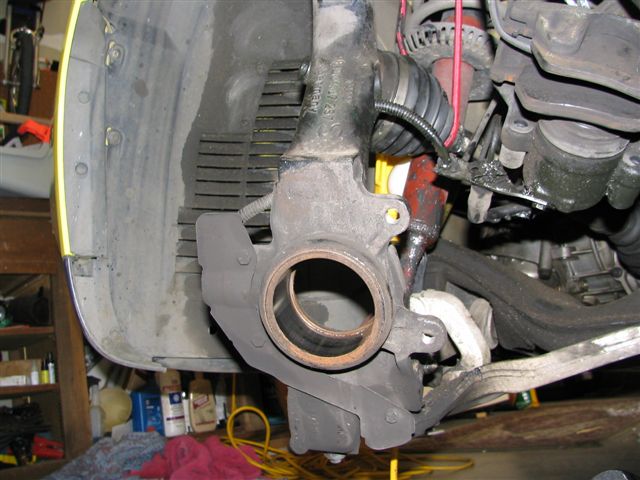
Bearing removed. Smile, now the fun begins.
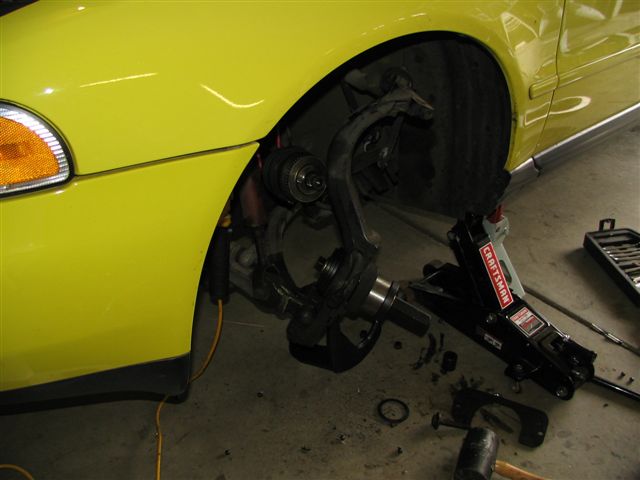
Basically reverse of bearing removal, follow hub tamer manual to press in the new
bearing.
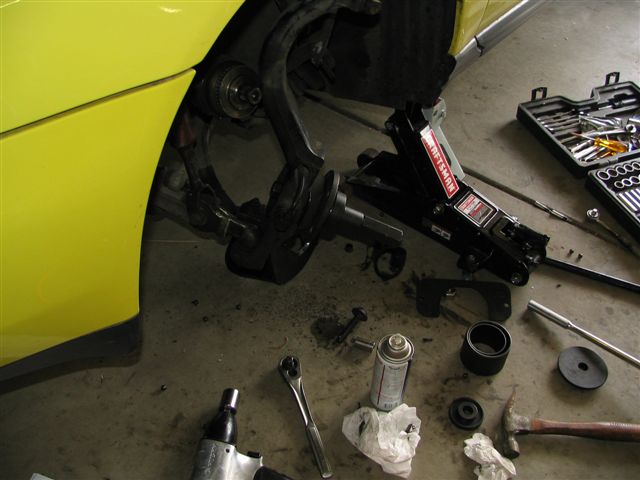
This is the hub tamer pressing the hub into the bearing. This was the only real gotcha I
had in the whole process. I gently tapped the hub to seat it in the bearing and my bearing
came completely apart. Luckily the grease they use is uber viscosity, it actually looked
like plastic so the bearings stayed completely intact when they fell out, I reassembled and
did not tap it in this time. Also, make sure your hub is aligned in the bearing before using
the impact wrench on it, I suggest tightening it up by hand to get it snug and aligned.
The other caveat I had was the piece they tell you to use to press the hub into the bearing
with fits over the hub. This is great to keep it aligned but it was tight, so tight that I had to
rig up the puller they gave you in the hub tamer kit to remove it. In the process I partially
pulled the hub back out. So I reversed it and tried again, this worked well.
Reassembly after the hub is back together:
Put your upper control arms back in, slide the bolt through and use the new nut supplied
in your bearing kit. Tighten to 30 ft/lbs.
In the process of using the hub tamer, I nicked the inside of the hub so I could not just
hand press the axle back into the hub. After a few iterations, I was able to get the axle in
just far enough to thread the old axle bolt to pull it in, I wrenched it tight, and removed
the old axle bolt then put the new one in. Tighten the new axle bolt to 85 ft/lbs,
do not put your axle wrenches away yet, final torque comes with the wheels all back on the ground.
Put your disc back on, caliper hangar, caliper, and wheel. Tighten your wheel bolts to
specs, 89 ft/lbs. Drop the car.
Now find a 4 foot extension for your breaker bar, you need to turn the axle bolt 180
degrees once the wheels are all down. When doing the final tightening of the axle bolt,
make sure the hex socket is ALL the way in the bolt. I stand with my leg pressing the
breaker bar assembly while I tighten the bolt to keep the socket pressed in. The bolt I got
in my kit was softer then the Audi supplied bolt I got in my CV boot kit, just an FYI.
Other notes: I did hand spin the old and new bearings in the car for comparison, the old
bearing clearly felt jagged, and when I looked at the actual bearings that fell out, they
were discolor to the point they were golden. Fresh bearings are silver.
Special Thanks to wifey for taking the pictures.
Take your quiet car for a ride. Hope this helps someone out there. I am sure that with
similar suspensions this process will work on most of the later model Audis with a bit of
modification here and there. Email me with any questions.
Job took about 3 hours which included 30 minutes out and back to the shop that got the bearing race off.
1 comment:
Can you tell me what size torx bit is used or what kind of torx set this was. I cannot find this anywhere. wheel bearing kit
Post a Comment