-10mm 12point socket
-18mm open-end wrench
-19mm open-end wrench
-19mm Universal Joint Socket
-22mm Universal Joint Socket
-2 ft of 3/8" extensions (can be made w/ several extensions obviously)

Here is a picture of the 3 important tools needed to remove the p/s rack from the car. It CAN be removed w/o the universal sockets, but it’s a LOT easier with them so spend the $20 for the sockets and pick ‘em up. The ones I used I borrowed from my mechanic. They’re snap-on. I found the 19mm at sears, but not the 22mm, so snap-on might be the only other source.
1) Get the front end off the ground and remove both front tires:

I put the whole car up on jack stands, but I was tackling a few other projects after I got the p/s rack removed.
2) Remove all p/s fluid from the reservoir. You can do this by using a turkey baster discard the fluid, you will need to replace it with fresh stuff.
3) Remove the lower driver’s side knee bolster and remove the steering column from the p/s rack:

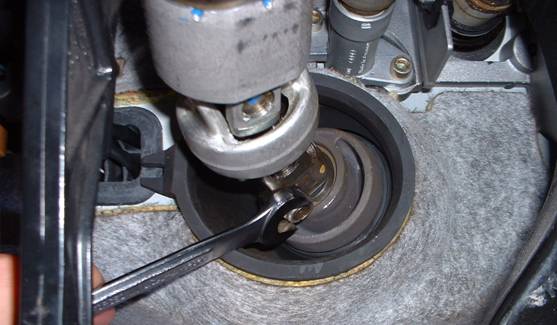
When removing the steering column bolt, you are going to see a Torx side and a 16mm nut. Do not worry about the torx side. The bolt itself is oblong, so all you need to do is take off the nut and the bolt will slide out. Turn the wheel as necessary to allow you to access the nut. Once it is removed, make sure the wheel is straight again.
Once the bolt is removed, slide the column up and wire it so the steering column does not separate into two (there is a hole in the column for this very purpose):

4) Next step is to remove the tie-rod ends from the hub assembly:


You can get the tie rod out by either using a pickle fork on an air hammer, or I used a 10mm deep socket and used it as a pusher and hammered the tie-rod out. Just be careful not to damage the top at all. As you can see, I soaked it pretty good w/ PB Blaster before I removed anything.
5) With the tie-rods separated on both sides, you can now removed the access panels that go around the p/s rack ends. There is a 10mm nut holding it in and a few plastic push tabs. Once the nut is off, you just need to pull until it comes off kinda unnerving, but you do whatcha gotta. Make sure you pull near where the plugs are so that there is a bit of support:

(pic of driver’s side)
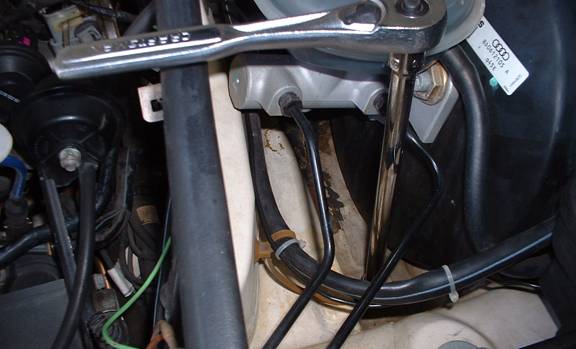
6) Next remove the mounting bolts to the rack. There are 3, and this is where you use the 12 point 10mm socket. One bolt is on the driver’s side near the brake booster, one is under the battery, and the 3rd is under the car on the driver’s side and REALLY hard to see in the pic I provided, but it gives you a general idea where it is.

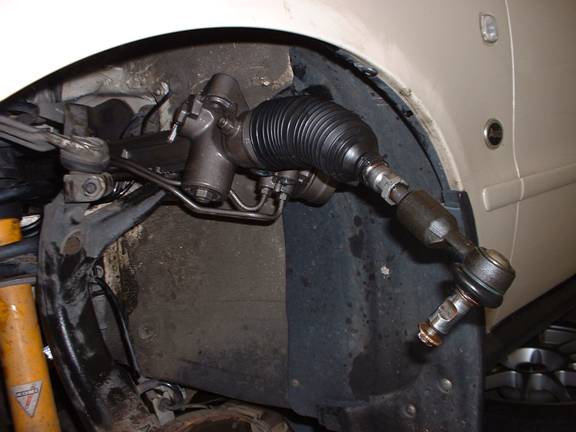
This is where the bolt is located (removed in this picture)
7) Using the universal sockets to remove the banjo bolts from the rack itself. I needed an extra pair of hands to make sure the socket lines up. Also, make sure you have a basin or something to catch the extra fluid from the p/s rack that drains on you. =)
I found that if you pull the rack towards the front of the car it allows you more access to the banjo bolts. I talked to my mechanic about it, and this is similar to what one of his friends does somehow he manages to get at all the bolts without moving the rack.
8) Time to remove the rack from the car. It is def easier said than done, but with the help of a friend, feed the rack out the driver’s side of the car. You have to kinda twist it as you pull it out, and move the steering/rotor hub assembly to get it out of the way.
Here’s a pick of it going back in so you have an idea how you need to twist it. Might also want to put some painters tape on the lip of your fender for those ‘just in case’ instances where you twist the wrong way and whack the rack against the paint.
Here’s the rack out of the car:
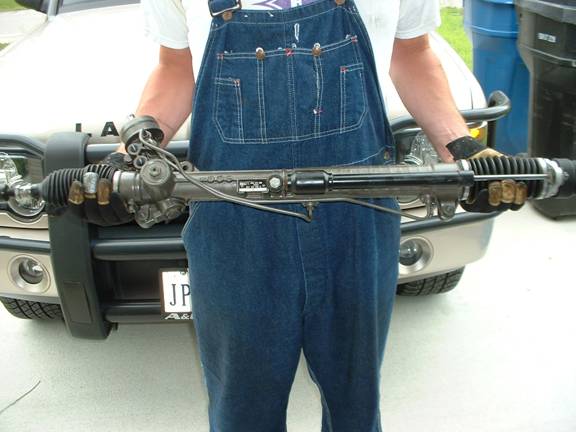
9) With the old rack out, you need to swap the tie-rod ends from the old rack to the new rack as well as the dampener (if you have one on your car). As you can see, I had one so I swapped it over.
10) Next comes the fun of reinstalling. You need to feed the rack in slowly and kinda twist it until it snaps in. The Bentley said to use the centering tool (a bolt w/ a chamfered end) but after talking with my mechanic he told me not to bother and I didn’t really need it. He was correct. I guess it just keeps the rack from going off center while you’re installing it so as long as you’re careful it’s really not needed.
11) Reinstall the banjo bolts. Make sure you replace the crush washers so that you have no leaks. It’s NOT easy trying to get the banjo bolts back in without dropping the crush washers a few times. I had a hard time, and had to contort my hand something fierce in order to get in there and get it threaded. Once you get it started, get the ratchet on the banjo bolts and tighten them down. Get them good and tight don’t have any torque specs, I just really torqued them down =) Redneck engineering style. I haven’t had any issues w/ leaking, so it def did the trick. You can move the rack back and forth as necessary to make it easier to access the banjo bolts from underneath. This is where it was real handy to have a friend helping you, because I could get things started and situated, and he used the ratchet w/ crazy extensions from under the car.
12) Reinstallation of everything else. At this point, it’s ready for you to start reassembling things. Put the mounting bolts back in the rack and torque them down good and tight. Again, not sure of torque specs, so you might want to look them up. I made ‘em good and tight. Then reinstall your steering wheel column to the rack. Tighten down the bolt/nut combo.
13) At this point, it’s time to top off your p/s fluid and start priming the system. I filled the reservoir and turned the wheel back and forth about ohhhhh 50 some times? Lock to lock, with the front end still in the air and the engine OFF. Keep topping off the reservoir as necessary. I kept doing this so that I got as much air out of the system as I absolutely could. It worked out really well, because when I did start the car there was NO p/s whine what so ever, so that is proof that the system was properly bled.
14) Finish reassembling the inside of the car (knee bolster, etc).
15) At this point, it’s time to fire up the engine and look for leaks. Turn the wheel back and forth and take a look at your banjo bolts for leaks. If they’re seeping, torque down on them a little more.
16) Put the wheels back on and take the car off the jack stands you are done
17) Congratulations, you have successfully finished your p/s rack R&R. Sit back, and enjoy the victory. Have a beer, a stiff drink, or whatever tickles your fancy.
18) Schedule yourself an alignment, because it’s going to be messed up I promise you.
Nice Post. Thanks for Sharing
ReplyDeleteAutomobile Suspension Part Manufacturers in India
suspension parts manufacturers in India
Best Automobile Part Manufacturers in India
Shock Absorber Manufacturers in India
Brake Shoe Manufacturers in India
Brake Manufacturers in India
Car Suspension Parts Manufacturers in India
ReplyDeleteNice blog! Thanks for sharing such an informative blog. The way you express your views are so easy to understand.
Visit our website:
Display Rack for shop
Rack for Supermarket
Rack for Shop
Display Rack For Grocery Store
Departmental Store Rack
This comment has been removed by the author.
ReplyDeleteThis comment has been removed by the author.
ReplyDeleteKasulik juhend roolivõimendi remondi alustamiseks Audi A4 (B5) puhul! regard Telkom University Jakarta
ReplyDelete